Showing posts with label landscape. Show all posts

Thursday, February 28, 2019

Artworks in Progress

Can I create a short update?

Is it possible?  I'm not sure how long you've been hanging out here at She Must Make Art, but it shouldn't take long to notice my posts are usually lengthy.  I am giving myself a new challenge to stick with this year.  There's a lot happening with my 2019 goals, including working toward a new website.  I've got new work completed and in frames, now displayed in my art room.  I will host a photographic tour soon.  Today, I have a quick look at some of the new work that's in progress or just completed recently.


Watercolor in progress. Christy Sheeler, artist.


The watercolor artworks are smaller, what some would call "littles" and I am able to finish them more easily.  My hours spent on art are broken up often with life's meetings and appointments not to mention family time.  These artworks are loosely based on photographs.  I am stretching myself to be more willing to paint intuitively.  That means that I am seeking to paint without being held tightly to what the photo is describing by itself.  


 Watercolor in progress; waterfall.


I have new pigments and brushes so some time is needed to become more familiar with those new supplies.  Pigments have their own qualities of transparency, granulation, warm vs. cool and how they mix with other pigments.  It takes time using new brushes to feel more confident in the marks they make in my hand.


New watercolor tubes and brushes.


I've got several new artworks just recently completed but today I am sharing only two of them.  I'll have more to share soon.  These are smaller which is so nice for shipping off to new homes.  They are easy to package up safe and snug, even in a frame, and much less worry in the process.  I pick up about 4 frames at a time.  I've found where the style of frames are well suited to my liking and affordable, too.  It's a wonderful thing having artwork framed and on display where I do the creating on a regular basis.  These two are now in frames so I'll add a photo of them at the end.  Hold your mouse over the photo to see the titles and sizes of each one.


"As Water Finds Its Way" Baring Creek, Watercolor of view from Glacier Nat'l Park, 3.5"x5" by Christy Sheeler 2019


"As Water Finds Its Way" Baring Creek, Watercolor of view from Glacier Nat'l Park, 3.5"x5" by Christy Sheeler 2019


 "Soakin' In the Warmth of Sun" Sunflowers in watercolor 4"x4" by Christy Sheeler, artist 2019.


 "Soakin' In the Warmth of Sun" Sunflowers in watercolor 4"x4" by Christy Sheeler, artist 2019.


Framed original watercolors displayed in my art room.


Framed original watercolors displayed in my art room.


Okay, so that's all for today...thank you for dropping by to see new watercolors and be sure to stop back again soon.  I'll be here, painting away and thinking about what to share.  Have a great rest of your day!

-Christy

She must make art.


Friday, June 8, 2018

Lessons in Loose and Less Controlled

Lessons in Loose and Less Controlled by Christy Sheeler Artist 2018 - She Must Make Art

Letting Go

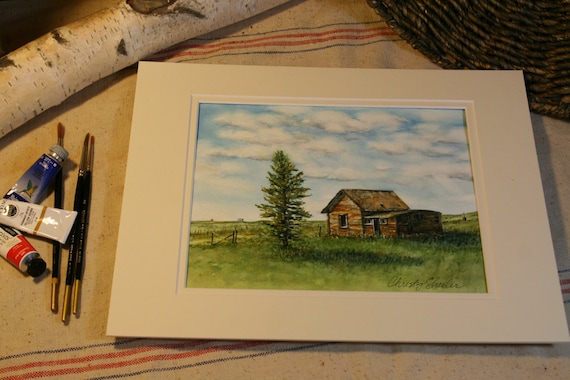
It's been a while but I'm here today and I've got some new watercolors in progress.  Because my art time is so limited now, the most recent projects are different.  I tend to work very tight, controlled and detailed when I paint.  Stepping out of my usual habits is forcing me to grow as an artist.  (The one here on far left is described more further on below.)  Can you relate with the struggle, working more tight and detail-focused in your own artwork?  Along the way, some tips on challenging yourself to be more loose with the brush and working less controlled in your own artwork.


The two paintings below are watercolors on Yupo surface.  It's not paper.  It's a plastic surface for watermedia or mixed media.  It takes some time and patience to work with in my experience.  With practice, it's been easier to adapt my strokes for a better result.  I enjoy working with this surface very much even though I've been so tight in my style for a long time.  The genius of this surface is it can all be rinsed and wiped away for a fresh new start.  The first landscape is done with a reference photo and the second landscape is just a fun imaginative journey.


Can you relate with the struggle, working more tight and detail-focused in your own artwork?  

In this post, 10 Tips for Working Loose and Less Controlled.


Waterfall Landscape on Yupo Surface


Watercolor landscape on Yupo surface.


I have followed Angela Fehr's work for a while on Facebook and love her YouTube videos for learning to relax and enjoy the watercolor medium.  Her work is so lovely.  She has online courses so I signed up for a free course on her website.  I'll link it here: Watercolor Jumpstart with Angela Fehr  

I wanted to keep myself painting even when my schedule is working against me.  She has such a positive way with explaining and she's easy to follow when she teaches.  I would say that if you are curious about taking lessons...go check out her courses.  You will enjoy yourself and she can take you from basics to advanced skills.

Here is the beginning stage of my project following along with her instruction.  This was my first time completely soaking my paper before beginning the first layer of color.  I loved this and enjoyed the time in my art room very much!  It's a mystery what will come of it and that's the fun of it.  The second photo below is further on in next stages...once the first layer of watercolor was dry.


Mountain landscape on watercolor paper.


Mountain landscape on watercolor paper, later progress.


This is the second project done with the online course.  She provides the art reference photos and they can be downloaded onto a pc or other device.  I had the photos downloaded onto my tablet so I could see them at my art table.  


Mountain landscape on watercolor paper.


The third of my works done through her online course is below.  This was an exercise in negative painting which is painting around an object to reveal its shape.  I was familiar with the technique but not excited to use it often.  It's a challenge to be sure!  She shares quite a few tips for making the negative painting process not so overwhelming.  


Negative painting with watercolor on watercolor paper.


This is the one I've chosen to revisit today but it didn't go very well.  If I'd seen this photo (taken over a month ago) while working on it today, I'd be much happier.  I faced two major problems.  The first, I couldn't remember which photograph I'd used for this project.  I searched and guessed it to be a similar photograph to the one showing below.  The second problem, I think I turned the painting upside down.  Ugh.  See, the work doesn't always go as originally hoped for in my art room, too.  I can scrap it altogether or I can see what can be done now.  Maybe this is the time to try washing it all off?  I'm not sure what I'll decide to do at this point.  


Early stage color washes in watercolor on watercolor paper.


The two photos below were taken after my painting time today.  I see that I chose the wrong photograph but right subject.  The watercolor paper should have been spun around but it could work as it is now.  Tough decision.  Not sure what I'll decide to do now.


Watercolor in progress with problems from previous session.


Watercolor in progress from today's paint session.


Today's warm up session was a quick landscape on Yupo surface.  It's done loosely with pale colors.  I used an art reference photo taken just a few weeks ago.  I don't love this one but I'm showing it anyway because you might think I turn out nothing but work that I love in the end.  It's so much more pale than my usual work.  It's an exercise in branching out for color scheme and less vibrant.  It's also on Yupo...so I will probably wash it all away and try again.  Love that about Yupo!


Quick warm up session today with watercolor on Yupo surface.


 It's been more productive in the art room for March, April and May in 2018.  Spring of 2017, I wasn't painting much at all.  I've been checking back to answer comments here as well as email.  If you've got questions, don't hesitate to contact me.  I'll get back to you as soon as I am able, usually 5-7 days.  Sheesh!  It's June now!  The days just fly by now.


10 Tips for Painting Loose and Less Controlled

1.  Block out the need to have an artwork for mat and frame.  Nobody has time for that pressure!

2.  Take 10-15 minutes to play on a smaller scrap of paper.  No expectations.  
      Warm up your mind and subconscious for creative energy to flow better.

3.  Try a new way of starting...like soaking the paper.  Be adventurous!

4.  Have an open mind about supplies and tools and techniques.  What would happen if...?

5.  Watch a painting tutorial that inspires you and then GO DO it yourself.                               
      YouTube is full of great videos that cost nothing.

6.  Be more aware of your self talk.  It's not just you thinking, "oh, what should I do now," 
       or "well, that didn't work the way I wanted," and "what should I do about this area?"  
       There are unsure moments in the process.  If it's really got me rattled, I lay it aside 
        and take a break (15 minutes) or I pick up another work in progress to get 
         my mind off of it for a while.

7.  This is hard work to move out of our comfort zone.  Don't expect it to come easily or quickly.        
      This retrains the brain, the eye, the hand, and the creative process.  Learning takes a lot of energy.

8.  Give yourself a bit of flexibility to be creative.  Set aside the art reference photo 
       and ask yourself how you want to paint this.  Take a glance now and then if it helps 
       relieve anxiety of needing direction.  Ask yourself how YOU want to paint this.  
       No one will see that photo.  It will not sit beside your painting.  It doesn't have to 
       match what the photo shows for accuracy. 

9.  Find a way to not stress over the supplies you're using.  We don't want to be adventurous 
       because this paper cost a pretty penny!  Paint on both sides of the paper.  Use it up.  
       Try washing the painting off...I'm going to try this soon.  Don't use cheaper paper.  
       Quality paper 140 lb. or 300 lb. is where you need to be.  I push myself to use only 300 lb. paper 
        now and it took years for me to get to that point.  YUPO!  Yupo is amazing.  
        It's a bit more money but you can really wash away all the paint and start again.  
        Rinsing it off in the sink will not damage it at all.  Stains?  Magic eraser.

10.  Do it all again.  Go back and remember the new methods.  Write yourself some reminders.  
        Repetition and reminders help us keep the new way of thinking and creating for the long term.


Thank you for stopping by the blog today!  Be sure to leave a hello in the comments.  You can find me on Instagram, Facebook, and Pinterest.  I'm most actively posting on Instagram these days because it's so quick and easy.


-Christy

She must make art.


Wednesday, April 6, 2016

More spring photography from Instagram!

When a subject from nature interests me, I take the opportunity to take as many photographs as possible.  Building my photography collection for art references is a serious effort.  I'm sure I've mentioned this before but it's crazy true.  My obsession with attention to detail, watching for a perspective or angle that I can't pass up is always there.  In the past few days, I've checked on the cherry blossoms often and taken perhaps 200 photos...some turn out and some don't, so I go a bit overboard to allow for mess ups.  I've been experimenting with the backgrounds being less distracting and more blurred.  I'm also learning that the tripod needs to go along and be put to good use!  New habits 101...


I'm excited to share a few more photos from our afternoon drive in the Lewis and Clark National Forest.  We just say, "let's take a drive up the Teton."  The fresh, clean air and big, blue sky combined with the scent of pine is just a rejuvenating way to escape regular life stuff for a while.


See you tomorrow!  I'm preparing to share some useful tips on keeping a better perspective, a continuation of the topic from last week.

-Christy

Thursday, January 7, 2016

My Winter Views

15 Photographs of My Montana Winter


It's taking more effort to get back into the creative routines again.  November and December were so busy and activity filled; it was too much to fit in my art goals.  We have had a bout with head/chest colds here.  In the process of taking care of everyone else, moms catch the ick, too.  I was able to play with watercolors and Yupo synthetic paper for a few hours.  Such fun to explore what paint does on this plastic surface.  I will share more next week!

This week, I've got a series of photographs taken over the past few weeks.  I'm writing very little today.  The room I use as art studio is our family multi-purpose room.  Art supplies have been stowed away off to the side for a place to wrap Christmas presents.  It's going to take an hour or two to clean up, put away Christmas related items, and set up for art process.  This is the best I can accomplish this week.  

We took a few drives as a family across country roads last weekend.  The sun was low in the sky and lighting was not ideal but I was able to adjust for better contrast.  Maybe there is no snow where you are and I'd like to share photographs the views we have here.  I've been away for a few weeks now and I want to get back into the creative swing of things.  


Thursday, October 29, 2015

Lush Fields of Teton County in Watercolor

Painting a View of the Front Range

Montana has won my heart!  The breathtaking views offered daily are more than an artist could ever capture.  Whether it's a brightly colored sunrise, a gentle frost on the tree branches, or a purple mountain range that seems to go on forever, it's a land of inspiration.  One of my most recently completed artworks was inspired several years ago.  

After watching the annual Independence Day parade in Choteau, Montana, we were driving home.  We topped the hill and then I saw this fantastic sight.  The fields were such a verdant green and in the distance I could see bright yellow flowers, perhaps mustard.  The sky was clear, no haze at all, and just sooo blue!  The mountains in the distance were easily visible.  The well worn tracks along the fence line drew my eye to the mountains.  I was mesmerized and picturing how it could become a painting.  My camera was close at hand and we pulled off onto the side of the road.  

As I've said many times, my husband and children are more than understanding and patient.  They know how much photography means to me.  Over the years, they have become accustomed to a camera being in my hand.  It's very seldom that they hurry me along or distract my focus.  I am indeed blessed.

The photo by itself is not that awe inspiring, I must admit it's just okay.  It's bones are nice though.  The elements of design being used here make it work; it just needs a little tweaking and it will be exactly what I need.  The basic composition is made up of sky, mountains, fields.  The mountains are not cutting through in the center of the frame.  This creates more interest.  Add to that, the horizontal planes are divided unevenly.  The wheel tracks and the fence line both break up the lower plane at eye pleasing angles.  See, I've been working at this long enough, it's planned out pretty well when the photo is taken.


Thursday, October 22, 2015

Rock City Canyon and Riverscape Watercolor Painting

Painting A View of Rock City in Watercolors


The next watercolor painting in a series of five landscapes focuses on a view that's familiar to many locals.  There's an area known as Rock City, a short drive north of Valier, Montana.  It's not easy to find without specific directions.  It's definitely a place you'd call off the beaten path.  We've taken weekend drives to get out of the house and this is a free, unusual outing.  While going through my photo references, I came across a view along the river's edge.  When I took the photos several years ago, it was already in my mind as a possibility for a future painting.


The rock formations in this area are very unusual compared to the surrounding landscape.  The best I can describe it, you're driving through what looks like farmland and prairie going on forever and then boom, you're there.  The rocks rise up in these crazy and fun shapes and the kids can't wait to jump out and run from one to another.  There's grasses, low-lying shrubs and wildflowers...and it's smart to watch for snakes.  I am sharing all these photos to give a better perspective of the area where my painting's view originated.  A few of these photos have been altered with filters.  That's one of the ways I prepare a photo as an art reference.  I bump it up a bit to achieve more color contrast along with distinct shadows.  My artistic style leans toward bold, vibrant colors with a hint of impressionistic textures.  


Thursday, October 15, 2015

Weathered Old Place and Lone Pine Watercolor Painting


Capturing a Favorite View with Watercolor Paint


A familiar view to those who know the area well, I think of this as the lone pine painting.  I know that doesn't give much attention to the old building that is it's companion.  Admittedly, I do not know the history of this place.  What's its story?  I just know that it grabs my eye every time I reach the top of that hill at the top of the bench.  This roadside view is one that I have always enjoyed seeing.  My photos are quite old now.  With only a few printed photographs, they weren't on my computer's hard drive.  I scanned them so I would be able to pull them up on my tablet through the Picasa Tool.  I'm not going to explain it any further because the tech part is confusing every time.  I've been spending a lot more time on the computer since committing to art on a daily basis.  At times, I can feel frustrated because so many computer related tasks need to be done instead of picking up a brush.

The original sketch was done on tracing paper.  The photo shows the support board holding from top layer to bottom, reference photo, tracing paper, white cardstock (makes sketch stand out better), and graphite paper.  The graphite paper was made with a sheet of tracing paper, soft graphite pencils, and rubbing alcohol on a cotton ball.


The sketch is transferred to 300 lb. Arches cold press watercolor paper.  This watercolor paper is thicker with a medium tooth surface.  It can take wetter washes with very little buckling or bending.  I'm able to use more techniques without the paper breaking up as can happen with thinner papers.  The tracing paper sketch is layered over graphite paper and watercolor paper.  My fingers have the foam board strip as a resting place; this prevents unwanted smudges and lines being transferred to the watercolor paper.  During this step, I frequently (and carefully) check to be sure the drawing is really transferring so lines are dark enough on the watercolor paper.  Any shifting of top or bottom layer is a BIG uh oh.  I use a pencil with a harder lead, like a 2H, to make the transfer work better.


Checking the drawing that's been transferred to watercolor paper, I check for lines that need more defining.  There are plenty of soft smudges from the transfer paper.  After erasing away the smudges and unwanted lines, I use a brush to sweep away the eraser bits.


It's almost time to paint!  Pulling out a reference book, The Watercolor Painter's Palette I'll plan out key color mixes that match my vision most closely.  This book is one I refer to often because it shows what the color mixes will look like.  There are several pigments I own and use that are not shown in this book.  It's just handy and helps guide me in the right direction.  I usually narrow down my colors to a main red, blue, and yellow...gearing toward those that are more transparent and less staining.


I also refer to my stash of color mixing grids.  The mixing grid from the crocus paintings has some very nice greens.  The blog post, Painting the Crocus from July shows this grid with my reference set up.  It's still a great resource tool and worth the time it took to create it.  I'm much better at planning out my color mixing than other prep practices.  I know I ought to make value studies part of my planning process.  All these disciplines make the art better.


This is the color mixing grid I made before beginning the five landscapes, this painting included.  It's much simpler and and focused on key colors I wanted to achieve.


The drawing is ready on watercolor paper for the first strokes of color.  I've got the tracing paper sketches (I made an additional sketch for the tree) and reference photos close at hand.  If you look closely, you'll notice a white grid on the screen of the tablet.  The white lines are drawn onto a piece of acetate.  The acetate is taped to the tablet screen.  I'm going to to tell about this tool in a future post.  I am studying all my photos to pick those that best illustrate what I do with it and what it's for...it's most useful while drawing the initial sketch.


 I wasn't enthralled with my first efforts with this sky.  My frustration with the results increased and I nearly gave it up to begin again fresh.  My husband backed me up, agreeing that if I was that unhappy with it, start again.  I'm not sure why but I fought the urge to scrap the whole thing.  Feeling like I had nothing to lose, I did something a little gutsy.  I did a little reading online and then grabbed a magic eraser.  In the past, I'd been cautious enough that I wouldn't risk it on other paintings.  Why mess up what's already going well?  In my previous post, "Watercolor Landscape & Sky: Scotch Tape and Magic Eraser" I explain how I used the magic eraser to correct the clouds in this painting.  I am sorry there is no photo of the before, only the after.  It's the mistakes we usually don't want to remember, so no thought to grab the camera.  Next time perhaps.  I keep learning every day!

Once the first washes of green were laid in to the prairie portions, I was excitedly watching as it all came together.  With careful thought, I studied the textures of the weathered wood on the building.  I planned the layering of the color from beginning to last, base to top.  This photo is not as clear but still shows the progress in elements being developed.  The tree has masking fluid protecting its detail for later.


Now the masking fluid has been removed to show the white of the paper in the tree's form and taller grasses.  My evening critique (with husband's input) brought focus to the shadows being exceptionally dark.  I'm learning to wet then scrape back with a palette knife for more definition.  Wetting and scrubbing also brings back the light details in specifically chosen areas.


A view from above shows the layout of an organized work space.  Lately, this has been more disheveled and chaotic as I work on three at a time.  I'm fighting the nagging feeling that cleaning needs to be done.  The priority needs to be finished paintings and a few quick clean up sessions can come later.  Breathe.  Just breathe and focus.  Continue to press on.


This art piece has taken me on a journey of persistence.  It's been an incredible experience to begin and finish eleven paintings since June.  I'm celebrating sixteen weeks of dedicated focus on my artistic goals!  At the beginning of my self-given challenge, I had felt lost without purpose for this creative energy.  I didn't schedule my days with art being a priority.  I didn't know how it could be possible.  With great curiosity, I searched to find artists that could be creative daily and raise a family.  I wanted to have it all spelled out, like "The Dummies Guide to Being An Artist, Wife and Mom."  Nope.  It's not in print.  Without finding a definite "here's how it's done" plan, I am discovering it as I go along.  We are communicating within our family to find out what we all need.  I am letting the house be less than perfectly put together.  The laundry, ironing, and cooking are not always done like I would prefer them.  If I don't relax my expectations, I'll have to give up the creative pursuit again.  If you stop by and see a cluttered home, it's because I've been painting today.


This painting is now available on Etsy at ChristySheelerArtist.
If you have not been to my Etsy shop, I invite you to go see the selection available there.


Copyright 2015 Christy Sheeler.  All Rights Reserved.


It will also be matted and framed to hang in a local restaurant.  I'll share more when that step has taken place.

On Facebook, Google+, and Instagram, I share more frequent snapshot views of progress through out the week.  You can find those listed on my Contact Page.

So that's my bit to share for the week.  I'm excited to be able to describe the work going on with my palette and brushes.  Next week, I'll give a beginning to end progression of another painting.  If you're familiar with the Rock City natural formations, you'll want to stop back.  I've chosen a view from the river's edge viewing the rock cliffs and hills above.

Until next time,

-Christy


because she must make art.


Thursday, October 1, 2015

Watercolor Landscape & Sky: Scotch Tape and Magic Eraser

Easy Watercolor Techniques For Landscapes

Have you been itching to try watercolor painting yourself?  Are you just a little excited to get your hands on a brush?  Today, I'm going to show two techniques that anyone can use.  

When painting a landscape that has more complex details, keeping the sky color separate from the land portion is a challenge.  It's easy for watercolor to spread over where you don't want it to be.  Keeping a paper towel ready makes a quick blot possible.  Sometimes, we just need a few fluffy white clouds in the sky so we'll add those, too.


Materials:

Watercolor paper
Scotch tape
Box knife or razor blade
1" flat brush, synthetic is durable for watercolors
Watercolor pigment in blue hue of your choice
(ultramarine or cobalt, add a little cerulean for variety)
Eraser cleaning pad
Scissors
Container of water


Scotch Tape with Watercolor


1.  Here, I've drawn a few basic lines to imitate the planes of a landscape.  The top line separates land from sky.  This is where we have possibility of paint spreading from sky area.  With this simple line, I would just turn the painting around with sky area closest to me.  This trick is key for landscapes with more varied or complicated shapes.  If the paper is clipped to a support board, then it can be tipped at an angle so paint runs toward the highest point of sky.  You can rest the board on a roll of masking tape to keep the back edge higher.