Showing posts with label natural decor. Show all posts

Saturday, April 30, 2016

Dancing Poppies Watercolor Painting

I meant to highlight each of the poppies watercolor paintings.  In the series of four paintings completed together, I shared each in a post of its own.  All except this one.

It's really no wonder; I've felt a bit scattered and disorganized lately.  My success in managing so many aspects of the art process varies with life's seasons.  I'm still learning how to keep it all together between artistic pursuits and family needs.

Bear with me, I'm finding the rhythm.  Maybe like learning a complicated dance step?


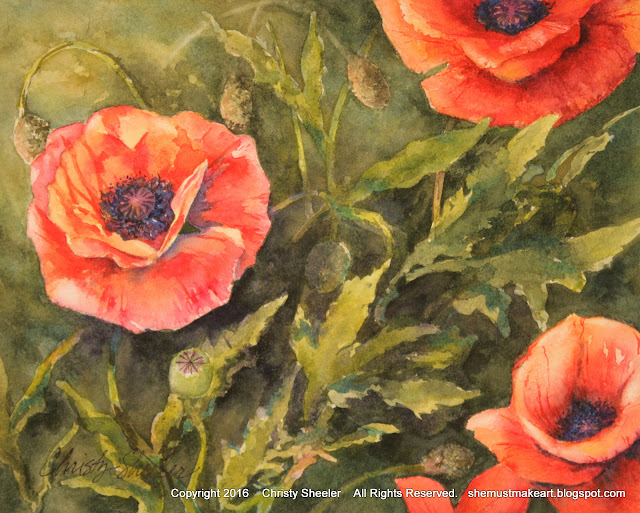
I would like to present Dancing Poppies, the completed watercolor painting!  It was completed in late February 2016.  The original watercolor painting is available on Etsy in my Christy Sheeler Artist shop.  (This post added April 2016.)  

Along the way, as the blog develops, I'm enjoying being able to share behind-the-scenes views of the process, like a virtual studio tour!  Hey, I'm so glad you had time to drop in today... Can I offer you something to drink, iced coffee, water, green tea?  Let's get started, it's just so fun to have friends stop by with eagerness to see the art studio.


Sketch It Out 


So this painting began as a simple value sketch with Sharpie fine point black marker.  You can see there's a vague and loose feel to the sketches.  Using a black and white print of the photographs helps me see the range of values from lightest to darkest areas.  This is not a regular habit of mine and I'm still deciding whether I'll use it on a regular basis.  I've got a feeling I'm already doing this subconsciously in my planning process.  The composition of this piece is not one that follows the traditional rules.  Without realizing it, I have a composition that breaks rules.


value studies sketches for poppies watercolor series


A Photograph for Reference


The photo reference I used for this piece with one change:  the flower at the left is reversed and placed at the far right.  This was a bit of a challenge when it came time to paint it with the light coming from the top left.  The light striking the petals needs to be consistent for all the flowers.  Mind bending?  Yes.  I still do it to myself anyway.


Dancing Poppies art reference photo by Christy Sheeler 2016


Tracing Paper Has The Details


Tracing paper has become my favorite for sketching.  It's easy to draw in a detailed way and erasing is effortless.  Now, with the sketch for Dancing Poppies, clipped to the board, I can transfer it to the watercolor paper with a sheet of carbon transfer paper sandwiched between the layers.


Poppies sketch on tracing paper.  Dancing Poppies watercolor painting planning stages.


Let the Watercolor Do Its Thing


The first washes of watercolor pigment are soft and loose.  I begin with the background for this piece.  Where I begin varies with each painting.  There are some that begin with the main subject.  Here, I had such joy in working on wet paper, allowing the pigment to flow where it pleased.  When I am concerned about pigment moving into delicate petal areas, I apply masking fluid while the paper is dry.  I applied masking fluid in stages so that stems and leaves had a soft wash of the background as their base color.  It's much easier to be free and spontaneous when I don't have to work carefully around details.


A photograph of beginning the watercolor background for Dancing Poppies.


In the background, the other three watercolor paintings in the poppies series are resting on the easel.  I have them there to study at a glance.  If there are problems, I'll usually notice them in passing more than while painting on them for an extending period of time.  There will be a final critique session with that great husband critic at the end.  Dancing Poppies, on the studio table, has a background that's building with layers of watercolor pigments.  It's even taken on a golden tone in the upper left area of the painting.


watercolor poppies series in progress


For some reason, I was so busy in the throes of creativity, there are no photos of this piece while the petals were being painted.  Sometimes, it happens like that.  I get a spurt of crazy get-this-going energy and there's no stopping until it's done.  So the completed Dancing Poppies with the tools used along the way.  The value studies, the sample brushstrokes of color, and the color mixing grid all help me through the process to the finish.


Dancing Poppies completed view with reference tools.


A shot of the studio table while work is going on shows my typical set up.  Occasional time-outs are called for some clean up.  It seems that in the flurry of paintbrushes and pigment, things get cluttered and out of sorts.  At the end of the day, I'll bring it all back to tidy again so it won't be an intimidating sight the next morning. 


Dancing Poppies watercolor painting completed viewed on studio table.


The Finished Painting


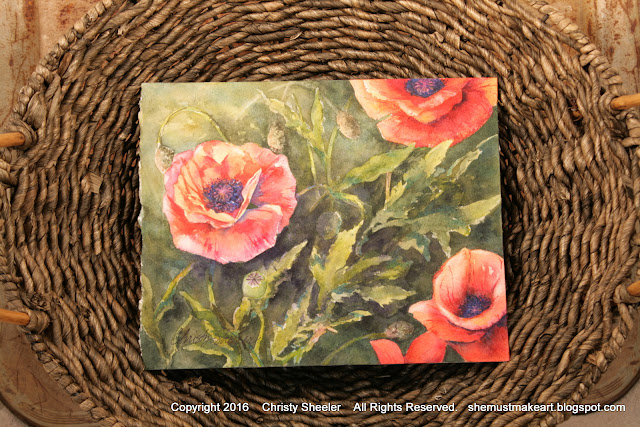
Dancing Poppies, the rule breaker for composition design.  The sunlit leaves weaving their way through at an angle seem to help it work...at least in my mind's eye.

Dancing Poppies Watercolor Painting


Dancing Poppies Watercolor Painting in decorative display


 Dancing Poppies by Christy Sheeler 2016


Well, I feel better knowing that Dancing Poppies got its own reveal.  Maybe no one will ever know the difference...but if you're here reading this, it did make a difference!

So what do you think of composition?  Do you like the more traditional or the unusual view better?  Maybe you've never really thought about it before.  This week, here's a challenge:  keep your eye on the look out for art that you enjoy most.  Look for the way the main parts are arranged.  Do you think it's traditional or not?

-Christy
she must make art.


P.S.  To see the blog post about the full process of all four poppies watercolor paintings in this series, click:  Watercolor Poppies Complete Art Process.


Friday, December 11, 2015

Christmas Tea: Part 2

Tall glass vase with vellum wrap


In part 1, I described the beginning of the table centerpiece.  Today, I'd like to show you how I created the tall glass vase with scripture on vellum.  The vellum wrap is inexpensive and easy to make.


The tall vase looks like frosted glass with painted lettering but it's a very simple project:  With Publisher software, a piece of vellum and a printer, a vase has inspiration to share.  I'll quickly lead you through the steps I took to complete it.


First, a template was needed to know where to print the lettering.  I used a piece of plain white copy paper and a pencil.  Once I had wrapped and taped it to the vase, I loosely sketched how much space I wanted the verse to fill.


With a ruler, I measured and marked the measurements from the left and top edges.  Taking this to the computer, the guides in Publisher help me match up where the text should fit.


Here's a screen view of how it appears as I work out the font type and size.  I chose Landsdowne, size 36, for the text.  I tried fonts with flourishes but found them harder to read at a glance.


Next, I printed off a sample on the another sheet of plain white copy paper.  This step saves me from wasting a sheet of vellum.  I take this and wrap it around the vase, making sure no further changes are necessary.  The rough draft on copy paper looks great; I'm ready to send the vellum through the printer.


In the photo below, I show the plain paper copy on bottom left and the vellum copy on bottom right.  At top right, the plain white vellum (frosted finish) with its item information on the left edge.  That edge needs to be trimmed off so that it will be 8 1/2" x 11" for the printer.  Don't skip this step!  The sheet of vellum needs to be the standard 8 1/2" x 11" when it's fed through the printer.


The paper cutter makes quick work of neatly removing that edge.  Now the vellum can be placed in the inkjet printer.


I remove all other paper from the tray to avoid more than one sheet feeding through at a time.  After printing on the vellum, I leave it to dry thoroughly because it could smudge easily.  I would suggest waiting 20-30 minutes before handling the vellum.  I haven't tried printing a photo on vellum but I think it's possible.

Rubber stamps could be used to add decorative detail.  I recommend using Stazon ink.  Information from the package label: a fast-drying solvent ink, made for use on plastic, metal, glass, ceramic, laminated paper, and leather.  You'll need a special cleaner to remove the Stazon ink from the rubber stamp.


I use two pieces of tape to secure it to the vase.  The vellum had a bit of overlap but I left it alone.  It could be trimmed.  Add a candle and it's done!


To my great amazement, I have more to share!  I hope you're enjoying these tips.  I had no idea this would turn into a three part series!  Next time, the brief how-to for these place cards with rubber stamps, decorative washi tape, paper doilies, and brown twine.  You don't have to wait until next Thursday...because it's all prepared and ready to go!  I'll have it here in the next day or two.

Thanks for following along and I'll chat with you again very soon!

-Christy

because she must make art.


Thursday, December 10, 2015

Christmas Tea Party

A rustic box, flowers and a string of lights


The past three weeks have been a whirlwind of activity!  While the art studio has been put to great use, there haven't been any paintings in progress.  The watercolor palettes are tucked away in the refrigerator for a while longer.  My parents spent two and a half weeks with us; what an incredible joy to have them here for my birthday, Thanksgiving and a special Christmas Tea.  If you haven't read previous posts, my exercise ball and I had a misunderstanding.  After a fall to the floor, my pelvis and tailbone needed some recovery time.  My parents arrived just when I needed them most, making it possible for me to keep up with several commitments.  They kept this house busy with activity, cleaning, repairing, organizing and decorating.  I just can't thank them enough!


Last time, I shared the making of seed packets to share with my table guests at the annual Christmas Tea at our church.  I've been planning my table decor since September but had to make some adjustments to those plans.  Simplicity and ease were now more important than ever.  Thankfully, most of the hard work was behind me.  I just needed to set up what I had envisioned in my head; whether it would look like I imagined, I needed to see for sure.


"The grass withers and the flower fades 

but the word of our God will stand forever!"


Isaiah 40:8


That was my inspiration for this table decor.  As I mulled over what to share this week, I thought that it might be fun to share the process of putting all the separate elements together.  Hopefully, you'll find this fun and interesting.  I believe home decor IS art.  My sister claims she doesn't have the same talent I have but I disagree.  Her home is just lovely and her ideas are fantastic.  I draw so much from what she does with every room of her home.  She doesn't know how much I quietly observe and gather ideas from her.


Friday, October 16, 2015

Art Studio Progress: Montana's Big Sky and Farmlands in Watercolors

A peek at what's going on today:

Yesterday, I just couldn't take it anymore!  I had to clean up this place.  It was driving me crazy.  Fall is here and the wind can really blow in Montana.  Leaves are everywhere.  That includes my art studio AKA the solarium.  I've got plenty to do but the state of this room was more than I could handle.  The clutter seems to clog up the creative energy.

So by last evening, I was too tired to sit down at with brushes and palette.  It was great to start fresh this morning.  With so much time spent between the computer and cleaning in the past two days, it took some time to find my groove today.  That makes me nervous...working on a painting before I'm really feeling "it" could mean mistakes.  I tentatively press on, believing any mistakes can be resolved.  I battle between being too tight and too free in my manner.  I could really use some loosening up with color and technique most days.

I brought out nature items collected to display on the art supply cabinet.  I used this space for photographing artwork, prepping for Etsy listings.  Photographing artwork to look it's best is harder than I expected.  With much frustration, I'm learning as I go along.  Sometimes, I just want to learn it too quickly.  I want the answers now but that's not how it works.  It takes sticking with it, being patient for a better idea to come another day.  The balance between hard working while still relaxed enough to create...that's my task.  It's a joy most of the time.  Other times, I stomp my foot and growl, and then I move on.  I can be silly like that because it's just me and a kitty that is busy chasing her tail.


I'm not sure how to explain it but I'm feeling that this piece is close to completion.  I'm putting it aside until I can have a critique session, most likely with my husband at the end of the day.  I've got two other watercolor landscapes waiting in the wings.  I'm off to get going again.


-Christy
because she must make art.