Showing posts with label inspiration. Show all posts

Friday, February 16, 2018

Writing My Artist Goals: 2018!

Graphic of blue skies with scattered clouds with foreground of land and telephone pole in silhouette.  Mountains in distance. Let's talk about goals.

While moving about the art room, my eye spots a simple sheet of paper.  At the top, it's titled 2015 Christy Sheeler Artist.  To anyone else, it might be just another list.  It is my list of art goals for 2015.  I quickly read over the list and feel amazed at what I was able to accomplish in that one year's time.  

So then I turn my head and see another list.  It's pinned to the bulletin board on the wall.  It's title:  2016 GOALS for Christy Sheeler Artist.  You caught that...not 2017.  There were no artist goals for 2017.  Well, 2018 needs some goals! The process and result will give me something to work toward for myself, the artist.

Let's get this process started!


Defining a goal

According to Merriam-Webster, goal can be defined as the end toward which effort is directed.


Synonyms for goal include: aim, ambition, aspiration, design, dream, idea, ideal, intent, intention, mark, meaning, object, objective, plan, point, pretension, purpose, target


White sheet of paper on bulletin board with 2016 Goals for Christy Sheeler Artist


A view of my bulletin board with assorted papers and photos.


Inspiration for Goal Writing


Our goals can only be reached through a vehicle of a plan, in which me must fervently believe, and upon which me must vigorously act.  There is no other route to success.
-Pablo Picasso


You are never too old to set another goal or to dream a new dream.
-C.S. Lewis


Outstanding people have one thing in common:  An absolute sense of mission.
-Zig Ziglar


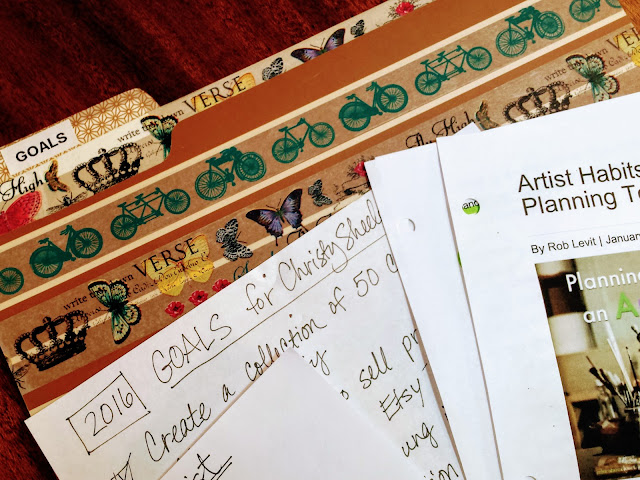
File folder labeled GOALS and previous years' goals.


Why write down yearly goals?

I need direction.  I am easily distracted.  It begins with one task which turns into switching to another task.  "Oh, I need to put this away."  "Where did that list go?"  And months can go by without remembering to figure out how to learn a new social media platform...Instagram, Pinterest, Facebook...  I need more structure; organization that helps me function better.  Having a list of lofty plans and major milestones has made it possible for me to go after the hard things.

Something I read a few years ago really gave me a serious nudge to be serious about being more intentional with my goals.  Artist Habits of Mind-A Great Planning Tool for 2014 written by Rob Levit (title is linked) gives the challenges to

"engage and persist...make a list of what you'd like to accomplish in 2014-personally and professionally.  What opportunity would provide the greatest reward-financially or in terms of professional satisfaction-if you engaged and persisted in its accomplishment?"

Thursday, March 31, 2016

(My) Perspective Matters: The Effects on an Artist

my perspective matters the effects on an artist christy sheeler she must make art blogspot 2016


Whether you consider yourself an artist or not, I'm sure you can relate.


Early spring has begun to arrive here in northern Montana.  It's not a picture perfect lush green yet.  That kind of spring has not arrived yet.  On Sunday, as we drove to church for Easter service, my son spotted a robin.  A few nights ago, as I was about to drift off to sleep, I heard the geese honking as they flew over our neighborhood.  While outside on a warmer day, last week I spotted the tulips leaves, just green tips of a few inches, starting their way up from the ground.  Strawberry leaves are coming back to life, among the dead leaves, pine cones, and twigs.  The green onions that remained in the raised garden beds have kept their square foot home in the soil.  Their stalks are turning green again, reminding me it won't be so long before planting will begin again.  Before I show those views to you, stick with me a bit longer...

We've had such a limited amount of snow in the past five months.  It's definitely reason to feel apprehensive about the coming months.  The summer of 2015 quickly turned troubling with the lack of moisture.  Before we realized it, we had a hard wildfire season.  Smoke-filled haze and ash on flat surfaces was such a disappointing end to summer activities.

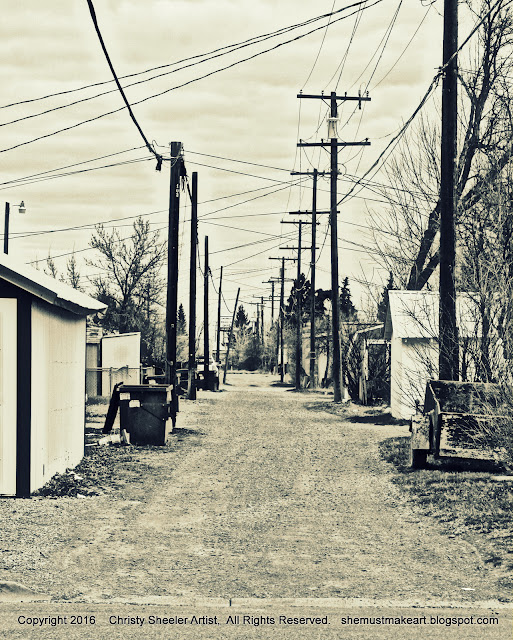
We still need moisture in some form.  Whether it be gentle rains or (typical for our spring) wet, heavy snow this time of year would be very welcome.  It's easy to become discouraged when we base our hope on what we can see or understand.  Human perspective is surely flawed!  And I'm included.  Tuesday morning I noticed garbage strewn along the ground near a dumpster in a nearby alley.  That was what my eye noticed, glancing out of the corner of my eye.  With my two teens in the car, we headed out for an orthodontic appointment.


photo of alley early spring black and white photo by christy sheeler 2016


In the back recesses of my mind, I was disappointed at the sight.  The cause could be cats, dogs, wind, etc.  It wasn't an enjoyable sight.  Now, I took the photo today...and maybe there was more garbage lying around then, I'm not sure.  That is beside the point.  Just hang on and see where I'm going with this...

I was fixated on the sight for a moment - caught up in it.  


Does that ever happen with you?  In can easily turn into a negative thought pattern.

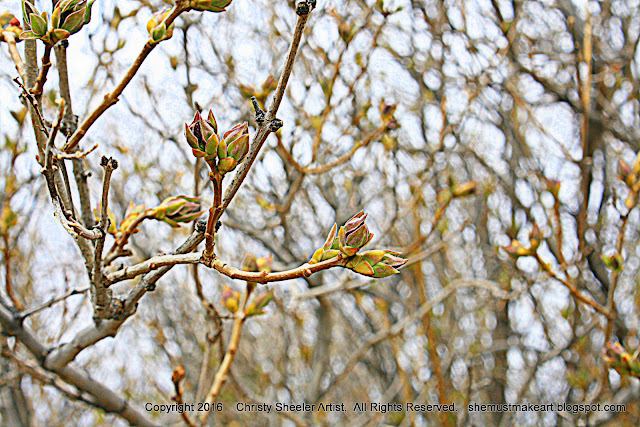
Now there's another view I've studied in passing - the lilac bush in a neighbor's yard.  I'm usually driving into the alley, approaching our garage entrance.  There on the bush, the tiniest buds, just bundles of leaves - not that they are recognizable at this early stage.  But I know what they are from past experience.  Now on first glance, it's not all that exciting.  But wait...


Lilac bushes first buds photography by Christy Sheeler 2016


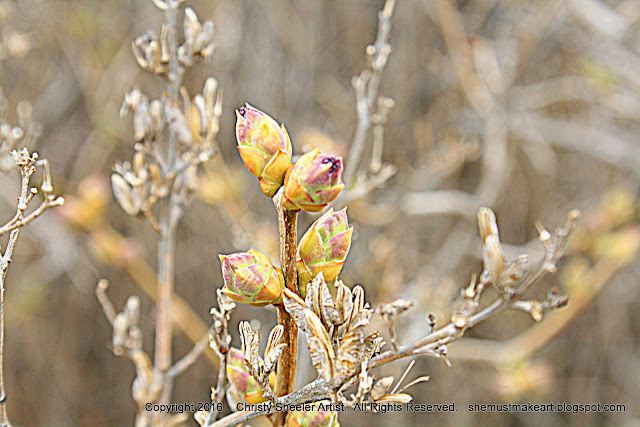
Lilac bushes first buds photography by Christy Sheeler 2016


Do you notice what happens as you draw closer?  Looking more intently, focused, it all changes to something so mesmerizing.  The effect is much different than with a quick glance.


Lilac bushes first buds photography by Christy Sheeler 2016


Thursday, March 3, 2016

Slow Down, Listen, Rest, Reflect

Trying To Do Too Much

In the past two weeks, there have been expectations.  
Big ones.  I set these big expectations myself.  
In my impatience and frustration at not having the results that I want, I push harder.  In my multitasking frenzy, I crank up my pace and get more done.  It's not easy.  It's tiring.  I want to cross more off that mental list.  There are all the tips I've read online.  Managing social media can crowd out the creative flow and overshadow the art process.  I feel my attentions going in too many directions.  Something inside, like a warning signal, tells me if I continue like this, burnout is a possible result.  I'm running out of steam.  It's time to do things differently.


Advice we all need:
1.  Slow down.  Reconsider the priorities and the timeline.
2.  Listen.  What do we hear our bodies telling us?  Are we emotionally strained?  Is the body needing an easier pace?  Are we taking care of ourselves?
3.  Rest.  We can only keep up an unreasonable pace for so long.  When we drive ourselves to unreasonable limits, there will be a price to pay.
4.  Reflect.  Examine what's really of most importance.  What is urgent?  When we list our goals and rate the priority, can a few be dropped?  Paying attention, evaluating and reconsidering helps us to be better at what we don't want to give up.

This is the advice I've been trying to give myself.  Maybe you will see the same true for yourself in the past, now, or in the future.  Overworking myself, I'm taking a risk that I will lose the joy for the art.  The passion for the creativity is worth protecting.  The only time lines are the ones I've chosen.

My back and neck have been sore for the past two weeks.  I'm very tired even while trying to keep up this pace.  All because I want it when I want it.  Not too bright.

This week, I've felt sluggish and drained.  I know it's a result of all I accomplished last week.
I had so many ups and downs with the tasks I was determined to finish.  I learned the basics of Canva, Society6 and Photoshop Elements.  I used Canva to make a fantastic graphic for sharing on Facebook.  It was a photo collage for my daughter's 15th birthday.  It was easy to learn and fun to create with my own photos.  It's a great option for playing around with graphics.  I'll learn to use it here for giving the blog intro's more pop.  Photographing new artwork for two different purposes was a big task to complete.  Then, I applied with Etsy to sell prints...that took several hours to complete, still no answer there.  Scanning new and previous artwork spread over into my Saturday.  I've got such a desire to get so many balls rolling at once!


This week, I've chosen a couple of ways to stay active in the art studio while easing up on myself.


First, I have been planning my next color mixing chart for upcoming watercolor paintings.  As you can see, there's a ways to go yet.  I'll get to it in the next few days.  Updated photos to come at a later date.


Second, playful watercolor for no special reason.  Relaxing exploration.  Brushes in hand, pigment on the paper and unknown results.


Third, laying out potential designs for note cards.  Experimenting with different layouts is great fun!  I'm looking at options for building some really unique layers with a variety of elements.  The pen and ink was a fun diversion.  


Fourth, Artist's Network TV videos online are a great way to take a break!  I just needed to take it easier physically.  This is a subscription service but so valuable to me.  I was able to watch two videos while putting my feet up!

Joyce Faulkner and Guy Magallanes are very entertaining!  I learn so much from both of them.  They each have their own distinct style and methods.  I watched one about painting crabapple blossoms and another about painting poppies.  I'll link to the YouTube previews here: Crabapple Blossoms and Icelandic Poppies.  Each of these videos were about 100 minutes in length.  The videos show the process from beginning to completion.  I love seeing techniques and methods in action!

Here's a link to Artists Network TV watercolor preview videos available on YouTube.  The watercolor videos alone are 242 in total!

So, now I'm off to relax and let my back take a time out.  I was torn about whether a blog post is really necessary in light of how I'm feeling BUT I love having this continuity!

Can anyone relate?  
Do you see yourself pushing at a harder pace to get the results you haven't seen yet?  
Are you familiar with simplifying and regrouping before going forward?  
How do you keep it all in perspective?  How do you evaluate your goals on a regular basis?  
What's your go-to way to relax and take a break?

I'd love the input!


-Christy


Thursday, January 28, 2016

Advice for Artist Moms Who Long For More Art Time


I ached to bring back my artist self


I missed the artist "me".  The "me" that had time to spend an entire Saturday with my brushes and a sheet of watercolor paper.  So as crazy and mixed up as that may sound to any non-artist types, I believe other artists (particularly moms) will be able to relate.  

My becoming a mom story is a bit different than most.  When I was 33 years old, we brought 2 children home ages 3 and 4...and I went from not-a-mom-yet to mom-of-two sibling group.  Life as I knew it was turned upside down but in a good way.  The changes in our lives and theirs meant we were always playing catch up.  I was very tired.  There isn't a word for how tired I was at that time. 


What can you do to keep the artist flame burning while pouring yourself out in dedication to spouse, children, job, or caring for a parent?  Many can attest to the fact that it's not always easy to be an artist while life is happening.  I felt lost, trying to find the way back to feeling like a real artist.  While visiting with other artists it was hard to say, "I'm an artist."  I fought the urge to say, "I used to be an artist."  I wondered how to keep some aspect of art interest alive during that season of my life. 

I've been formulating in my mind, what tips and encouragement I might give another artist in that place right now.  I know it feels like you are the only one but please take heart!  It will not always be like this... and there are ways you can keep the flame from going out.


5 Ways to Keep Your Artistic Flame Alive


1.  Squeeze some art into the between-moments.
Pause and give some thought to what you can make time for with your current restraints.  What can you do with short bits of time?  When you're waiting to pick up children from school?  When you're in the waiting room for dental check-ups?  While waiting for sports practice to end?

For me, it was reading magazines like The Artist's Magazine and Watercolor Artist as a quick afternoon reward while kiddos had rest time.  I've gone through them and added sticky notes to help me find favorite tips.  Now there's Pinterest!  Now is the time to get started gathering ideas for projects.  Find ideas that can be done in small amounts of time.  Find ideas for projects in the future when life changes once again.


Three books I love looking through...just lovely ideas to ponder over in the few quiet moments.  Watercolor A New Beginning by Ann K. Lindsay is just fantastic for beginners.  She's encouraging and hopeful, while giving a well-rounded foundation for watercolors.  Watercolor Made Easy by Janet Walsh is another valuable beginner's book.  The photos break it all down into simple to follow progression.  The Artistic Mother by Shona Cole will delight the senses with fantastic photography of lovely projects.  Her Introduction is titled, Why Should Mothers Make Time to Create Art?  In this book, you'll find inspiring ideas for tying photography into a variety of unique projects.

Thursday, January 7, 2016

My Winter Views

15 Photographs of My Montana Winter


It's taking more effort to get back into the creative routines again.  November and December were so busy and activity filled; it was too much to fit in my art goals.  We have had a bout with head/chest colds here.  In the process of taking care of everyone else, moms catch the ick, too.  I was able to play with watercolors and Yupo synthetic paper for a few hours.  Such fun to explore what paint does on this plastic surface.  I will share more next week!

This week, I've got a series of photographs taken over the past few weeks.  I'm writing very little today.  The room I use as art studio is our family multi-purpose room.  Art supplies have been stowed away off to the side for a place to wrap Christmas presents.  It's going to take an hour or two to clean up, put away Christmas related items, and set up for art process.  This is the best I can accomplish this week.  

We took a few drives as a family across country roads last weekend.  The sun was low in the sky and lighting was not ideal but I was able to adjust for better contrast.  Maybe there is no snow where you are and I'd like to share photographs the views we have here.  I've been away for a few weeks now and I want to get back into the creative swing of things.  


Friday, December 11, 2015

Christmas Tea: Part 2

Tall glass vase with vellum wrap


In part 1, I described the beginning of the table centerpiece.  Today, I'd like to show you how I created the tall glass vase with scripture on vellum.  The vellum wrap is inexpensive and easy to make.


The tall vase looks like frosted glass with painted lettering but it's a very simple project:  With Publisher software, a piece of vellum and a printer, a vase has inspiration to share.  I'll quickly lead you through the steps I took to complete it.


First, a template was needed to know where to print the lettering.  I used a piece of plain white copy paper and a pencil.  Once I had wrapped and taped it to the vase, I loosely sketched how much space I wanted the verse to fill.


With a ruler, I measured and marked the measurements from the left and top edges.  Taking this to the computer, the guides in Publisher help me match up where the text should fit.


Here's a screen view of how it appears as I work out the font type and size.  I chose Landsdowne, size 36, for the text.  I tried fonts with flourishes but found them harder to read at a glance.


Next, I printed off a sample on the another sheet of plain white copy paper.  This step saves me from wasting a sheet of vellum.  I take this and wrap it around the vase, making sure no further changes are necessary.  The rough draft on copy paper looks great; I'm ready to send the vellum through the printer.


In the photo below, I show the plain paper copy on bottom left and the vellum copy on bottom right.  At top right, the plain white vellum (frosted finish) with its item information on the left edge.  That edge needs to be trimmed off so that it will be 8 1/2" x 11" for the printer.  Don't skip this step!  The sheet of vellum needs to be the standard 8 1/2" x 11" when it's fed through the printer.


The paper cutter makes quick work of neatly removing that edge.  Now the vellum can be placed in the inkjet printer.


I remove all other paper from the tray to avoid more than one sheet feeding through at a time.  After printing on the vellum, I leave it to dry thoroughly because it could smudge easily.  I would suggest waiting 20-30 minutes before handling the vellum.  I haven't tried printing a photo on vellum but I think it's possible.

Rubber stamps could be used to add decorative detail.  I recommend using Stazon ink.  Information from the package label: a fast-drying solvent ink, made for use on plastic, metal, glass, ceramic, laminated paper, and leather.  You'll need a special cleaner to remove the Stazon ink from the rubber stamp.


I use two pieces of tape to secure it to the vase.  The vellum had a bit of overlap but I left it alone.  It could be trimmed.  Add a candle and it's done!


To my great amazement, I have more to share!  I hope you're enjoying these tips.  I had no idea this would turn into a three part series!  Next time, the brief how-to for these place cards with rubber stamps, decorative washi tape, paper doilies, and brown twine.  You don't have to wait until next Thursday...because it's all prepared and ready to go!  I'll have it here in the next day or two.

Thanks for following along and I'll chat with you again very soon!

-Christy

because she must make art.