Showing posts with label art techniques and tips. Show all posts

Thursday, January 31, 2019

Watercolor Success on YUPO


Watercolor Success on Yupo blog post by Christy Sheeler Artist 2019. Are you up for a challenge?


Watercolor is an adventure all on its own but if you are up for more challenge, you might give Yupo a try.  I am here to give you some pointers that will improve your experience.  Though it may seem foreign and scary at first, after a few painting sessions, you might just fall in love with this unique surface.  Shake up your creative process and take a break from the usual watercolor techniques.  While you may wonder whether you will ever get the gist, be willing to explore the possibilities.  Do you remember sitting in a classroom as a child, looking wistfully out the window, waiting in eager expectation for time on the playground?  Time.  Time to do as you wished without the rigid instructions and limitations.


Sometimes, I need more play with watercolor.


Like me, perhaps you have a underlying wish to break out of a rut, be more fluid and less confined by the traditional methods.  I wanted to be more free to watch the watercolor pigment spread as water carried it across the surface...without the stress and guilt of "wasting" a sheet of watercolor paper.  Are you ready?  Let's get on with this adventure!


What is Yupo?


You might be asking me, "what exactly is Yupo?"  That's a good place to begin.  Yupo is a synthetic paper that is tree-free.  This surface is 100% recyclable, smooth, very durable, tear-resistant, waterproof.  It resists buckling that usually occurs with cotton watercolor papers.  It does not absorb the pigment.  There is no need to tape Yupo on a board.  Pigments remain vibrant and white of the surface is easily restored.  Most often, artists use alcohol inks on Yupo but other mediums can be used as well. There are two different weights of Yupo offered:  74 lb and 144 lb.  For the purpose of watercolor painting, 74 lb. is more than sufficient.  There's also a translucent Yupo but I have not explored watercolor options there yet.  Yupo's available where art supplies are offered.

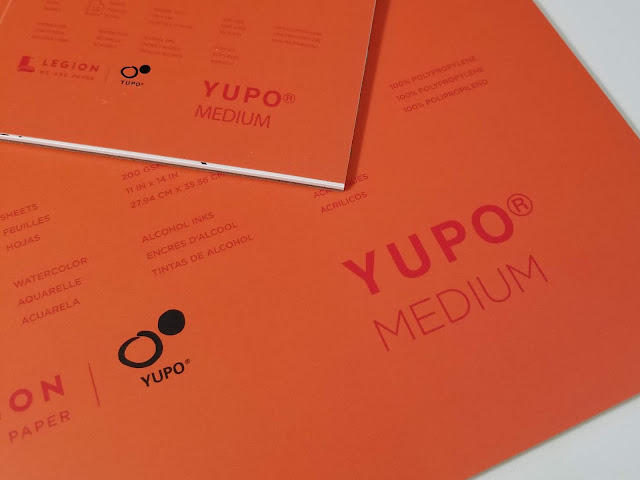
Here, I show you two sizes of Yupo 5" x 7" and 11" x 14" with 10 sheets per pad.The smaller pad was $4.93 and the larger pad was $16.82.  They were purchased from Dick Blick.  The 20 sheet pad (74 lb.) of Yupo costs $16.99 on Cheap Joe's Art Stuff presently.


Yupo synthetic paper in various sizes.


Yupo synthetic paper in various sizes.


What I understand about Yupo so far...


 In a previous post (January 2016) , I shared my first experience with Yupo.  I will link the post titled Watercolor Adventure with Yupo here.  I had fun playing with Yupo and still do.  At that time, I needed more time painting on this new surface.  The hours spent gave me a better comfort level and results.  My favorite subjects are landscapes and flowers.  I wanted to challenge myself to be less detailed and tight with my technique.  At first, I felt like I would never have the knack for anything representative of these subjects.  I will admit it's a long stretch to find how to bring watercolor to Yupo in a way that connects with my style.  Each time that I returned to "play" on Yupo with my watercolors, I was more pleased.  The artwork is now something I enjoy looking at and displaying for others to see.


Watercolor painting on Yupo paper back in 2016.
My first major session of experimenting with Yupo back in 2016.


So, let's move on to my tips for watercolor success on Yupo.


Starting with the basics:


1.  Yupo is made from polypropylene.  It's not a paper at all.  
2.  It's an alternative surface for painting and ink.  
3.  It does not absorb color at all.  Watercolor paint can be lifted off to bring back whites.
4.  Prep the surface using a cotton ball and rubbing alcohol.  This removes oils left by fingerprints.
5.  Draw with water-soluble pencils.  Look for water-soluble graphite pencils.  Draw with watercolor
     pencils instead of graphite.  Do not erase.  Eraser marks act as a resist.
6.  Paint once to add color; paint twice and it will lift color.
7.  More watery color mixes will take longer to dry.
8.  When complete, the painting needs to be sealed with a Krylon matte sealer.

Those are the basic guidelines I understood when I first began experimenting back in 2016.  I had been aware of Yupo for quite a few years but had avoided it.  I feel better knowing many watercolor artists are still avoiding it like I did.  Still, it's worth the risk and you might find it's your new love.

Saturday, February 3, 2018

5 Steps For Making Your Own Watercolor Mixing Grid

Painted watercolor squares with title, 5 Steps for Making Your Own Watercolor Mixing GridPlan Your Mixing For Better Creative Flow

I use mixing grids as tools, because it saves so much guesswork.  Clearly seeing which mixes I want to use in my work,  I am less frustrated and make fewer mistakes.  It's less, "oh, I don't like that!"  There's more "oh, it's coming together!"  

Would you like to make one?  Does it seem intimidating?  Can I give you some tips to get you started?  It's an enjoyable process, methodical yet relaxing at the same time.  In the past, artists have shown interest in making a chart like this.  It's just paper and paint.  Really.  I promise.  Don't hold back because I'm just sure you can handle it.  

(Well, no...I don't know you that well...what do you have to lose?  You might have a great time!)


After the many years I've painting with watercolors, there's a stack of various watercolor paper scraps with free form brushstrokes of color.  Each one of these pages is a record of my time exploring how to achieve a certain mix for a painting.  The earliest mixing "notes" are filled with blobs of color with a few scribbled notes in my handwriting.  I sorted this stack into the following collections.  Some of them instantly take me back to the specific painting, others not so much.  It's interesting to see how my methods changed over time.


Various collected watercolor mixing grids with written notes.


LET'S BREAK IT DOWN.

Supplies:
Watercolor paper (I'm using 300 lb. cold press)
Pencil
Fine-point permanent marker
Straight edged ruler
Watercolor pigment
Watercolor brush
Watercolor palette
Container of rinse water
Paper towels


Watercolor supplies: paint palette, paint tubes, container of rinse water, pencil, permanent marker, ruler, paintbrush, paper towel, watercolor paper.


1.  Choose your pigments.  

Keep the number limited.  How about the primaries, and then a few other pigments you're curious about trying out.  I usually begin by comparing my reference photo with my favorite reference book, The Watercolor Painter's Pocket Palette by Moira Clinch.  Over time, I have saved my mixing grids from previous artworks, and those are also great tools now.  So, for the hollyhocks as my photo reference, I've chosen these watercolor pigments.

I chose Daniel Smith Quinacridone Coral, Daniel Smith Quinacridone Red, Windsor & Newton Transparent Yellow, Daniel Smith Quinacridone Gold, Da Vinci Cerulean Blue, and Daniel Smith French Ultramarine.


Tubes of watercolor pigment.


Thursday, March 9, 2017

Change. What it really means.


Black and yellow butterfly landing on Indian Paintbrush wildflowers. Oh, spring, come soon.

The words to describe how much I need spring.  Right.  Now.  I love Montana.  I love it all year long.  I wish spring didn't take this long to arrive.  I grew up in Nebraska.  I've been in Montana since 1994.  It makes sense that I should have adjusted by now.  Nope.  I keep saying, "spring will come," and, "it's worth the wait."  Oh, and I tell myself the moisture makes for "happy farmers."  That's my reminder that there's good in more snow.

We've had more sunshine lately so that helps a bunch.  It melts off partially.  More light snow showers arrive to lightly coat everything again.   As I write at mid afternoon, it's 36° F and the sun shines so brightly.  I crave the sunshine.  I'm eager to have the days warmer, the hours of sunlight longer, the soil ready for planting seeds in a garden.

Adding to my longing for spring, I'm preparing for change.  There's good to come and yet there's sacrifice at the same time.  I'll soon have to rework when and how I work in my art room.  It's going to be a quiet place during the daytime hours. When the creative spark is lit in the evening hours, I would like to think I'll be drawn to this inspirational and relaxing place.

Creative energy...the artistic mind...it's a part of me.


It's been suggested that maybe I'll have to give up my art for the present time.  I just can't accept that.  Maybe that's what will come without my acceptance.  Creative energy...the artistic mind...it's a part of me.  I feel vibrantly alive when working with my brushes and palette.  Sorting through watercolor tubes for a specific pigment is so familiar to me.

...in the face of letting go and embracing the new.


What do we do with change?  How do we meet it?  Is there a wait to greet change with hope and joy?  Even if it's in the face of letting go and embracing the new.  I go forward because I'm choosing to be happy anyway.  What unexpected adventures are waiting for me?  I don't know, but I know it will be worth watching for the surprise blessings in the journey.

I'll share more another time.  For today, I'm contemplating these thoughts.  I'm doing a bit of clean up in my art room.  I've got some relaxing music playing.  The fish tank filter bubbles away like a water fountain.  The sunlight through the window blinds, creating shapes on the floor and wall, is warm and soothing.  I breathe deeply...feeling like I haven't been so aware of my breathe lately.  I need to breathe deeply more throughout my days.  I will sweep and vacuum a bit.  And then I'll glance at my art table and study that one area of the current painting that is driving me crazy.  Maybe I'll have an ah-ha moment of how I'd like to tackle that hollyhock blossom.  A way to move on and complete this artwork before my days adopt a different routine.

Can you relate to the ebb and flow of seasons for creativity?  How do you handle the change?


I'd love to hear your suggestions for working art time into your extra moments.

Until next Thursday...or when I can find spare time to write again...

-Christy

She must make art.


Thursday, March 2, 2017

24 Must-Try Watercolor Techniques

24 Must-Try Watercolor TechniquesTechniques and Tips for Watercolors

When it comes to watercolor painting, these are the tricks that draw the ooh's and aah's every time.  Watercolor as a medium seems like such a challenge because it seems unpredictable at first glance.  It's so important to learn what to expect from the pigment when it meets water.

When learning watercolor basics, these will help form a better foundation in painting with more enjoyment.  The frustration is lessened because you have a better idea of how the pigment is going to respond to what you do.

There are many helpful videos on YouTube that are great resources shared by other artists.  Do a quick search on YouTube and you'll have a great time watching artists demonstrate these techniques.

When teaching these techniques in a workshop, I bring out these posters and copies of the instructions as handouts for students.  I'm sharing those handouts with all of you, here and now!  This post has been a long time in the planning stages and I'm so thrilled to have it finally ready to share with other watercolor enthusiasts.


So, I have a bit of confessing to do first.  Have you seen my pins on Pinterest for these techniques?  Years ago, when I was new to Pinterest, I created pins for the images of these posters.  At the time, I didn't realize how popular these posters would become with time.  Now, these pins are my most commonly saved pins!  Unfortunately, they lack any explanation.  The pins lead nowhere but to the images.  Lesson learned, believe me!  I can't tell you how much I regret that mistake!  It's taken me a while but now I'm glad to share the posters and the tips that help explain each one. 

If there's a technique you'd like me to elaborate on more, please let me know in the comments.  I'd be more than happy to help you with that!


When it comes to watercolor painting, these are the tricks that draw the ooh's and aah's every time.


Watercolor Techniques Pages 1 and 2


Created by Christy Sheeler.  For personal use only.  Request permission to reproduce.


Created by Christy Sheeler.  For personal use only.  Request permission to reproduce.


Tips & Explanations for Watercolor Techniques


I know the text on the tips sheets may be hard to read so here's a link to the printable PDF file:


I hope you are able to try these techniques on your own!  These make up a watercolor artist's tool box for creating unusual effects.  There are several I use often.  There are 4 or 5 I rarely use but at times, these techniques are useful.  It all depends on the style and subject matter.  It's a good idea to become familiar with them, try them out with a bit of practice before applying them to an artwork you are working on.

Leave me a note in the comments!  Let me know if you've got questions and I'd be very happy to explain any of these further.  Thank you for stopping by and sharing a few minutes here today!


ADDED NOTE:  So many have commented and requested to use this as a resource for instructional material.  Thank you for the compliment!  I am glad you have found this to be helpful in teaching in your own settings.  Use permission is granted with the agreement that source credit is given to Christy Sheeler Artist and She Must Make Art, the art blog.  Permission is not given to altar these in any way or form.  I know the images above do stipulate for personal use only.  I do appreciate you commenting below your own purpose for using because it's so nice to read your stories.  I love knowing how these are spreading to touch others' enjoyment of watercolor painting.  -CS  2023

Thank you to those of you who have requested my permission in the comments.  I am too often late in replying so thus the reason for adding this note.  May your instruction go well and these resources be a blessing!


Christy
-She must make art.


Thursday, October 20, 2016

5 Tips for Technique: Lifting Watercolor Pigment

Lifting watercolor pigment, 5 tips for this techniqueLifting Color From Select Areas

A trio of precious lambs, one of my works in progress, is the inspiration for tips shared today.  It makes perfect sense that watercolor painting is about laying down pigments on paper.  There's another technique that's also very crucial for bringing the piece to life.  

Lifting back color.  

This isn't possible with oils or acrylics once they've dried on the canvas.  Watercolor pigment, once dry on paper, can still be lifted to see more of the paper surface.  Lifting back to completely white is possible by scraping with a razor blade.  Some pigments are more staining than others.  The results will vary depending on which pigment is being lifted.  It's easy to do a search and learn more about your pigments; you should do this before choosing your pigments for a project.  If you think you might like to lift back color further into the project, plan for it.
The technique of lifting color has become key in my methods for creating depth in my artwork.  The highlights and the shadow are key components for developing form on a flat surface.  Would you like your subject to pop off the paper?  Are there areas you'd like to highlight?  Get ready, here we go!

Thursday, October 6, 2016

Watercolor Paint on Fabric: 10 Tips To Share

Watercolor Paint on Fabric:10 Tips to Share by Christy Sheeler Artist 2016

painting my fabric banner

I love Pinterest for the convenience of collecting and organizing ideas.  I usually have several project going on at once.  For all the projects actually going on at a work station in my art room, there are several more projects going on in my head.

While working on a design for my event booth, I've pulled together colors and textures that represent me as an artist.  Because I love nature so much, it seems appropriate that nature should be reflected in how I represent myself and my artwork.  I went on my search through Pinterest to find beautiful booths from other artists and creatives.  I'm definitely a visual learner (no surprise there, right?) so all the photos help me streamline what I'd like for my own event booth.

While I worked on the banner, I shared photos on Instagram and someone asked me to share more.  I try to take a lot of photos as I work on a project and I enjoy sharing about the processes involved!  So, here's another project that you might enjoy trying!


It began with me wondering how it could be possible to paint with watercolors on fabric.  This kind of project is venturing into the unknown.  It's always my preference to find some great how-to's to get me started!  I came across a great tutorial and wondered how I could use it to make my own watercolor painted banner.  Cami at Tidbits shares Inspiration for Do-It-Yourself Living and she gives a great tutorial on How to Watercolor Paint on Fabric.  She leads the reader through an easy-to-follow project using white pillow covers.  They turn out lovely with the varying colors and textures!  She gave me the tips I needed to begin this project!

While rummaging through my fabric stash, I came across the leftovers from a curtain I had shortened; it's ecru color would be a perfect base.  It had enough weight to it that it ought to hold up nicely.  Once it was trimmed and had a new hem all around, it was ready to become a banner.


All the necessary supplies: sewing machine, fabric, watercolor paints are ready.


Supplies list:

Fabric
Watercolor paints (tubes or cakes)
Fabric Medium (I bought 2 bottles (2 fl. oz. for $3.75 each)
Black acrylic paint
Drying Time Extender Medium (2 fl. oz. for $2.35)
Permanent marker, black
Inexpensive brushes
Disposable plates or bowls
Freezer paper
Masking Tape


Before diving in on the actual banner, I wanted to test out the techniques on a scrap of fabric.  I am a bit of a control freak and I like knowing what to expect.  There always seem to be surprises but I feel better prepared this way.  I pulled out student grade watercolors from when I've taught watercolor classes in previous years.  I found I also had some paint still leftover in plastic palette duos.


Gathering the watercolor paints for a fabric banner project.


There's a loose and fresh watercolor painting I painted in Glacier National Park years ago; it's become the background for much of my promotional signs.  I love the colors and the textures and so this was my inspiration for the banner painting.


One of my watercolor paintings, done in Glacier National Park, is the inspiration for the banner.


The fabric medium instructions recommend mixing paint 2:1 with medium.  That means 2 parts paint to one part fabric medium.  I kept this in mind but tried Cami's method first.


Gathering supplies for the practice run with watercolors on fabric.


Many of the paints were already in plastic palette cups.  With this trial painting session, I painted on the fabric with the watercolor paints and then went back over with the fabric medium.  It went very well and I loved the effects that were achieved.  I had hoped to use India ink for my lettering but that would not be as durable. Instead, I mixed a small amount of black acrylic, fabric medium and drying extender in a small plastic cup.  (Both the fabric medium and the drying extender can be found in a craft store with the bottles of acrylic paint.)  Please remember, the fabric medium is meant to make the paint permanent, even washable, so it will prevent you from being able to remove it from the paint cups, brushes, and so forth.  (I tossed the palettes when done.)


The painted background on my practice fabric with a soft mix of watercolors.


In order to transfer the lettering to fabric, I first made a template on the computer.  With my name in the font and size I wanted, I printed off a copy on my printer.  I used the tracing-at-the-window trick by taping the sheet of paper with the printed lettering to the glass.  I taped the fabric over that so the light would shine through and the black lettering could be traced on the fabric with a black permanent marker.


Tracing lettering onto the fabric with a permanent marker.


Once the lettering had been traced on the fabric, I brought it back to the work table to paint in the lettering with a mix of black acrylic paint, fabric medium and drying extender.  In the example below, I created a bit of great texture by not filling in the letters completely.  It really gives the effect of brushed letters.  I liked this effect but did not use it in the final banner.


Painting the black lettering onto the fabric with acrylic paint and fabric medium.


The finished lettering on fabric and supplies used for the practice run.


The finished practice run completed on fabric.


My trial run worked so well, I felt confident to begin the fabric banner.  I spread freezer paper (plastic shiny side up) over my work surface.  Then, with the fabric spread across the freezer paper, I used masking tape to map out my borders.  The paint did bleed under the tape because I worked very wet.  Be aware that the tape, unlike watercolor paper, will not prevent paint from traveling past those borders.


Laying out the fabric for the banner on my worktable.


I really enjoyed painting with the watercolor paints on the fabric!  Using the spray bottle filled with water, I could make great effects but I didn't realize it would result in more muted colors when finished.  That was my mistake.  Oops!  When I went back over the finished painting with fabric medium, the colors became so muted, I knew I'd have to try again.


Watercolors in plastic palettes ready to go!  Setting up my materials.


First brushstrokes of watercolor with a wide brush on fabric.


Adding more watercolor details to the fabric banner.


The finished first try with watercolors on fabric.


After the fabric medium is applied, the watercolors are more muted.


My second attempt worked better for me.  This time, I mixed the fabric medium with my watercolors prior to painting on the fabric.  You'll see the difference in the photos toward the end of this post.

  NOTE:  The brushes and mixing palettes/surfaces should be disposable for doing it this way.  I found that my brush and palettes could not be cleaned completely.  I took this risk knowing they might all have to be tossed in the end.  I'll share a list of 10 tips at the end of this post.

The paint, once mixed with the fabric medium, becomes similar to an acrylic craft paint and will dry quickly.  I used the drying extender, which I already had from another project, to give me a bit more time while painting.  At this point, I was figuring out that by mixing in the fabric medium, it would be wise to use a disposable mixing surface.  I don't have a photo to show, but I used Styrofoam bowls and plates the second time around.  When done, the bowls could just be tossed in the garbage.  Fortunately, as I tried out all this, I did not pull out my best palettes or brushes!  So keep in mind, use only what you are willing to throw away when finished with this project.

I repeated the steps for transferring the lettering to the banner.  I began by designing the words on the computer and printing them off on paper.  Once the banner and sheets with lettering were laid out, I could judge how well the words would fit.


Text is printed on paper and laid out on the fabric to judge how it fits.


Text printed on paper laid out to judge how it fits on the fabric.


At this point, I needed to tape these to the glass window for tracing the lettering.  My daughter helped me out here and a second set of hands made this step easier!  I repeated the steps of tracing the lettering with a permanent marker.


Text on paper and fabric are taped to the glass window.  I trace the lettering on to the fabric with permanent marker.


A closer view of the text showing through the fabric while taped to the glass window.


Lettering traced onto fabric.  I am ready to begin painting the lettering.


I took some extra precautions to protect the banner from dripping paint.  I tore off a sheet of freezer paper and taped it to the banner.  It would be impossible to clean up any drips at this point.  The paint from the background had dried and been tossed in the garbage.  I didn't want to mix up more paint to cover any smudges or drips of black paint.  I used cheaper brushes and kept them wrapped in plastic while not being used.
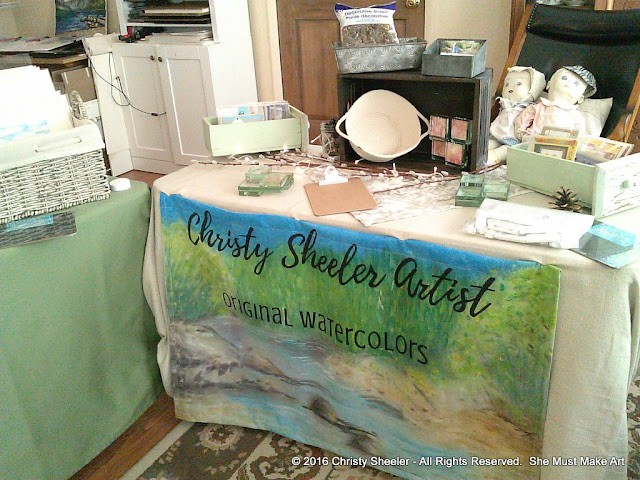


Painting the black lettering onto the banner.


Painting the black lettering onto the fabric banner.


The lettering is finished and the fabric banner is now complete.


I try out my set up in my art room and hang the banner with the display.
The finished banner hanging as a part of my booth display.


The banner hangs as a part of my booth display.


I am so pleased with the finished banner!  In the end, I did trim more fabric and re-hem it to hide the soft bleed of color that moved under the tape.  That was my own personal preference.  I sewed the top hem so a curtain rod could be used to hang the banner.


The main supplies needed for the black lettering on the fabric banner.


10 Tips for Painting with Watercolor on Fabric:

 1.  Use freezer paper to protect your work surface.  Freezer paper makes clean up a breeze!
 2.  Practice on a scrap of fabric first.  Less stress and more fun!
 3.  Mix the fabric medium with paint in disposable bowls/plates.
 4.  Use brushes you are willing to toss when done.
 5.  Mix one part fabric medium to 2 parts watercolor paint.
 6.  Type out and print off text on paper as a guide.
 7.  Hang the text and fabric on glass to trace lettering on fabric with a permanent marker.
 8.  Wrap brushes in plastic wrap to prevent drying out if switching between different sizes of brushes.
 9.  Try Drying Extender (just 3 or 4 drops) to extend your painting time.
10.  Heat set 30 seconds with iron.  I laid a clean white cloth (flour sack towel) over
      the banner and used my iron on a cotton setting, moving the iron to a new section every 30 seconds.


If you'd like to see the tutorial that helped me get started with this project, be sure to visit TidBits!


Please comment below if you try this type of project and how it goes!  It's a great way to explore a new way of painting with watercolor.  Who would imagine that watercolor could go on fabric in a durable way?  

With so many new opportunities opening up for me lately, I'm having more difficulty being consistent in my blog posts.  I really do enjoy sharing more lengthy posts like this one.  I have participated in two events and I have one (possibly two) coming up in November.  Three original watercolor paintings and several art prints have been sold recently.  I've been contacted about two artwork commissions and am excited about those opportunities!  I'm in the process of making more small improvements in my art room.  September was one of the busiest months I've had in over a year!  It's not easy for me to share shorter blog posts.  I'll work on that and try to find my voice for a short art studio update.  I'm still loving the creative life and being able to share it here with all of you!


-Christy
She must make art.


Thursday, June 23, 2016

Kayaks, Summer Sketches, Cherry Blossoms & ICAD 2016

Watercolor sketch done at the lake.  Travel palette holds the watercolor mixes.

Summer is a crazy kind of different!


The daily routine is just not the same.  What time do we get up now?  When is lunch?  What should we eat? (Can't I just go back out to my art room?)  Can we really call it a routine?  Like making my way through a darkened room, I am feeling my way through the non-scheduled months.  It's a feat to keep some sort of routine especially where art is related!  It's easier if I'm being flexible.  In the back of my mind, there's a commitment to not relapse into an artistic drought.  At this time last summer, my art room was just beginning to be situated for daily use.  Many new routines and goals are in progress now.  While I want to hold on to making art, I don't want to miss the joys of summer!  Children are at home for the summer days.  We all adjust.  I embrace life in this season.  These days zip by and won't be back again!


We've got two kayaks this season; they are such a great addition to our family time on the area lakes/reservoirs.  We'll have many summer afternoons spent on the water.  There's just something so therapeutic about water.  A few strokes of the paddle and I'm in the middle of this expanse of water.  A new perspective of the land and the surface below makes me want to take pause and soak it up.  Now that our kids are in their teens, we focus on what will interest them so they'll look forward to family getaways.  Here, we think we've scored in that department!  They have always loved the water, but the days of rolling up your pant legs and wading along the shore are gone.


Two kayaks on the lake shore, one green and one blue.  Summer spent on the water is relaxing.


Thursday, May 12, 2016

Pigment Choices That Last

watercolor tubes, art supplies, art studio materials, sorting through watercolor stash
Watercolor pigment is a major player in this artistic adventure!  In the past week, I found myself exploring the Diane Sutherland Botanical Artist blog.  Her work is just beautifully detailed.  In her post, About Watercolor Paint, she talks about the pigment labeling and what it means.  I was enjoying her post so much, picking up some great tips.  Then I read what she shares about lightfastness.  She gives links to other websites (I'll share at the end of this post) where test results are given for many watercolor pigments.  I had to go dig deeper.  Next thing I knew, I was sorting through my stash of watercolor tubes.  This had me wondering about my own supply of paint!  I can say I was not in a panic.  This is not an emergency.  It is information I'd like to understand.  I want to be informed for future art supply purchases.  I want to use this knowledge as I add to my pigment supply.  Here's an artist's point of view on quality of materials.


In the past year, I've been making a transition to all professional grade watercolor pigment.  I was so frustrated with myself for realizing I'd recently purchased two more tubes of student grade watercolor pigment.  That had not been my intention.  Mistakes happen, I guess.  I'm trying to make a commitment to all artist grade because it matters to me.


In my research, I found I have three tubes in my supplies that are questionable for fading.  Now, anyone who has artwork they wish to protect will most likely not hang it in direct sunlight.  That makes sense, right?  Watercolor artwork should be matted and framed behind glass and hung out of direct sunlight.  It's still wise on my part to reconsider using pigments that may fade or change over time.  The time spent choosing and mixing pigments, along with the time spent applying the individual layers of that painting...pigment choice matters.  I invest so much of myself that it's worth making changes to which pigments are on my palette.