Thursday, October 3, 2019

Taking Time To Stretch In The Art Room

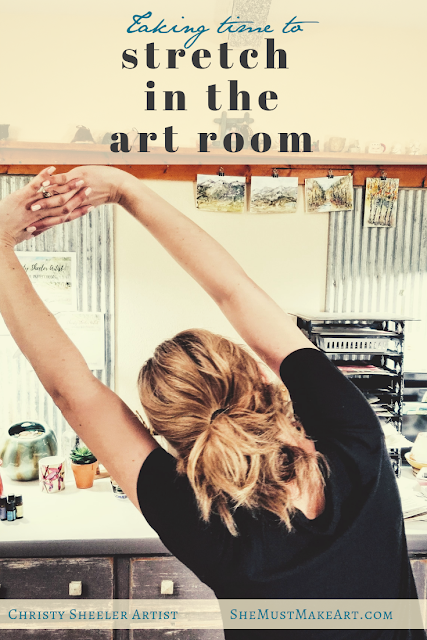
Taking time to stretch in the art room by Christy Sheeler Artist.  Artist stretching with arms linked above her head.

What I should be doing every day.


It's one of my biggest challenges.  Stretching and taking care of my body is definitely important.  Too much sitting and concentrating takes a toll on my body.  Lost in thought, intently focused on a painting, I don't want to stop for anything.  Is there any chance you know where I am coming from?  Why do we do this to ourselves?

Today, it might be a good idea to focus on how you and I can take better care of ourselves with some body stretching breaks.  I've got some tips.  Let's talk about taking time to stretch in the art studio.

To be honest with you, I am needing to take my own advice.


Where are you affected most?


When I am working at the art table, my neck and shoulders can become tight and sore.  Whether I sit or stand to paint with watercolors, my focus is on the painting in progress.  I get in the zone.  I don't want to quit.  At the end of the day, I am feeling it physically.  So where is a good place to begin?

Let's think about the areas of the body most affected by the creative work.

Hands, wrists, arms, shoulders, neck, upper back...and on from there.

Once you know your target areas that need some TLC with stretching, you can begin looking for stretches.  I did a Google search for stretches for neck, shoulders, low back, and hips.

Here are a few for starters:


6 Stretches to Relieve a Tight, Sore Neck from Self.com.
16 Simple Stretches for Tight Shoulders from Greatist.com.
Hand, Wrist, Neck, & Shoulder Stretches & Exercises for Artists with Ask Dr. Jo on YouTube.
12 Hand Stretches For Artists: Hand and Wrist Pain


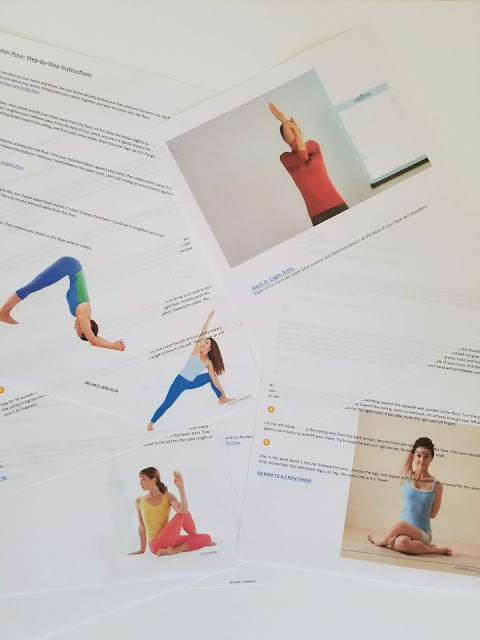
Sheets of paper with my favorite stretches, a quick reference I like to use.

What will work best for you?


Think about what method or plan would work best in your daily art practice.  I created several pages for myself by copying and pasting into Publisher.  I selected the poses or stretches that appeal to me.  This gave me my own cheat sheet of stretches and yoga poses as a reference when I take a stretch break.

You can create a Pinterest board to save your own favorite websites for stretching and yoga poses.  YouTube is a great source for stretching and yoga videos; make yourself a playlist just for this purpose.

How can you focus on follow through?


For me, the best way to be sure I stretch is setting a timer.  A timer app set for 30 minutes helps me to work without having to watch the clock.  When the timer goes off, I take 5 or 10 minutes to do some stretching.  With a printed copy of the stretches I am using, I can do a few stretches per break.  If I choose a video instead, then I can stretch along with the video for 10 minutes and then pause it until the next break.

On YouTube, Yoga With Adriene is my favorite account to follow along in relaxing yoga sessions.  She has a large collection of yoga videos to choose from for all ability levels, target areas of the body, length of sessions, and many different purposes.  She has yoga for neck and shoulders, yoga at your desk, and yoga for your lunch break.

Also on YouTube, search for DoYogaWithMe.  Yoga for hands, arms and shoulders would be a great regular routine to follow.

Consider what gear might help with fitness.


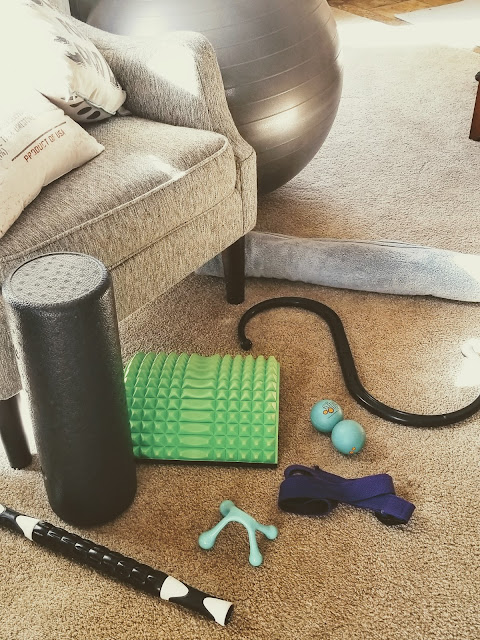
Over the years, I have purchased the gear that helps me keep my body stretched and feeling better.  The exercise ball is helpful for stretching out my back after too much sitting.  The green curved foam form helps stretch the low back.  I use the rolled towel to give my neck a bit of traction as I lay on the floor.  The curved black S Backnobber, the two small Yoga Massage Balls, and the blue hard plastic tool all help with knots in the muscles.  (The last of those three came from a dollar store!)  The purple strap helps with many stretches.  The two black rollers on the left help with rolling out deep tissues.  I have a yoga mat and yoga blocks which I forgot to include in the photo.  It's worth investing in the tools that make stretching more effective especially if it becomes a daily routine.


My fitness equipment used at home.


A word of caution.


If you are currently experiencing pain and discomfort, ignore all this and go see a doctor.  I have injured my wrists and hands in the past.  I made sure to see a doctor, benefited from physical therapy, and I have stretchy wrist braces to help when I am sore.  Be cautious when you stretch.  It should not be painful.  Don't push through and ignore the pain.  Take extra care to be sure you are not doing more damage to your body.  In the long run, a break from art for self care is just smart.  You would not want to be taking risks that would cost you the ability to be creative for a long period of time.

There's art to make so the body needs to last.


There is no way our bodies will be able to continue supporting the creative pursuits unless we make it a goal to care for our bodies at all times.  I didn't really consider this when I was younger.  Now, I understand that my body can't take the abuse for long without feeling it.  I find that extended time at the computer affects my hands and wrists most noticeably.  The rest of me feels the strain, too.  This is a hard task for me to develop a better habit of caring for my body.  I have not mastered it and realize it's going to be an ongoing process to continue improving each day.

Do you have insight or tips to add?  What steps have you taken to help take care of yourself so you can be able to continue your creative pursuits?  Please comment below so we can all make this a better daily habit!

Take care and I'll be back with another post related to being a creative adventurer!

P.S.  I am done with the nannying season for another year and that means more time for creating and selling artwork.  There are more than 30 smaller pieces that need to be finished up.  For several, it means deciding what size will be best and cropping the artwork.  I have miniatures, 3 1/2" x 5", 4" x 6", and 5" x 7" in the stack.  I will try to share more in the next week.  If you haven't visited my website yet, I would love for you to see so go check it out next!

-Christy

She must make art.


Saturday, March 16, 2019

My Big News: My Website Has Launched!

Website is Live, www.christysheeler.com

My Website is Live


I'm doing a happy dance!  One of my big art goals is now reality.  It's been a test of my courage.  I hesitated as we do so often, afraid of the unknown.  Feeling out of my element and knowing that I am running out of time for this to happen, it would mean a lot of hard work.  It wasn't as scary as I made it out to be.

Will you share 30 seconds with me and go check it out?  I would love for you to see my artwork.  While you are there, sign up for my newsletter!  I'll let you know when new artwork is added.

  There are several collections and I'm already planning one or two more for spring and summer.  I will continue adding options to the website such as matting and frame offerings.  


I am off to paint more for the next collection to be added soon.  Stay tuned!

-Christy

She must make art.


Thursday, March 7, 2019

Is it time to begin selling my art online?

Artist Logo for Christy Sheeler, Watercolor Artist with watercolor mountain landscape in the background.

My time is running out...website coming.

It's nearly spring and that means I will be returning to my other job (joy, really) as a nanny.  Spring through fall, I have a dream position caring for the three children of a local family.  As the time approaches, I am carefully taking stock of what I would like to accomplish with my art career.  With just a few weeks left, I am looking over priorities.  I am preparing to debut a website of my own for my watercolor artwork.


Artwork is being photographed to show in its best light.  Over time, I have been building my body of artwork.  I am not sure whether I am 100% ready but that cannot keep me from moving forward.

My word for the year: courage.

I believe this blog will be continued on my new website.  Whether this blog remains as is for art tips and techniques written for other creatives...I have not figured that out yet.  As this all comes about, I will be sure to post information here so that you can find me at my new location.  The new website blog may have my thoughts and insights about upcoming artwork for collectors.

Thank you for your encouragement and interest in the next chapter of watercolor journeys as I continue with my goals.  Please be sure to keep in contact.  I know there's so much more to come!  I look forward to seeing you there!

My online gallery of original watercolors:  christysheeler.com

-Christy

She must make art.
Thursday, February 28, 2019

Artworks in Progress

Can I create a short update?

Is it possible?  I'm not sure how long you've been hanging out here at She Must Make Art, but it shouldn't take long to notice my posts are usually lengthy.  I am giving myself a new challenge to stick with this year.  There's a lot happening with my 2019 goals, including working toward a new website.  I've got new work completed and in frames, now displayed in my art room.  I will host a photographic tour soon.  Today, I have a quick look at some of the new work that's in progress or just completed recently.


Watercolor in progress. Christy Sheeler, artist.


The watercolor artworks are smaller, what some would call "littles" and I am able to finish them more easily.  My hours spent on art are broken up often with life's meetings and appointments not to mention family time.  These artworks are loosely based on photographs.  I am stretching myself to be more willing to paint intuitively.  That means that I am seeking to paint without being held tightly to what the photo is describing by itself.  


 Watercolor in progress; waterfall.


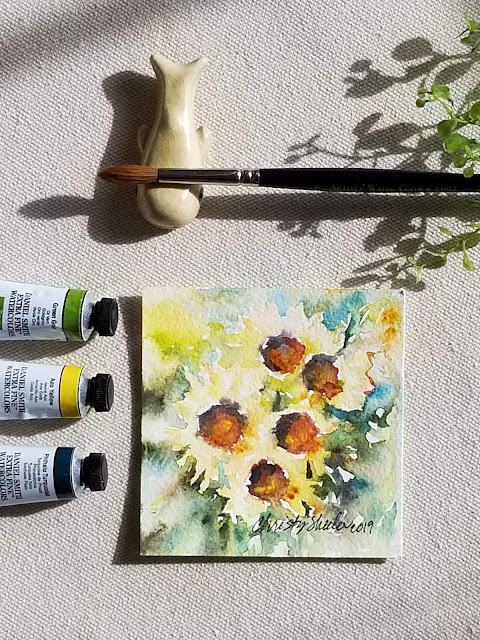
I have new pigments and brushes so some time is needed to become more familiar with those new supplies.  Pigments have their own qualities of transparency, granulation, warm vs. cool and how they mix with other pigments.  It takes time using new brushes to feel more confident in the marks they make in my hand.


New watercolor tubes and brushes.


I've got several new artworks just recently completed but today I am sharing only two of them.  I'll have more to share soon.  These are smaller which is so nice for shipping off to new homes.  They are easy to package up safe and snug, even in a frame, and much less worry in the process.  I pick up about 4 frames at a time.  I've found where the style of frames are well suited to my liking and affordable, too.  It's a wonderful thing having artwork framed and on display where I do the creating on a regular basis.  These two are now in frames so I'll add a photo of them at the end.  Hold your mouse over the photo to see the titles and sizes of each one.


"As Water Finds Its Way" Baring Creek, Watercolor of view from Glacier Nat'l Park, 3.5"x5" by Christy Sheeler 2019


"As Water Finds Its Way" Baring Creek, Watercolor of view from Glacier Nat'l Park, 3.5"x5" by Christy Sheeler 2019


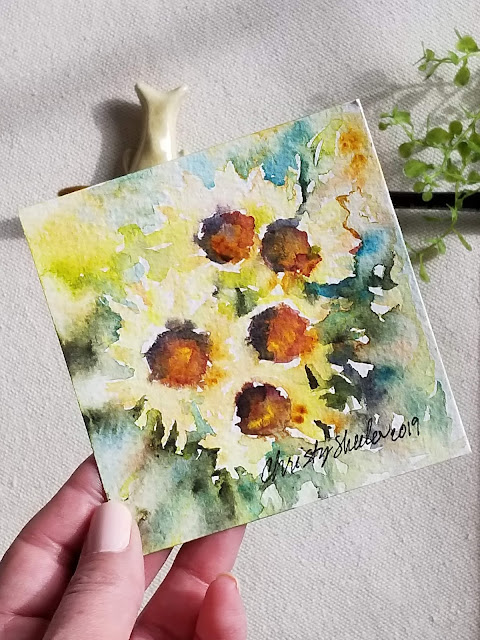
 "Soakin' In the Warmth of Sun" Sunflowers in watercolor 4"x4" by Christy Sheeler, artist 2019.


 "Soakin' In the Warmth of Sun" Sunflowers in watercolor 4"x4" by Christy Sheeler, artist 2019.


Framed original watercolors displayed in my art room.


Framed original watercolors displayed in my art room.


Okay, so that's all for today...thank you for dropping by to see new watercolors and be sure to stop back again soon.  I'll be here, painting away and thinking about what to share.  Have a great rest of your day!

-Christy

She must make art.


Thursday, February 21, 2019

Writing My 2019 Artist Goals

Blog post title graphic: Writing My 2019 Artist Goals It's that time again.

I have been stalling on this one.  It seems like a huge project.  Once I get started, I feel more excited.  Maybe it seems daunting but in reality, it's such a good thing.  I have a folder labeled "GOALS" which is where I keep my art goals from previous years.  2015.  That's the year I made my first list of art goals.  Each year, I make a list of art related goals I haven't reached yet.  The list contains some of what I didn't finish the year before and more that I can imagine past those goals.  Some items on the list are easily done.  Others will take serious effort and time.  A few will require me to find others to give me some assistance.  Last year, I posted Writing My Artist Goals.  I have 5 simple tips to share if you're interested in writing your own artist goals.  Here's how I go about the process to create my own list.


1.  Reflect back on where I have been.


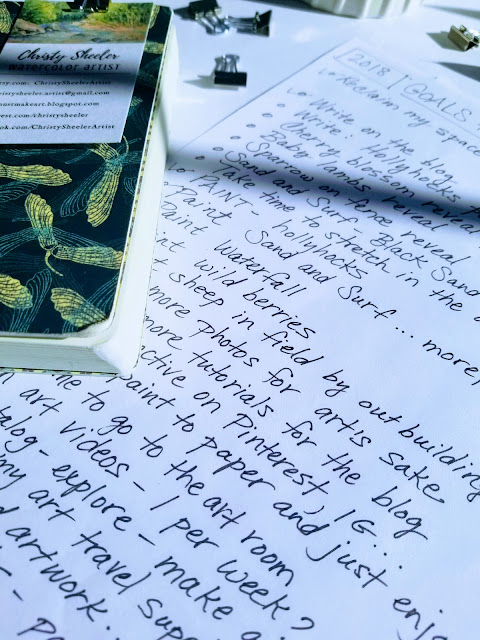
A closer view of 2018 Artist Goals and notebook.


It's time again.  While I avoid it, it's not so bad.  Looking over the previous year's goals, thinking about how much I was able to do, is very satisfying.  I feel a sense of accomplishment.  I didn't let art go.  I kept this commitment to my creative self.  There's so much to distract and reroute life.  So many different directions that my attention is drawn...so many responsibilities.

It would be natural to become sidetracked with other interests.  Years ago, my art room was close to being like a ghost town...you know, the photos of interiors where there's an inch of dust on every surface, cobwebs create a veil of gray, and a sadness at the way furniture has fallen apart unused.  This room is attached to the back of our house.  It's by walking from the kitchen, through my art room, out the back door that we get to the garage and backyard.  At times, I was slightly grieved with each pass through this room to leave the house.  I felt an inward struggle, knowing I needed to put other people and responsibilities first, but still missing my artist self.

I found that I enjoyed looking back over my 2018 art goals.  As I was reading through each one, I checked off those that were completed.  I examined the goals not completed and then chose whether that goal should be carried over to 2019.  Maybe some goals weren't as important in the grand scheme of things.  If I felt a remaining desire to try again, that one is a keeper.


2.  Remember my commitment to my art.


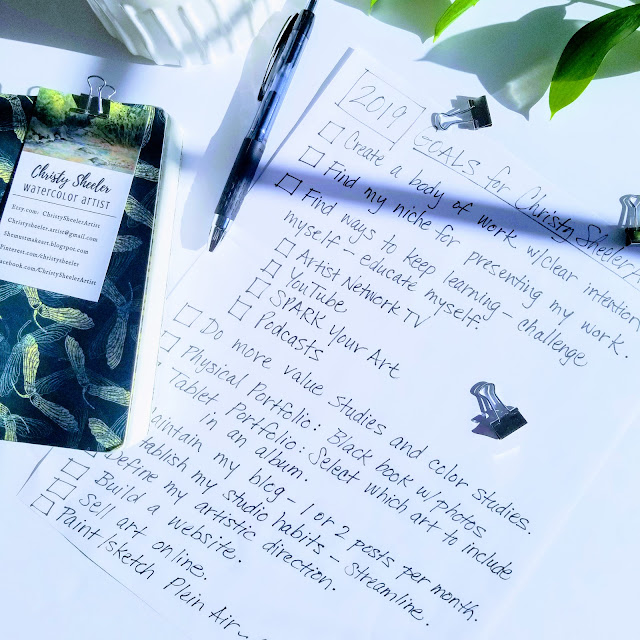
A cup of tea, a pen, mini binder clips, and 2015-2019 Artist Goals with file folder.


When I began writing my art goals in 2015, it was like a personal declaration that art is important.  Art is important to me.  For many years I had let everything else be more important.  My creative self felt like it was starving or worse yet...dying.  I craved that energy flowing through my mind to the paper, becoming a watercolor work of art.  That was the year when I decided to never let art be crowded out again.

Creating my own art is important to me.  I am committed to keeping art as a priority in my own life.  My artist experience changes with the ebb and flow of life.  Sometimes, I have several full days to dedicate to my art.  Most often, it's fitting art into the free slots of time...maybe an hour before I have to go in another direction.  Like a woven fabric, the threads of art are constantly varied from a few to many all depending on what my personal life requires of me.


3.  Get it in writing.


Closer view:  Office supplies, a cup of tea, and notebook; writing artist goals on paper.


I don't read my yearly goals daily.  They aren't anything fancy or professional looking.  My goals are handwritten on a sheet of plain white paper.  Somehow, just by writing them, they are more imprinted on my subconscious mind.  If I write it on the paper, it's important to me.  As I imagine where I want to take my artist self from the present, that's what I list as a goal.  I go all out with smaller and larger goals.  Admitting I want that big goal fuels my confidence and courage to go for it.  These goals are written for me...to remind myself where I am headed with creating art.


A view of 2019 Artist Goals written on paper with pen.


4.  All the goals matter.


My written artist goals for 2019, a closer view.


I pick some big goals and some small goals.  My question to myself is this, "what is important to me with my art in 2019?"  My art priorities are varied so that there are some very satisfying goals that don't take much time.  If the big goals cannot be met because life takes an unexpected turn, I have some comfort.  I keep remembering there are ways I can achieve goals with limited time and energy.  If a big goal is not met in 2019, I will carry it over to 2020.  No judgement.  No guilt.  I just keep pressing on.


Zoomed in view of art goals on paper.


5.  Post my goals


My list for 2019 is now posted on the bulletin board in my art room.


There's a spot at the top of my bulletin board which I reserve for this list.  With a thumb tack pressed through the sheet of paper, this list is my declaration for this year.  Now that I have these aspirations on paper, they don't belong in a notebook or a file folder.  The goals become a part of my art room and a reminder of why I am showing up to make more artwork.  I post it there to remind me I am moving forward toward the things that matter to the artist in me.


5 Simple Tips For Writing Your Art Goals:


1.  Reflect back on where you have been. 

Remember back to the beginning, when you decided to make art a priority.  How far have you come already?  Are you excited to see the changes that have taken place?  Feel good about that.  Soak it up.

2.  Remember your commitment to your art.

Why are you creating art?  Why is it important to you?  Do you feel like your creative self is starving?  Do you feel like art is your therapy?  What does it look like for you to give more time and energy to creative pursuits?

3.  Get it in writing.

Don't make it complicated.  Nothing fancy here.  Take a sheet of paper and a pen.  Write down your list of what would be the possible outcomes.  When you imagine yourself being more creatively fulfilled, what are you doing?  You write them down for your own declaration to yourself, giving you purpose and drive and hope.

4.  All the goals matter.

These are your goals.  If it matters to you, it matters.  Don't spend any energy downplaying your goals; none are insignificant.  If you'd like to take a class, write it down.  If you'd like to watch YouTube videos about a specific medium or technique, write it down.  Be daring and adventurous without hesitation.

5.  Post your goals.

Now that your art goals are written down on paper, it's time to hang them up on a wall or bulletin board.  Take a photo and make it the wallpaper on your phone.  Keep a copy in your planner or sketch book.  This is a declaration of intent and a place to begin.  Be excited.  Be proud.  Your creative spirit that is hungry for making art is coming alive again.


Wrapping up for today...


Do me a big favor...if you wouldn't mind, will you leave a comment with one of your own art goals?  Are you going to take on this challenge and write your own goals for art?  Is this a habit you have already taken on?  How has it worked for you?

One of the best things about writing this blog is meeting other creative people.  We share this energy to learn more about pursuing art.  It's an amazing way to connect with others.

Thank you for dropping in and sharing some of your time here.  I ramble on and wonder whether anyone is out there that might relate with what I share.  It's like my artist journal.  These are my thoughts and inspirations.  I hope it inspires you.

Life will soon change as I return to nannying for six months.  I'll be in and out of my art room but less frequently.  Time will be more precious and my posts will be brief.  I will attempt to bring some simple yet creative updates.  Shorter posts are still a challenge for me.  I will be checking in to read comments and answer questions.


Christy

She must make art.


Thursday, February 14, 2019

Exploring New Mediums with Watercolors

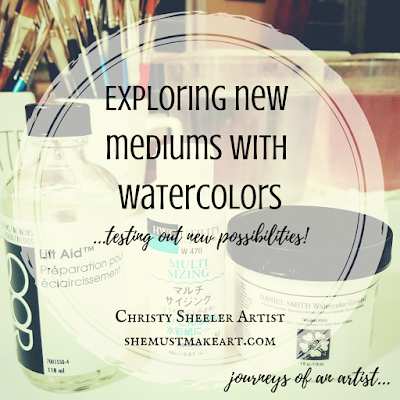
Exploring New Mediums with Watercolor Blog Graphic Christy Sheeler Artist I have new mediums in my stash.

It's like Christmas morning.  New art supply order arrives and I am a child again.  Excitedly, I search through the package for mediums for my art supply stash.  I am in love with exploring new methods and techniques.  My mind gets lost in thinking about new watercolor possibilities for future artworks.  Sometimes, I need to shake up my artist techniques a little bit.  Can you relate?  I have three new mediums to share today.  I have been testing out how they can work with my watercolor painting process.  Here's the scoop on what I've grasped so far!


I had a specific reason for trying out these mediums:


Watercolor paper can lose its sizing.  


I have experienced watercolor paper that is no longer its original best which is frustrating.  I learned to buy only the paper I need for several months.  Great changes in temperature and humidity can affect the sizing.  My art room wasn't always heated and so the range of temperatures was hard on my paper.  You might still be asking, "what is sizing?"  Watercolor papers are treated with a substance like gelatin that makes the surface less absorbent.  The watercolor pigment and water can float on the surface.  When a paper loses its sizing, the color and pigment sink down quickly and cannot be lifted out.  Many times, a strange speckled texture appears in the paper surface.

I want to add that the papers I have had issues with sizing-wise were high quality 140 lb. watercolor papers.  This is not about cheaper paper, though it can happen with any quality of watercolor paper.

If you would like to learn more about watercolor sizing:  Birgit O'Connor's blog explains this with more detail.  If you would like to see examples of what to watch out for:  Karen Sioson's blog describes these paper problems along with photos.

I have odds and ends of 140 lb. cold pressed watercolor paper in my paper stash.  I would like to be able to treat those papers so I can still paint on them.  My search began with wondering if these mediums would be an asset for this purpose.


I have been playing with these three mediums to understand them better.
For each medium, I first want to know...

Question:  Will this medium work to help with sizing problems?


---------------------------------------------------------------------------------
Before you begin trying any of these:
1.  Set up a work area away from watercolor palette.  Don't let any of this mix on your palette.
2.  Use a water container that you'll rinse well afterwards.  You probably don't want any of this to migrate to your watercolor painting sessions.
3.  Rinse your brushes well and right away.
---------------------------------------------------------------------------------


The Mediums I Explored with Watercolors:

QoR Lift Aid 118 ml. $8.74
Holbein Sizing Liquid Medium 60 ml.  $12.39
Daniel Smith WC Ground Titanium White 4 oz.  $8.19
(Prices at time of order from Cheap Joe's Art Stuff, 2018)


Lift Aid by QoR-------------------------------------------------


Lift Aid by QoR bottle 118 ml


I am not sure why I thought this would be a possible solution.  I was all out determined to find some options.  The QoR lift aid peaked my curiosity.  Lifting back to white can be a challenge and I like the idea of having some extra assistance.  Don't get me wrong.  I am not going to be prepping all my watercolor paper before I begin paintings.  

Thursday, January 31, 2019

Watercolor Success on YUPO


Watercolor Success on Yupo blog post by Christy Sheeler Artist 2019. Are you up for a challenge?


Watercolor is an adventure all on its own but if you are up for more challenge, you might give Yupo a try.  I am here to give you some pointers that will improve your experience.  Though it may seem foreign and scary at first, after a few painting sessions, you might just fall in love with this unique surface.  Shake up your creative process and take a break from the usual watercolor techniques.  While you may wonder whether you will ever get the gist, be willing to explore the possibilities.  Do you remember sitting in a classroom as a child, looking wistfully out the window, waiting in eager expectation for time on the playground?  Time.  Time to do as you wished without the rigid instructions and limitations.


Sometimes, I need more play with watercolor.


Like me, perhaps you have a underlying wish to break out of a rut, be more fluid and less confined by the traditional methods.  I wanted to be more free to watch the watercolor pigment spread as water carried it across the surface...without the stress and guilt of "wasting" a sheet of watercolor paper.  Are you ready?  Let's get on with this adventure!


What is Yupo?


You might be asking me, "what exactly is Yupo?"  That's a good place to begin.  Yupo is a synthetic paper that is tree-free.  This surface is 100% recyclable, smooth, very durable, tear-resistant, waterproof.  It resists buckling that usually occurs with cotton watercolor papers.  It does not absorb the pigment.  There is no need to tape Yupo on a board.  Pigments remain vibrant and white of the surface is easily restored.  Most often, artists use alcohol inks on Yupo but other mediums can be used as well. There are two different weights of Yupo offered:  74 lb and 144 lb.  For the purpose of watercolor painting, 74 lb. is more than sufficient.  There's also a translucent Yupo but I have not explored watercolor options there yet.  Yupo's available where art supplies are offered.

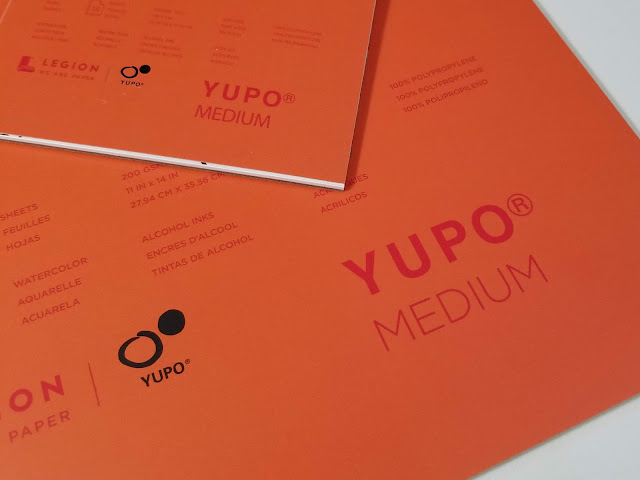
Here, I show you two sizes of Yupo 5" x 7" and 11" x 14" with 10 sheets per pad.The smaller pad was $4.93 and the larger pad was $16.82.  They were purchased from Dick Blick.  The 20 sheet pad (74 lb.) of Yupo costs $16.99 on Cheap Joe's Art Stuff presently.


Yupo synthetic paper in various sizes.


Yupo synthetic paper in various sizes.


What I understand about Yupo so far...


 In a previous post (January 2016) , I shared my first experience with Yupo.  I will link the post titled Watercolor Adventure with Yupo here.  I had fun playing with Yupo and still do.  At that time, I needed more time painting on this new surface.  The hours spent gave me a better comfort level and results.  My favorite subjects are landscapes and flowers.  I wanted to challenge myself to be less detailed and tight with my technique.  At first, I felt like I would never have the knack for anything representative of these subjects.  I will admit it's a long stretch to find how to bring watercolor to Yupo in a way that connects with my style.  Each time that I returned to "play" on Yupo with my watercolors, I was more pleased.  The artwork is now something I enjoy looking at and displaying for others to see.


Watercolor painting on Yupo paper back in 2016.
My first major session of experimenting with Yupo back in 2016.


So, let's move on to my tips for watercolor success on Yupo.


Starting with the basics:


1.  Yupo is made from polypropylene.  It's not a paper at all.  
2.  It's an alternative surface for painting and ink.  
3.  It does not absorb color at all.  Watercolor paint can be lifted off to bring back whites.
4.  Prep the surface using a cotton ball and rubbing alcohol.  This removes oils left by fingerprints.
5.  Draw with water-soluble pencils.  Look for water-soluble graphite pencils.  Draw with watercolor
     pencils instead of graphite.  Do not erase.  Eraser marks act as a resist.
6.  Paint once to add color; paint twice and it will lift color.
7.  More watery color mixes will take longer to dry.
8.  When complete, the painting needs to be sealed with a Krylon matte sealer.

Those are the basic guidelines I understood when I first began experimenting back in 2016.  I had been aware of Yupo for quite a few years but had avoided it.  I feel better knowing many watercolor artists are still avoiding it like I did.  Still, it's worth the risk and you might find it's your new love.