Showing posts with label palette knife. Show all posts

Thursday, March 2, 2017

24 Must-Try Watercolor Techniques

24 Must-Try Watercolor TechniquesTechniques and Tips for Watercolors

When it comes to watercolor painting, these are the tricks that draw the ooh's and aah's every time.  Watercolor as a medium seems like such a challenge because it seems unpredictable at first glance.  It's so important to learn what to expect from the pigment when it meets water.

When learning watercolor basics, these will help form a better foundation in painting with more enjoyment.  The frustration is lessened because you have a better idea of how the pigment is going to respond to what you do.

There are many helpful videos on YouTube that are great resources shared by other artists.  Do a quick search on YouTube and you'll have a great time watching artists demonstrate these techniques.

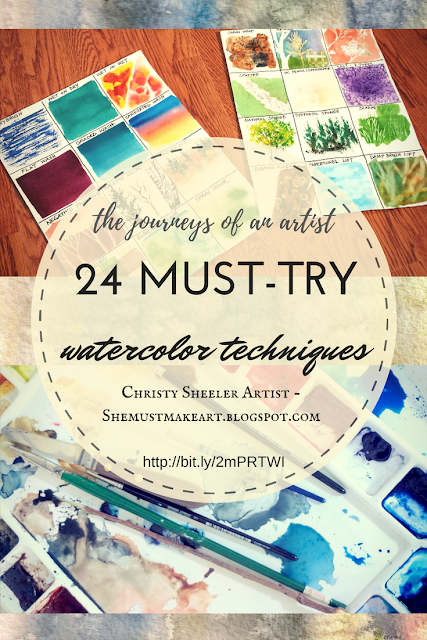
When teaching these techniques in a workshop, I bring out these posters and copies of the instructions as handouts for students.  I'm sharing those handouts with all of you, here and now!  This post has been a long time in the planning stages and I'm so thrilled to have it finally ready to share with other watercolor enthusiasts.


So, I have a bit of confessing to do first.  Have you seen my pins on Pinterest for these techniques?  Years ago, when I was new to Pinterest, I created pins for the images of these posters.  At the time, I didn't realize how popular these posters would become with time.  Now, these pins are my most commonly saved pins!  Unfortunately, they lack any explanation.  The pins lead nowhere but to the images.  Lesson learned, believe me!  I can't tell you how much I regret that mistake!  It's taken me a while but now I'm glad to share the posters and the tips that help explain each one. 

If there's a technique you'd like me to elaborate on more, please let me know in the comments.  I'd be more than happy to help you with that!


When it comes to watercolor painting, these are the tricks that draw the ooh's and aah's every time.


Watercolor Techniques Pages 1 and 2


Created by Christy Sheeler.  For personal use only.  Request permission to reproduce.


Created by Christy Sheeler.  For personal use only.  Request permission to reproduce.


Tips & Explanations for Watercolor Techniques


I know the text on the tips sheets may be hard to read so here's a link to the printable PDF file:


I hope you are able to try these techniques on your own!  These make up a watercolor artist's tool box for creating unusual effects.  There are several I use often.  There are 4 or 5 I rarely use but at times, these techniques are useful.  It all depends on the style and subject matter.  It's a good idea to become familiar with them, try them out with a bit of practice before applying them to an artwork you are working on.

Leave me a note in the comments!  Let me know if you've got questions and I'd be very happy to explain any of these further.  Thank you for stopping by and sharing a few minutes here today!


ADDED NOTE:  So many have commented and requested to use this as a resource for instructional material.  Thank you for the compliment!  I am glad you have found this to be helpful in teaching in your own settings.  Use permission is granted with the agreement that source credit is given to Christy Sheeler Artist and She Must Make Art, the art blog.  Permission is not given to altar these in any way or form.  I know the images above do stipulate for personal use only.  I do appreciate you commenting below your own purpose for using because it's so nice to read your stories.  I love knowing how these are spreading to touch others' enjoyment of watercolor painting.  -CS  2023

Thank you to those of you who have requested my permission in the comments.  I am too often late in replying so thus the reason for adding this note.  May your instruction go well and these resources be a blessing!


Christy
-She must make art.


Thursday, November 12, 2015

Montana's Big Sky Farmland: Watercolor Painting No. 2

Watercolor Landscape of Big Sky Farmlands No. 2


Dramatic clouds across a blue sky are the inspiration for the watercolor landscape I'm sharing today.  Last week, I shared the first painting Big Sky Farmlands No. 1 where I showed the progression of that painting.  The fantastic effects of sky play against the wide spreading fields.  This is the photo that I sketch from to begin this process.


 I sketch on tracing paper so that the watercolor paper is not marred up with multiple pencil lines and eraser marks.  The mistakes are corrected on tracing paper.  I use a piece of acetate with a white 4 x 4 grid; it's taped to the front of the tablet screen.  A grid of 4 x 4 squares is drawn onto a sheet of tracing paper.  The grid on tracing paper is laid as the second layer below my sketch.  The bottom layer is a piece of white card stock which makes it all bright white in appearance.


As I sketch, I use more shading than will appear on the watercolor paper.  This sketch is my guide, giving direction in values for the final work.  I'm able to work out my design for the main parts of the composition here.

Thursday, November 5, 2015

Montana Big Sky Farmlands Watercolor Painting Part 1

Big Sky Farmlands  No. 1 Watercolor Landscape

This artwork began as a view from the car, on a road traveled often.  There's something about the dramatic clouds that had me in awe.  Living in the rural areas of Montana...well, it's pretty much all rural...there's a lot of driving to and from as a part of everyday life.  If you've never been here, it will be hard to comprehend.  We spend a lot of time in the car on a regular basis.  The views of land and sky go on forever.  Each day holds a new striking view of the surroundings.  My favorite sight is the many strips of green crops against gold stubble fields against bare dirt becoming a great mosaic.

The first photo is the original that I began with and the second shows an HDR filter added.  With the filter applied, I have a greater contrast for values.  I see the light and dark areas clearly.


My sketch is drawn with consideration of the details I want to keep for the final artwork.  The sketch (on tracing paper) is layered over graphite paper and watercolor paper.  A binder clip holds it all firmly in place on a masonite board.  A harder 2H pencil makes the transferring of the sketch more effective.


The pigments are mixed up and sampled on a scrap of  watercolor paper.  The first soft washes are placed into the sky.  Direction and motion are very important.  A barely damp brush lifts color back out to create the light beams breaking through clouds.

Monday, October 12, 2015

Quick Glimpse of Recent Watercolor Progress

What's happening today?


Well, two paintings are being flattened under a stack of books.  They will be fully flattened tomorrow and then comes the dreaded signing.  I always stress over my signature.  Is it straight?  Is it weird?  Is it just right?  Re-do is not an option.  Over thinking again.  That's me.

Three more landscapes are mid-process with their skies completed.  It's time turn my focus to the land part of the compositions.  Who knows what little challenges lie ahead, causing me to rethink my techniques.  What techniques will work best to achieve the desired effect?

I was able to get further along on two of the three remaining landscapes.  An ivory mat laid on top gives me new perspective on how the whole composition is coming along.  It's a tough thing to decide how much color an area needs.  The saturation of color affects the contrast but too much is not always a good thing.

This is a view of the whole setup in front of me while working today.  Changing out the water often is very important.  I have another tub of rinse water to my right, out of view.  The roll of toilet paper is wrapped with paper towel; this is where I blot extra water out of clean brushes.  Too much water left in the brush will travel up the bristles into the metal ferule.  The end result is that extra moisture is absorbed up into the wood handle and the result is cracked paint on the handle.


At times, it feels like a good idea to take a break and set the painting aside.  I'll set it on an easel across the room.  As I pass by, I glance at it to see what stands out as an area needing changes.  In the evening, I'll call on my husband for a critique session.  Over the years, we've done this so often, we complete each other's sentences.  He begins and I can guess where he's going with his thoughts.  Another person's point of view is an incredible tool in deciding what still needs work.  The painting below is from the "Cut Across" road; we were coming back from the Fourth of July parade in Choteau.  My husband loves this one most right now because of the wheel tracks leading along the edge of the field.


It's all I can do to keep myself from grabbing the camera right now!  I would love to show all the changes that have taken place in the past two days.  Why not?  I 'd never complete the painting.  I'm going to be disciplined and get back to work with a brush in hand.  I'd like to plan another update later in the day...although it may be a very short addition below.  


Another blog entry to come again on Thursday...check back and I'll show off a previously completed landscape painting.  The watercolor palette is calling my name so I'm heading back to create for today.

I have two new landscape paintings to be added to the Etsy shop in the next week.  If you have not been to the shop, click to go to ChristySheelerArtist.  I've been taking more photos of each painting to give more variety of views for each listing.  Those will be updated in the coming weeks.

-Christy,
because she must make art!

Quick Question:

If you were to use paint to capture a scene in your mind, what would it be?  What type of paint would you use...or what other medium would you choose?