Showing posts with label scripture verse. Show all posts

Thursday, March 31, 2016

(My) Perspective Matters: The Effects on an Artist

my perspective matters the effects on an artist christy sheeler she must make art blogspot 2016


Whether you consider yourself an artist or not, I'm sure you can relate.


Early spring has begun to arrive here in northern Montana.  It's not a picture perfect lush green yet.  That kind of spring has not arrived yet.  On Sunday, as we drove to church for Easter service, my son spotted a robin.  A few nights ago, as I was about to drift off to sleep, I heard the geese honking as they flew over our neighborhood.  While outside on a warmer day, last week I spotted the tulips leaves, just green tips of a few inches, starting their way up from the ground.  Strawberry leaves are coming back to life, among the dead leaves, pine cones, and twigs.  The green onions that remained in the raised garden beds have kept their square foot home in the soil.  Their stalks are turning green again, reminding me it won't be so long before planting will begin again.  Before I show those views to you, stick with me a bit longer...

We've had such a limited amount of snow in the past five months.  It's definitely reason to feel apprehensive about the coming months.  The summer of 2015 quickly turned troubling with the lack of moisture.  Before we realized it, we had a hard wildfire season.  Smoke-filled haze and ash on flat surfaces was such a disappointing end to summer activities.

We still need moisture in some form.  Whether it be gentle rains or (typical for our spring) wet, heavy snow this time of year would be very welcome.  It's easy to become discouraged when we base our hope on what we can see or understand.  Human perspective is surely flawed!  And I'm included.  Tuesday morning I noticed garbage strewn along the ground near a dumpster in a nearby alley.  That was what my eye noticed, glancing out of the corner of my eye.  With my two teens in the car, we headed out for an orthodontic appointment.
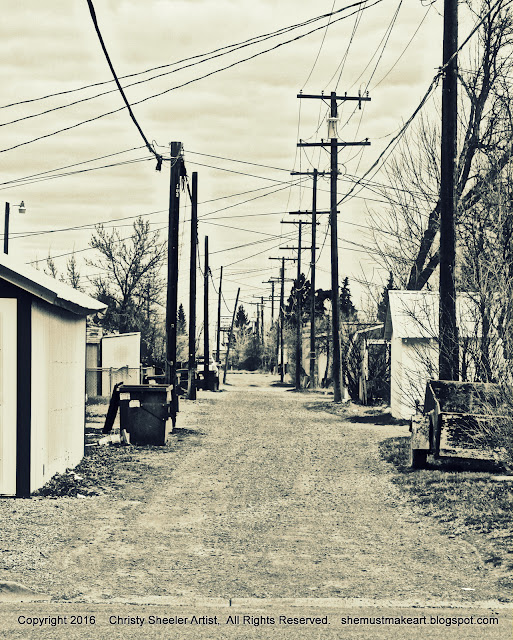


photo of alley early spring black and white photo by christy sheeler 2016


In the back recesses of my mind, I was disappointed at the sight.  The cause could be cats, dogs, wind, etc.  It wasn't an enjoyable sight.  Now, I took the photo today...and maybe there was more garbage lying around then, I'm not sure.  That is beside the point.  Just hang on and see where I'm going with this...

I was fixated on the sight for a moment - caught up in it.  


Does that ever happen with you?  In can easily turn into a negative thought pattern.

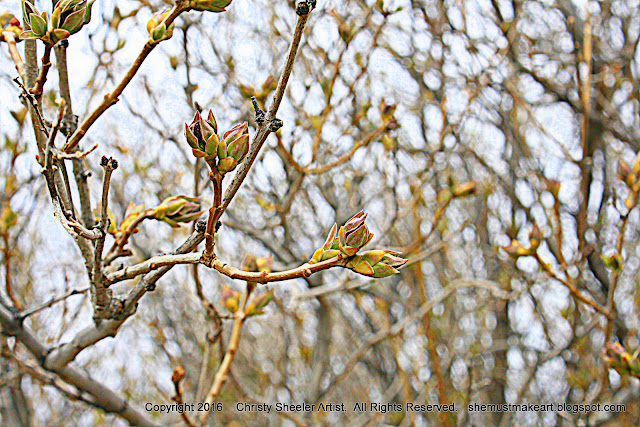
Now there's another view I've studied in passing - the lilac bush in a neighbor's yard.  I'm usually driving into the alley, approaching our garage entrance.  There on the bush, the tiniest buds, just bundles of leaves - not that they are recognizable at this early stage.  But I know what they are from past experience.  Now on first glance, it's not all that exciting.  But wait...


Lilac bushes first buds photography by Christy Sheeler 2016


Lilac bushes first buds photography by Christy Sheeler 2016


Do you notice what happens as you draw closer?  Looking more intently, focused, it all changes to something so mesmerizing.  The effect is much different than with a quick glance.


Lilac bushes first buds photography by Christy Sheeler 2016


Friday, December 11, 2015

Christmas Tea: Part 2

Tall glass vase with vellum wrap


In part 1, I described the beginning of the table centerpiece.  Today, I'd like to show you how I created the tall glass vase with scripture on vellum.  The vellum wrap is inexpensive and easy to make.


The tall vase looks like frosted glass with painted lettering but it's a very simple project:  With Publisher software, a piece of vellum and a printer, a vase has inspiration to share.  I'll quickly lead you through the steps I took to complete it.


First, a template was needed to know where to print the lettering.  I used a piece of plain white copy paper and a pencil.  Once I had wrapped and taped it to the vase, I loosely sketched how much space I wanted the verse to fill.


With a ruler, I measured and marked the measurements from the left and top edges.  Taking this to the computer, the guides in Publisher help me match up where the text should fit.


Here's a screen view of how it appears as I work out the font type and size.  I chose Landsdowne, size 36, for the text.  I tried fonts with flourishes but found them harder to read at a glance.


Next, I printed off a sample on the another sheet of plain white copy paper.  This step saves me from wasting a sheet of vellum.  I take this and wrap it around the vase, making sure no further changes are necessary.  The rough draft on copy paper looks great; I'm ready to send the vellum through the printer.


In the photo below, I show the plain paper copy on bottom left and the vellum copy on bottom right.  At top right, the plain white vellum (frosted finish) with its item information on the left edge.  That edge needs to be trimmed off so that it will be 8 1/2" x 11" for the printer.  Don't skip this step!  The sheet of vellum needs to be the standard 8 1/2" x 11" when it's fed through the printer.


The paper cutter makes quick work of neatly removing that edge.  Now the vellum can be placed in the inkjet printer.


I remove all other paper from the tray to avoid more than one sheet feeding through at a time.  After printing on the vellum, I leave it to dry thoroughly because it could smudge easily.  I would suggest waiting 20-30 minutes before handling the vellum.  I haven't tried printing a photo on vellum but I think it's possible.

Rubber stamps could be used to add decorative detail.  I recommend using Stazon ink.  Information from the package label: a fast-drying solvent ink, made for use on plastic, metal, glass, ceramic, laminated paper, and leather.  You'll need a special cleaner to remove the Stazon ink from the rubber stamp.


I use two pieces of tape to secure it to the vase.  The vellum had a bit of overlap but I left it alone.  It could be trimmed.  Add a candle and it's done!


To my great amazement, I have more to share!  I hope you're enjoying these tips.  I had no idea this would turn into a three part series!  Next time, the brief how-to for these place cards with rubber stamps, decorative washi tape, paper doilies, and brown twine.  You don't have to wait until next Thursday...because it's all prepared and ready to go!  I'll have it here in the next day or two.

Thanks for following along and I'll chat with you again very soon!

-Christy

because she must make art.