Showing posts with label Painting with watercolors. Show all posts

Thursday, May 21, 2020

New Artwork: Garden Blooms Collection!


Garden Blooms Released!

It's very rainy here this week and though it is a bit dreary and chilly here in northern Montana,  I am hopeful for gardens sprouting new life.  It brings me joy to spread a bit of good news from my art studio...new artwork is available on my website at christysheeler.com!  They are sizes 5" x 7" and smaller so very easy on the pocketbook for sure.

Thank you for popping in to see what is happening here with my art creating space.  I am making time in the early morning for art...and then on the occasional day off and weekends.  While my time is a bit more challenged for being in my art room, I continue to make it there just the same.

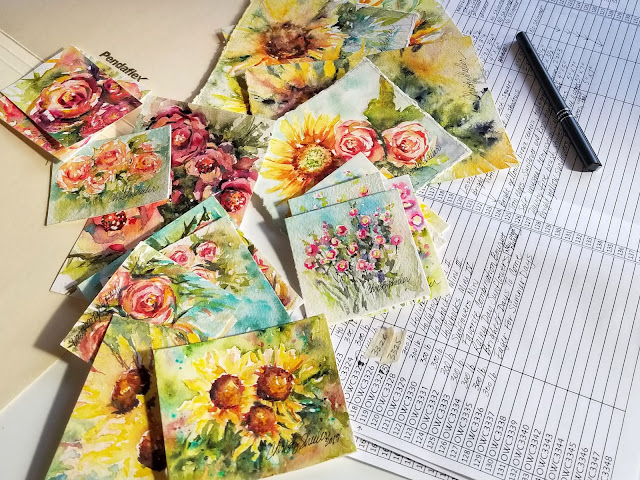
Here is a limited preview of what you can find in this collection:


Favorite Combination Bouquet  © 2020 Christy Sheeler Artist  All Rights Reserved.


Peachy Little Roses © 2020 Christy Sheeler Artist  All Rights Reserved.


Hollyhocks Mini I © 2020 Christy Sheeler Artist  All Rights Reserved.


More artwork is ready to be added again soon...next collection coming is Ethereal Expressive Collection, loose and refreshing landscapes.  While you are on my website, be sure to sign up for my newsletter.  Early notice of upcoming art releases will be sent out each time, giving insiders the news first.  Three days earlier than on social media!  

Thank you for stopping by to spend a few minutes here...see you again soon!  Have a great week.

Christy
-She must make art.


Wednesday, May 13, 2020

Garden Blooms Collection Releases Soon

I am so ready for spring.  Montana spring is full of the occasional snow.  Gardens full of peas and lettuce will be a welcome sight.  And flowers.  I am excited for flowers.  The year 2020 has brought so much unpredictable and strangeness for daily life.  So while we might be feeling impatient for some beauty in the garden, I can bring you some blooms earlier than they will bloom locally.  Color so vibrant and touches of playful watercolor effects are on the way.  They are titled, in my art inventory,  have been photographed and now being uploaded on the website!


© Christy Sheeler 2020 She Must Make Art.  All rights reserved.


It has been my goal to remain  creative.   I find that even if no one needs my art, I need it.  I crave and heal through the process of creating art.  This outlet helps me cope with what is happening around me.

There are roses and sunflowers among the artworks coming soon to my website.   Nearly twenty in all, ranging in sizes from miniatures to 5" x 7" with prices that are super budget friendly.   My target date is May 21st, 2020 for these to be available online to purchase. 

I would like to add a few larger pieces to this collection though that may take a few weeks.  I have limited time available now.  I have returned to my seasonal nannying position on weekdays.   The small pockets of time available are key to making art and getting it ready to release online.

Would you like early access to see new artwork? 


My plan at the present is to release an art collection every 2 or 3 weeks.  That is dependent on a lot of things but it always helps to have a target.  There are seven collections ready to be released.  I will need to create the listings on my website which takes a few hours for each collection.  At this time, the collections are as follows:  Garden Blooms, Ethereal Expressive (landscapes), Summer Memories (landscapes), Waterfalls and Rivers, Trees, Autumn, and Winter.  I have plans to add two more collections, Wildflowers II and Prairie.

My website is www.christysheeler.com so go visit and you will be invited to sign up for my mailing list.  I have not been brave enough to actually try sending out a newsletter...until now.  Do it scared, right?  I do plan to send out an announcement for the release of each collection.  Sign up and you'll know before I publish it on social media!  What can be better than that?

I have two private commissions in the planning stages.  These will be larger pieces considering the sizes I have been working in lately.  I have been trying out studies in watercolor to prepare myself for working out the composition and values and color pigment choices.

One of my goals for this season is a better morning routine,  with about an hour reserved for being in my art room.   

Along with this, I have been bringing a small bag of watercolor supplies to work and I can find time to paint one or two times a week.  Even 30 minutes helps my outlook so much.


© Christy Sheeler 2020 She Must Make Art.  All rights reserved


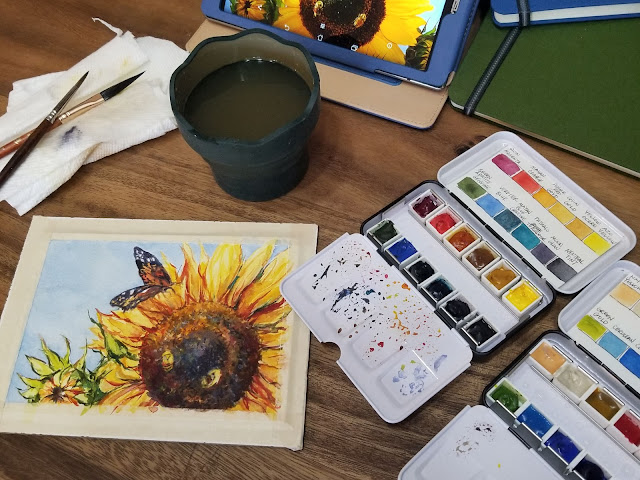
The two palettes shown are the Cornucopia Empty Watercolor Palette Trays.  They come as a 2-pack with 72 empty half-pans.  I ordered them from Amazon and they were under $20 total.  Dick Blick sells a larger variety for sizes of empty palette and full pans or half pans.  I chose pigments that would be lovely together, either just the one palette by itself or both together.  They have primary pigments and other favorites for pairing and mixing.  The sketch journals are Global Handbook Artist Journals.  The collapsible water cup is the Faber-Castell Clic & Go

I have been searching out a small and medium size bag perfect for organizing and protecting my art supplies.   Another of my goals is to have a perfectly packed for small quick day trips and longer ones as well.

It's great to be able to post this update and I will be working hard to make this spring and summer productive.  Thanks for stopping in to join me for this chat and let me know if you have any comments or questions.  You can comment below or send me a message through the link off to the right.

Christy
-She must make art.


Friday, June 8, 2018

Lessons in Loose and Less Controlled

Lessons in Loose and Less Controlled by Christy Sheeler Artist 2018 - She Must Make Art

Letting Go

It's been a while but I'm here today and I've got some new watercolors in progress.  Because my art time is so limited now, the most recent projects are different.  I tend to work very tight, controlled and detailed when I paint.  Stepping out of my usual habits is forcing me to grow as an artist.  (The one here on far left is described more further on below.)  Can you relate with the struggle, working more tight and detail-focused in your own artwork?  Along the way, some tips on challenging yourself to be more loose with the brush and working less controlled in your own artwork.


The two paintings below are watercolors on Yupo surface.  It's not paper.  It's a plastic surface for watermedia or mixed media.  It takes some time and patience to work with in my experience.  With practice, it's been easier to adapt my strokes for a better result.  I enjoy working with this surface very much even though I've been so tight in my style for a long time.  The genius of this surface is it can all be rinsed and wiped away for a fresh new start.  The first landscape is done with a reference photo and the second landscape is just a fun imaginative journey.


Can you relate with the struggle, working more tight and detail-focused in your own artwork?  

In this post, 10 Tips for Working Loose and Less Controlled.


Waterfall Landscape on Yupo Surface


Watercolor landscape on Yupo surface.


I have followed Angela Fehr's work for a while on Facebook and love her YouTube videos for learning to relax and enjoy the watercolor medium.  Her work is so lovely.  She has online courses so I signed up for a free course on her website.  I'll link it here: Watercolor Jumpstart with Angela Fehr  

I wanted to keep myself painting even when my schedule is working against me.  She has such a positive way with explaining and she's easy to follow when she teaches.  I would say that if you are curious about taking lessons...go check out her courses.  You will enjoy yourself and she can take you from basics to advanced skills.

Here is the beginning stage of my project following along with her instruction.  This was my first time completely soaking my paper before beginning the first layer of color.  I loved this and enjoyed the time in my art room very much!  It's a mystery what will come of it and that's the fun of it.  The second photo below is further on in next stages...once the first layer of watercolor was dry.


Mountain landscape on watercolor paper.


Mountain landscape on watercolor paper, later progress.


This is the second project done with the online course.  She provides the art reference photos and they can be downloaded onto a pc or other device.  I had the photos downloaded onto my tablet so I could see them at my art table.  


Mountain landscape on watercolor paper.


The third of my works done through her online course is below.  This was an exercise in negative painting which is painting around an object to reveal its shape.  I was familiar with the technique but not excited to use it often.  It's a challenge to be sure!  She shares quite a few tips for making the negative painting process not so overwhelming.  
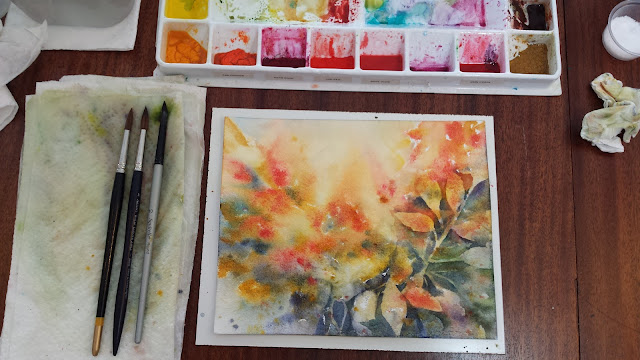


Negative painting with watercolor on watercolor paper.


This is the one I've chosen to revisit today but it didn't go very well.  If I'd seen this photo (taken over a month ago) while working on it today, I'd be much happier.  I faced two major problems.  The first, I couldn't remember which photograph I'd used for this project.  I searched and guessed it to be a similar photograph to the one showing below.  The second problem, I think I turned the painting upside down.  Ugh.  See, the work doesn't always go as originally hoped for in my art room, too.  I can scrap it altogether or I can see what can be done now.  Maybe this is the time to try washing it all off?  I'm not sure what I'll decide to do at this point.  


Early stage color washes in watercolor on watercolor paper.


The two photos below were taken after my painting time today.  I see that I chose the wrong photograph but right subject.  The watercolor paper should have been spun around but it could work as it is now.  Tough decision.  Not sure what I'll decide to do now.


Watercolor in progress with problems from previous session.


Watercolor in progress from today's paint session.


Today's warm up session was a quick landscape on Yupo surface.  It's done loosely with pale colors.  I used an art reference photo taken just a few weeks ago.  I don't love this one but I'm showing it anyway because you might think I turn out nothing but work that I love in the end.  It's so much more pale than my usual work.  It's an exercise in branching out for color scheme and less vibrant.  It's also on Yupo...so I will probably wash it all away and try again.  Love that about Yupo!


Quick warm up session today with watercolor on Yupo surface.


 It's been more productive in the art room for March, April and May in 2018.  Spring of 2017, I wasn't painting much at all.  I've been checking back to answer comments here as well as email.  If you've got questions, don't hesitate to contact me.  I'll get back to you as soon as I am able, usually 5-7 days.  Sheesh!  It's June now!  The days just fly by now.


10 Tips for Painting Loose and Less Controlled

1.  Block out the need to have an artwork for mat and frame.  Nobody has time for that pressure!

2.  Take 10-15 minutes to play on a smaller scrap of paper.  No expectations.  
      Warm up your mind and subconscious for creative energy to flow better.

3.  Try a new way of starting...like soaking the paper.  Be adventurous!

4.  Have an open mind about supplies and tools and techniques.  What would happen if...?

5.  Watch a painting tutorial that inspires you and then GO DO it yourself.                               
      YouTube is full of great videos that cost nothing.

6.  Be more aware of your self talk.  It's not just you thinking, "oh, what should I do now," 
       or "well, that didn't work the way I wanted," and "what should I do about this area?"  
       There are unsure moments in the process.  If it's really got me rattled, I lay it aside 
        and take a break (15 minutes) or I pick up another work in progress to get 
         my mind off of it for a while.

7.  This is hard work to move out of our comfort zone.  Don't expect it to come easily or quickly.        
      This retrains the brain, the eye, the hand, and the creative process.  Learning takes a lot of energy.

8.  Give yourself a bit of flexibility to be creative.  Set aside the art reference photo 
       and ask yourself how you want to paint this.  Take a glance now and then if it helps 
       relieve anxiety of needing direction.  Ask yourself how YOU want to paint this.  
       No one will see that photo.  It will not sit beside your painting.  It doesn't have to 
       match what the photo shows for accuracy. 

9.  Find a way to not stress over the supplies you're using.  We don't want to be adventurous 
       because this paper cost a pretty penny!  Paint on both sides of the paper.  Use it up.  
       Try washing the painting off...I'm going to try this soon.  Don't use cheaper paper.  
       Quality paper 140 lb. or 300 lb. is where you need to be.  I push myself to use only 300 lb. paper 
        now and it took years for me to get to that point.  YUPO!  Yupo is amazing.  
        It's a bit more money but you can really wash away all the paint and start again.  
        Rinsing it off in the sink will not damage it at all.  Stains?  Magic eraser.

10.  Do it all again.  Go back and remember the new methods.  Write yourself some reminders.  
        Repetition and reminders help us keep the new way of thinking and creating for the long term.


Thank you for stopping by the blog today!  Be sure to leave a hello in the comments.  You can find me on Instagram, Facebook, and Pinterest.  I'm most actively posting on Instagram these days because it's so quick and easy.


-Christy

She must make art.


Saturday, February 3, 2018

5 Steps For Making Your Own Watercolor Mixing Grid

Painted watercolor squares with title, 5 Steps for Making Your Own Watercolor Mixing GridPlan Your Mixing For Better Creative Flow

I use mixing grids as tools, because it saves so much guesswork.  Clearly seeing which mixes I want to use in my work,  I am less frustrated and make fewer mistakes.  It's less, "oh, I don't like that!"  There's more "oh, it's coming together!"  

Would you like to make one?  Does it seem intimidating?  Can I give you some tips to get you started?  It's an enjoyable process, methodical yet relaxing at the same time.  In the past, artists have shown interest in making a chart like this.  It's just paper and paint.  Really.  I promise.  Don't hold back because I'm just sure you can handle it.  

(Well, no...I don't know you that well...what do you have to lose?  You might have a great time!)


After the many years I've painting with watercolors, there's a stack of various watercolor paper scraps with free form brushstrokes of color.  Each one of these pages is a record of my time exploring how to achieve a certain mix for a painting.  The earliest mixing "notes" are filled with blobs of color with a few scribbled notes in my handwriting.  I sorted this stack into the following collections.  Some of them instantly take me back to the specific painting, others not so much.  It's interesting to see how my methods changed over time.


Various collected watercolor mixing grids with written notes.


LET'S BREAK IT DOWN.

Supplies:
Watercolor paper (I'm using 300 lb. cold press)
Pencil
Fine-point permanent marker
Straight edged ruler
Watercolor pigment
Watercolor brush
Watercolor palette
Container of rinse water
Paper towels


Watercolor supplies: paint palette, paint tubes, container of rinse water, pencil, permanent marker, ruler, paintbrush, paper towel, watercolor paper.


1.  Choose your pigments.  

Keep the number limited.  How about the primaries, and then a few other pigments you're curious about trying out.  I usually begin by comparing my reference photo with my favorite reference book, The Watercolor Painter's Pocket Palette by Moira Clinch.  Over time, I have saved my mixing grids from previous artworks, and those are also great tools now.  So, for the hollyhocks as my photo reference, I've chosen these watercolor pigments.

I chose Daniel Smith Quinacridone Coral, Daniel Smith Quinacridone Red, Windsor & Newton Transparent Yellow, Daniel Smith Quinacridone Gold, Da Vinci Cerulean Blue, and Daniel Smith French Ultramarine.


Tubes of watercolor pigment.


Thursday, February 1, 2018

Coming Soon: 5 Steps - Watercolor Mixing Grid


Coming Soon Preview of Color Mixing Grids by Christy Sheeler at She Must Make ArtHey there!  I'm just so glad you stopped in today.  I want to welcome you to She Must Make Art.  I am Christy, an artist and lover of creating in all kinds of ways.  I enjoy sharing my own journey in making and loving art.  While life has thrown me a few curves and I'm not making art as often, I am here no matter what.

There's a new blog post in progress and I've got my plan for a tutorial describing my method for mixing watercolors and creating a color mixing grid.

The tutorial is written and edited so now it's time for brushes to do their job.  This is a tutorial that needs new photos taken as I create a mixing chart just for the purpose of showing my methods to you.  Once the photos are taken, edited and added...you'll be able to see something brand new.  Here.  From me.  Christy.  The artist.

So for now I'm just giving you a bit of inspiration for the next blog post.  Here are the photos taken as I prepared and began to paint cherry blossoms in watercolor last spring.  This was one of the most recent artworks completed before life changed in such a big way.  I'll share the progression of several watercolor paintings focused on cherry blossoms in a future blog post.  Can you see how I was just in the creating-watercolor-happiness-zone?  I really was!


A color mixing grid with watercolor.  © 2018 Christy Sheeler.  She Must Make Art.  All Rights Reserved.


Color mixing with watercolors and cherry blossoms artwork.


While the background is soft and pale, the layers of watercolor wash begin in a gradual process.  The watercolor mixing grid helps me stay focused as I work through the artwork.  


Cherry blossoms watercolor painting in progress.


Okay, well now I must be off to get the watercolor pigments on the grid.  I am excited to share it when it's finished!  Thanks for giving me the time to share and come hang out again soon!

-Christy
She Must Make Art.


Thursday, March 2, 2017

24 Must-Try Watercolor Techniques

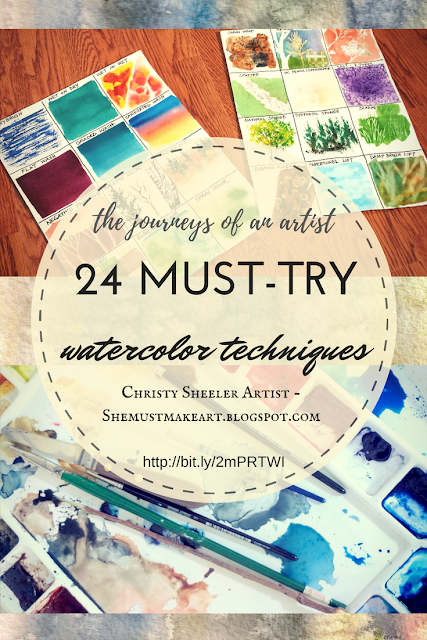
24 Must-Try Watercolor TechniquesTechniques and Tips for Watercolors

When it comes to watercolor painting, these are the tricks that draw the ooh's and aah's every time.  Watercolor as a medium seems like such a challenge because it seems unpredictable at first glance.  It's so important to learn what to expect from the pigment when it meets water.

When learning watercolor basics, these will help form a better foundation in painting with more enjoyment.  The frustration is lessened because you have a better idea of how the pigment is going to respond to what you do.

There are many helpful videos on YouTube that are great resources shared by other artists.  Do a quick search on YouTube and you'll have a great time watching artists demonstrate these techniques.

When teaching these techniques in a workshop, I bring out these posters and copies of the instructions as handouts for students.  I'm sharing those handouts with all of you, here and now!  This post has been a long time in the planning stages and I'm so thrilled to have it finally ready to share with other watercolor enthusiasts.


So, I have a bit of confessing to do first.  Have you seen my pins on Pinterest for these techniques?  Years ago, when I was new to Pinterest, I created pins for the images of these posters.  At the time, I didn't realize how popular these posters would become with time.  Now, these pins are my most commonly saved pins!  Unfortunately, they lack any explanation.  The pins lead nowhere but to the images.  Lesson learned, believe me!  I can't tell you how much I regret that mistake!  It's taken me a while but now I'm glad to share the posters and the tips that help explain each one. 

If there's a technique you'd like me to elaborate on more, please let me know in the comments.  I'd be more than happy to help you with that!


When it comes to watercolor painting, these are the tricks that draw the ooh's and aah's every time.


Watercolor Techniques Pages 1 and 2


Created by Christy Sheeler.  For personal use only.  Request permission to reproduce.


Created by Christy Sheeler.  For personal use only.  Request permission to reproduce.


Tips & Explanations for Watercolor Techniques


I know the text on the tips sheets may be hard to read so here's a link to the printable PDF file:


I hope you are able to try these techniques on your own!  These make up a watercolor artist's tool box for creating unusual effects.  There are several I use often.  There are 4 or 5 I rarely use but at times, these techniques are useful.  It all depends on the style and subject matter.  It's a good idea to become familiar with them, try them out with a bit of practice before applying them to an artwork you are working on.

Leave me a note in the comments!  Let me know if you've got questions and I'd be very happy to explain any of these further.  Thank you for stopping by and sharing a few minutes here today!


ADDED NOTE:  So many have commented and requested to use this as a resource for instructional material.  Thank you for the compliment!  I am glad you have found this to be helpful in teaching in your own settings.  Use permission is granted with the agreement that source credit is given to Christy Sheeler Artist and She Must Make Art, the art blog.  Permission is not given to altar these in any way or form.  I know the images above do stipulate for personal use only.  I do appreciate you commenting below your own purpose for using because it's so nice to read your stories.  I love knowing how these are spreading to touch others' enjoyment of watercolor painting.  -CS  2023

Thank you to those of you who have requested my permission in the comments.  I am too often late in replying so thus the reason for adding this note.  May your instruction go well and these resources be a blessing!


Christy
-She must make art.


Thursday, October 13, 2016

Cherry Blossoms For My Sister

I've never had an artwork take so long to complete!  There are thousands of photos in my art reference folders on my computer. Photos don't always get chosen for subjects of paintings.  I choose the subject based on how inspired I feel to do it well.  The focus of today's post, the cherry blossom, has been on the list for eight years or more!  While the photo reference for this painting was taken just a few months ago, the plans to paint cherry blossoms have been upended many times.  I've taken photos of this painting's progress, so join me today and I'll do a bit of storytelling at the same time.


Watercolor mixing chart for cherry blossoms artworks.
The watercolor mixing chart used for these artworks.


My sister's husband is in the Navy and their family travels a lot, as many military families know well.  I've had a desire to paint something for her for many years.  Her request was for a painting of cherry blossoms.  They've been stationed in Japan twice.  The first time was about eight or nine years ago.  She emailed me a photo of a branch with cherry blossoms.  I loved the photo and began to think through the process of capturing the scene.


Cherry blossoms photograph by L. McMahon
The first photo sent by my sister from Japan.


Saturday, April 30, 2016

Dancing Poppies Watercolor Painting

I meant to highlight each of the poppies watercolor paintings.  In the series of four paintings completed together, I shared each in a post of its own.  All except this one.

It's really no wonder; I've felt a bit scattered and disorganized lately.  My success in managing so many aspects of the art process varies with life's seasons.  I'm still learning how to keep it all together between artistic pursuits and family needs.

Bear with me, I'm finding the rhythm.  Maybe like learning a complicated dance step?


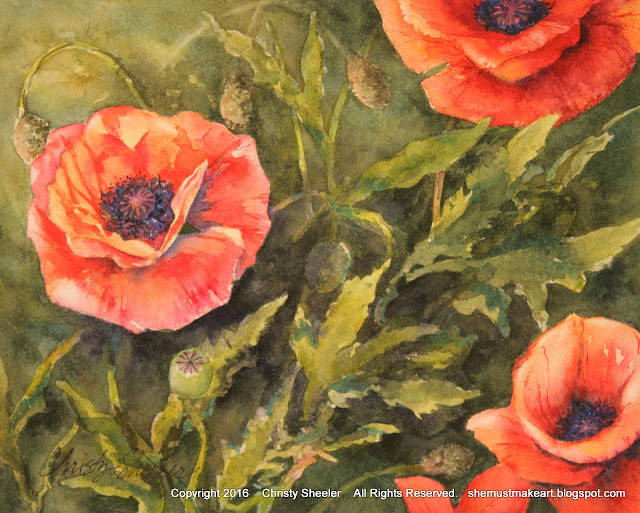
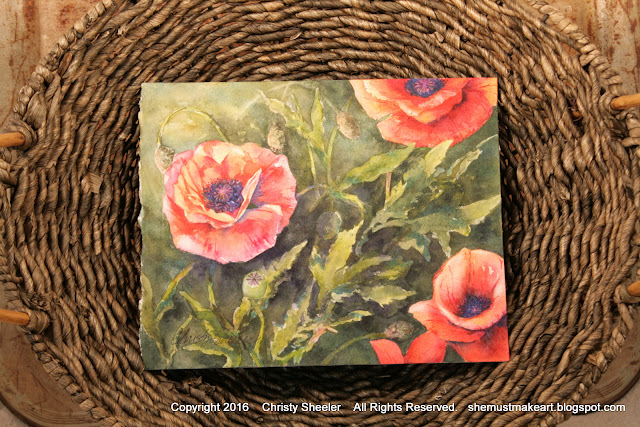
I would like to present Dancing Poppies, the completed watercolor painting!  It was completed in late February 2016.  The original watercolor painting is available on Etsy in my Christy Sheeler Artist shop.  (This post added April 2016.)  

Along the way, as the blog develops, I'm enjoying being able to share behind-the-scenes views of the process, like a virtual studio tour!  Hey, I'm so glad you had time to drop in today... Can I offer you something to drink, iced coffee, water, green tea?  Let's get started, it's just so fun to have friends stop by with eagerness to see the art studio.


Sketch It Out 


So this painting began as a simple value sketch with Sharpie fine point black marker.  You can see there's a vague and loose feel to the sketches.  Using a black and white print of the photographs helps me see the range of values from lightest to darkest areas.  This is not a regular habit of mine and I'm still deciding whether I'll use it on a regular basis.  I've got a feeling I'm already doing this subconsciously in my planning process.  The composition of this piece is not one that follows the traditional rules.  Without realizing it, I have a composition that breaks rules.


value studies sketches for poppies watercolor series


A Photograph for Reference


The photo reference I used for this piece with one change:  the flower at the left is reversed and placed at the far right.  This was a bit of a challenge when it came time to paint it with the light coming from the top left.  The light striking the petals needs to be consistent for all the flowers.  Mind bending?  Yes.  I still do it to myself anyway.


Dancing Poppies art reference photo by Christy Sheeler 2016


Tracing Paper Has The Details


Tracing paper has become my favorite for sketching.  It's easy to draw in a detailed way and erasing is effortless.  Now, with the sketch for Dancing Poppies, clipped to the board, I can transfer it to the watercolor paper with a sheet of carbon transfer paper sandwiched between the layers.


Poppies sketch on tracing paper.  Dancing Poppies watercolor painting planning stages.


Let the Watercolor Do Its Thing


The first washes of watercolor pigment are soft and loose.  I begin with the background for this piece.  Where I begin varies with each painting.  There are some that begin with the main subject.  Here, I had such joy in working on wet paper, allowing the pigment to flow where it pleased.  When I am concerned about pigment moving into delicate petal areas, I apply masking fluid while the paper is dry.  I applied masking fluid in stages so that stems and leaves had a soft wash of the background as their base color.  It's much easier to be free and spontaneous when I don't have to work carefully around details.


A photograph of beginning the watercolor background for Dancing Poppies.


In the background, the other three watercolor paintings in the poppies series are resting on the easel.  I have them there to study at a glance.  If there are problems, I'll usually notice them in passing more than while painting on them for an extending period of time.  There will be a final critique session with that great husband critic at the end.  Dancing Poppies, on the studio table, has a background that's building with layers of watercolor pigments.  It's even taken on a golden tone in the upper left area of the painting.


watercolor poppies series in progress


For some reason, I was so busy in the throes of creativity, there are no photos of this piece while the petals were being painted.  Sometimes, it happens like that.  I get a spurt of crazy get-this-going energy and there's no stopping until it's done.  So the completed Dancing Poppies with the tools used along the way.  The value studies, the sample brushstrokes of color, and the color mixing grid all help me through the process to the finish.


Dancing Poppies completed view with reference tools.


A shot of the studio table while work is going on shows my typical set up.  Occasional time-outs are called for some clean up.  It seems that in the flurry of paintbrushes and pigment, things get cluttered and out of sorts.  At the end of the day, I'll bring it all back to tidy again so it won't be an intimidating sight the next morning. 


Dancing Poppies watercolor painting completed viewed on studio table.


The Finished Painting


Dancing Poppies, the rule breaker for composition design.  The sunlit leaves weaving their way through at an angle seem to help it work...at least in my mind's eye.


Dancing Poppies Watercolor Painting


Dancing Poppies Watercolor Painting in decorative display


 Dancing Poppies by Christy Sheeler 2016


Well, I feel better knowing that Dancing Poppies got its own reveal.  Maybe no one will ever know the difference...but if you're here reading this, it did make a difference!

So what do you think of composition?  Do you like the more traditional or the unusual view better?  Maybe you've never really thought about it before.  This week, here's a challenge:  keep your eye on the look out for art that you enjoy most.  Look for the way the main parts are arranged.  Do you think it's traditional or not?

-Christy
she must make art.


P.S.  To see the blog post about the full process of all four poppies watercolor paintings in this series, click:  Watercolor Poppies Complete Art Process.


Thursday, April 28, 2016

The Vintage Tractor in Watercolor

a virtual studio tour the vintage tractor Christy Sheeler artist 2016

Virtual Studio Tour!

It's taken a while now but I'm happy to reveal
The Vintage Tractor watercolor painting.  After so many landscape and floral subjects, it's been a treat to take some time with the faded paint, dents, and rust!

More than ten years since my last mechanical type subject...
So many years, I'll have to check with my car-guy husband to know for sure which one was most recent before this one.


As I've shared often, I love the hunt for all variety of items from a time gone by.  It's like these items have a story to tell.  They tell about the culture and the daily living of that time.  When I saw this old tractor sitting out in the elements, it seemed to have character all its own.  Only later did my husband explain to me that it was pieced together with some real ingenuity.  Automobile parts were used by the skilled hands that put this tractor together.  He tells me how someone who knows cars will recognize the unconventional parts used for making it a tractor.  My untrained eye did not see that.  There was just something unusual and interesting about it...that's all I could figure when I chose this as an art reference.

Have you ever seen a completed project and wondered, "how did they do that?"  With artwork, I believe that happens so I enjoy sharing the behind-the-scenes progression of artwork.  Well, here goes!

Friday, March 11, 2016

Watercolor Mixing Grid (Created with @Magisto)

Mixing Up Pigment for a Watercolor Grid

In the previous post, I shared Why I Make Watercolor Mixing Grids.  Better than telling is showing!  This quick video shows the action in completing a row of mixed swatches.  Watercolor mixing is great fun!!!  The result is a guide for an upcoming watercolor painting.  Having a reference close at hand is such a great tool.  I can't imagine being without some record of the general creative plan.

I've been having a fantastic time with learning to record on video!  New skills can be a great adventure!!!  While there's plenty on my to-do list, I'm making time for sharing what I do...
The video is created with Magisto free version.

Are you even a tiny bit curious?  I hope so.


It's short.  It seems self-explanatory to me, but maybe not.  My purpose isn't really to give a demo how-to but to a quick little glance at what I've been doing lately.  If it seems too small a window, click to view on YouTube.

Over the years, I've noticed that people have a fascination with watching artists at work.  Whether it's other artists or myself...I know that when I pass by an artist busy with their craft, I've got to stop for a few moments and see how they do their thing.

I remember in California Adventure, the amusement park, there are artists who look like street sweepers.  They come along with a bucket and and a broom...and they create a work of art there on the sidewalk with water.  That artwork is only there until the water evaporates.  I was just amazed.  I could follow them all day, watching what they'll create next!!!

Okay...I found a YouTube video of a Broom Artist in Disney California Adventure:


What do you think?  Have you ever stopped to observe an artist while they create?

Have a beautiful day!  Remember to watch for the priceless in today.

Christy

She Must Make Art!


Wednesday, March 9, 2016

Why I Make Color Mixing Grids

Let me begin by saying that not every artist does it this way. 


 Some use washes of pigment, adding in layers on top of layers...the previous one dry before another is added.  Some artists change pigments as they paint, letting one color meld into another.  It is such a fun sight, seeing the color mix right there on the paper.  And some, like me, get caught up in the possible combinations (endless?) of mixing various pigments!

Every artist has their methods.


It's great experimentation to see the results on paper.  Add to that, the ways the result can change by diluting with water, changing the proportions of pigments used, adding a third pigment.

Have I lost you already?  I hope not!

Color mixing grids have become a key part of my preparations for painting watercolors.  I usually have a firm vision in mind of where I'd like to go with an art reference photo.  There are times when the vision is still fuzzy and the color mixing can help me make more decisions.  


My mixing results do not have to match the photo.  The photo is just a guide, a starting-off point...inspiration.  It took me a long time to let go of the expectation to stick to the photo too closely.  That may have been when my artistic style began growing in a really noticeable way.

Several years ago, my way of mixing pigment was more haphazard.  It was a guess-and-by-golly method!  I'd pick pigments out not really knowing much about their characteristics.  Is it transparent or opaque?  Transparent pigment will show the layers below it.   This brings a luminescence.   Is it more granular...resulting in a mottled effect?  Is it strongly staining?  Lifting and scrubbing later, there would still remain a hint of that pigment.


Why Go To All This Trouble?


1.  Useful Guide For Future Artworks

So here's an example of my earlier color mixing "notes" from previous paintings.  They give me very little information about how I got those sample bits of color.   I may look back now and love something I see there, but without any written guide, it would be hard to duplicate now.