Showing posts with label creative mom. Show all posts

Friday, February 16, 2018

Writing My Artist Goals: 2018!

Graphic of blue skies with scattered clouds with foreground of land and telephone pole in silhouette.  Mountains in distance. Let's talk about goals.

While moving about the art room, my eye spots a simple sheet of paper.  At the top, it's titled 2015 Christy Sheeler Artist.  To anyone else, it might be just another list.  It is my list of art goals for 2015.  I quickly read over the list and feel amazed at what I was able to accomplish in that one year's time.  

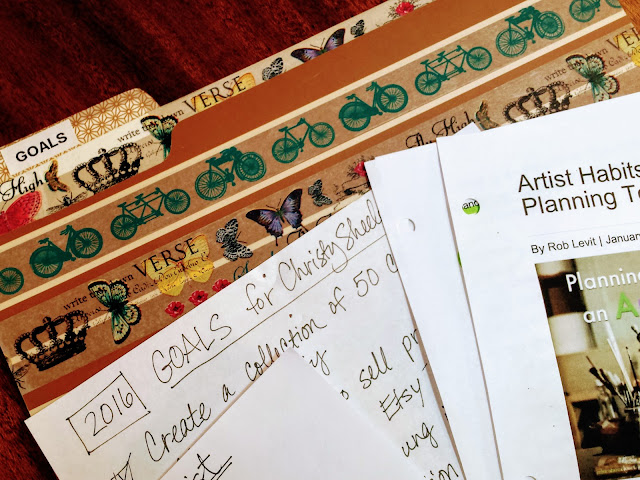
So then I turn my head and see another list.  It's pinned to the bulletin board on the wall.  It's title:  2016 GOALS for Christy Sheeler Artist.  You caught that...not 2017.  There were no artist goals for 2017.  Well, 2018 needs some goals! The process and result will give me something to work toward for myself, the artist.

Let's get this process started!


Defining a goal

According to Merriam-Webster, goal can be defined as the end toward which effort is directed.


Synonyms for goal include: aim, ambition, aspiration, design, dream, idea, ideal, intent, intention, mark, meaning, object, objective, plan, point, pretension, purpose, target


White sheet of paper on bulletin board with 2016 Goals for Christy Sheeler Artist


A view of my bulletin board with assorted papers and photos.


Inspiration for Goal Writing


Our goals can only be reached through a vehicle of a plan, in which me must fervently believe, and upon which me must vigorously act.  There is no other route to success.
-Pablo Picasso


You are never too old to set another goal or to dream a new dream.
-C.S. Lewis


Outstanding people have one thing in common:  An absolute sense of mission.
-Zig Ziglar


File folder labeled GOALS and previous years' goals.


Why write down yearly goals?

I need direction.  I am easily distracted.  It begins with one task which turns into switching to another task.  "Oh, I need to put this away."  "Where did that list go?"  And months can go by without remembering to figure out how to learn a new social media platform...Instagram, Pinterest, Facebook...  I need more structure; organization that helps me function better.  Having a list of lofty plans and major milestones has made it possible for me to go after the hard things.

Something I read a few years ago really gave me a serious nudge to be serious about being more intentional with my goals.  Artist Habits of Mind-A Great Planning Tool for 2014 written by Rob Levit (title is linked) gives the challenges to

"engage and persist...make a list of what you'd like to accomplish in 2014-personally and professionally.  What opportunity would provide the greatest reward-financially or in terms of professional satisfaction-if you engaged and persisted in its accomplishment?"

Thursday, February 1, 2018

Coming Soon: 5 Steps - Watercolor Mixing Grid


Coming Soon Preview of Color Mixing Grids by Christy Sheeler at She Must Make ArtHey there!  I'm just so glad you stopped in today.  I want to welcome you to She Must Make Art.  I am Christy, an artist and lover of creating in all kinds of ways.  I enjoy sharing my own journey in making and loving art.  While life has thrown me a few curves and I'm not making art as often, I am here no matter what.

There's a new blog post in progress and I've got my plan for a tutorial describing my method for mixing watercolors and creating a color mixing grid.

The tutorial is written and edited so now it's time for brushes to do their job.  This is a tutorial that needs new photos taken as I create a mixing chart just for the purpose of showing my methods to you.  Once the photos are taken, edited and added...you'll be able to see something brand new.  Here.  From me.  Christy.  The artist.

So for now I'm just giving you a bit of inspiration for the next blog post.  Here are the photos taken as I prepared and began to paint cherry blossoms in watercolor last spring.  This was one of the most recent artworks completed before life changed in such a big way.  I'll share the progression of several watercolor paintings focused on cherry blossoms in a future blog post.  Can you see how I was just in the creating-watercolor-happiness-zone?  I really was!


A color mixing grid with watercolor.  © 2018 Christy Sheeler.  She Must Make Art.  All Rights Reserved.


Color mixing with watercolors and cherry blossoms artwork.


While the background is soft and pale, the layers of watercolor wash begin in a gradual process.  The watercolor mixing grid helps me stay focused as I work through the artwork.  


Cherry blossoms watercolor painting in progress.


Okay, well now I must be off to get the watercolor pigments on the grid.  I am excited to share it when it's finished!  Thanks for giving me the time to share and come hang out again soon!

-Christy
She Must Make Art.


Thursday, May 26, 2016

Moments Worth Pausing For

balloon garland on cotton stringIt's my day for writing and preparing to share the week's art studio happenings.  As much as I want to keep up with everything, I realize my limitations. I've got a commitment that comes first.  My son's eighth grade recognition is next week.  It's a big celebration for his class and I'm fortunate enough to help with the decorating team.  I've promised my kids that when it comes right down to it, family comes first.  This is an event that won't come back around.  I love being involved and being available for these milestones.

How many balloons make an 18 foot swag anyway? (60) Will a glow stick tucked into a balloon really work? (not really)  And so on with so many great Pinterest finds... finding out which clever ideas really work.  I've found that the dollar store is the best starting point for any party decor planning.  It's difficult to decorate on a budget!  Oh, and if you want to sandwich glow stick bracelets between two clear plastic cups, take the glow stick with you to be sure the clear plastic cup will be the right size!


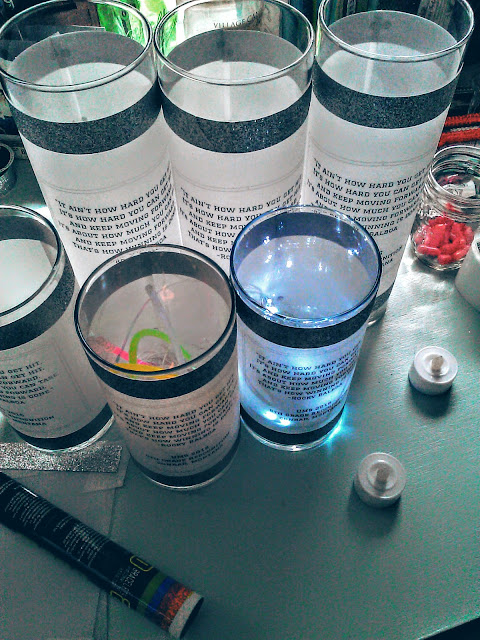
Throughout the past year, I've learned that there are times when it's okay to take a break from the art studio.  I've been able to establish that routine and it won't be impossible to pick up again soon.  So, while I'm not posting a lengthy piece with a great number of photographs today, I am checking in and saying hello!  I'm still here, just focusing on glow sticks, balloons, table centerpieces with a Rocky Balboa printed on the vellum wrap, etc.

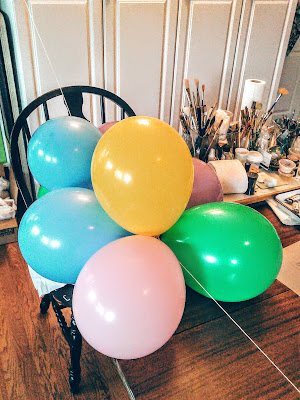
We'll be using red, white, and silver balloons for the party.  I had these assorted balloons here at home.  I wanted to have an idea of how many balloons would be needed for the desired effect.


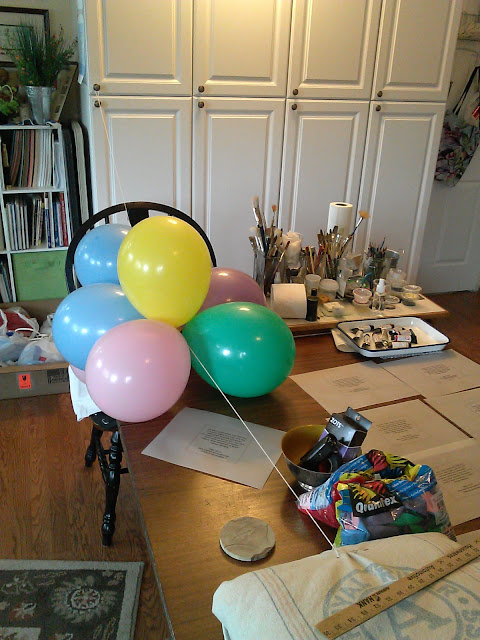
testing out how many balloons for every 3 feet of garland
Here's the test run for number of balloons to 3 feet of garland.


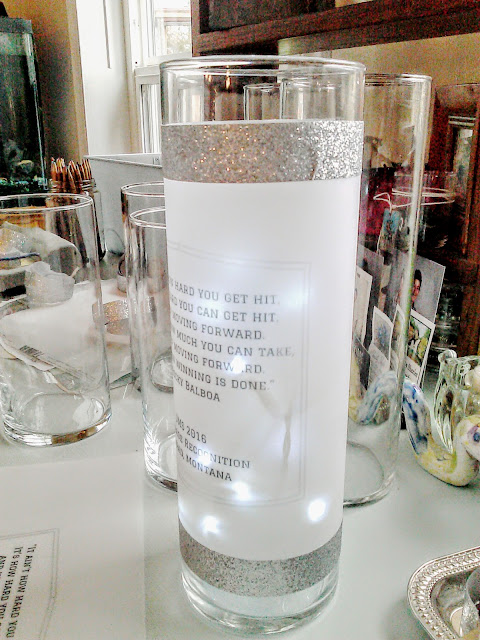
The vellum wrapped vases are my favorite way to make a fantastic eye-catching centerpiece.
Here is a snapshot of the supplies I used.  Comment below if you have any questions!  The vellum is 8 1/2" x 11" sheet and I print on it with my inkjet printer.  I set the page format on landscape and centered the text on the page.  For the shorter vases, I trimmed an inch from the top and another inch from the bottom, making the sheet 6 1/2" x 11" in size.


I printed the class quote on the vellum with the page format in landscape style.  Zots (have you heard of these?) are the most wonderful way of attaching the vellum to the vase.  Three little dots of the clear adhesive dots at the left and right edges and the vase is wrapped!  That's when I realized I had forgotten a step.  The silver glitter tape to trim it needed to be added.  The one below was my first try at applying the glitter tape after the vellum was attached to the vase.  You can see a wrinkle in the tape and it is unevenly attached.  This tape does NOT come back off without some damage to the tape and the vellum.  I was better off leaving it for this vase.  For the remaining sheets of vellum, I attached the silver glitter tape while the vellum lay flat.


vellum wrap with text wrapping a tall vase, silver glitter tape accent


If you're curious about making something like this vellum wrap for tall glass vases, I shared the instructions in a December post.  See Christmas Tea: Part 2 for more information.  For the set I'm working on today, I created them with Canva.  It's a very handy online tool for building your own graphics.


white string lights and glow sticks with votive light in glass vases


I tried several different combinations to find the best way to light up the vases.  The glow sticks are much more impressive in a darkened room!  If you want the neon, bright colors of glow stick I would suggest using 8-12 glow sticks per vase.  I really like the string lights but I have more of the glow sticks and battery operated votive candles.  I purchased iridescent shred gift bag filler (like Easter grass) at the dollar store.  The very best effect I achieved was using a handful of the filler and the string white lights.  The shred filler is so prone to static cling!!!  Spray your hands with Static Guard for better results.  This is so much fun!  Now to go build four more!!!  (If you look closely, you'll see a jar of Hot Tamales candies; I have a serious sweet tooth!  I'm sure candies show up in many of the studio shots.  I don't even realize it anymore.)


vase centerpieces, quote printed on vellum, vellum wrap for vases, silver glitter tape, glow stick, battery operated lights


Wait, what just happened?  For not actually planning a blog post, it seems I've got one.  It wasn't so hard to complete and hopefully you have a new idea to try!  Please feel free to explore the other posts I've shared in the past.


vellum wrapped vases, custom touches on a small budget, table centerpiece, party decor


Thank you for stopping by and be sure to return again soon!
I'll be back in a week...or two.  The next week and a half will be busy but I'll be thinking on what to share next time.  I want to share posts with quality and purpose.

We're going to attempt at least one trip to the mountains so some photography with wildflowers ought to be coming up soon.  That art travel kit is packed up and ready for our next adventure!

I'll do what I can with what I have.  I am enjoying this everyday creativity too much to put it down for an extended length of time.

What are you making time for?  Is there a creative type of outlet that you feel drawn to from time to time?  What's stopping you?  Be intentional.  Don't expect it to come together all at once.  What would be a first step toward filling that void?


-Christy
she must make art.

P.S.  I've got plenty of new listings to be added to Etsy in the weeks to come!
        Are you following me on Facebook?  I share updates there for new blog posts, new Etsy    
        listings, along with other art related information I find elsewhere.


Thursday, January 28, 2016

Advice for Artist Moms Who Long For More Art Time


I ached to bring back my artist self


I missed the artist "me".  The "me" that had time to spend an entire Saturday with my brushes and a sheet of watercolor paper.  So as crazy and mixed up as that may sound to any non-artist types, I believe other artists (particularly moms) will be able to relate.  

My becoming a mom story is a bit different than most.  When I was 33 years old, we brought 2 children home ages 3 and 4...and I went from not-a-mom-yet to mom-of-two sibling group.  Life as I knew it was turned upside down but in a good way.  The changes in our lives and theirs meant we were always playing catch up.  I was very tired.  There isn't a word for how tired I was at that time. 


What can you do to keep the artist flame burning while pouring yourself out in dedication to spouse, children, job, or caring for a parent?  Many can attest to the fact that it's not always easy to be an artist while life is happening.  I felt lost, trying to find the way back to feeling like a real artist.  While visiting with other artists it was hard to say, "I'm an artist."  I fought the urge to say, "I used to be an artist."  I wondered how to keep some aspect of art interest alive during that season of my life. 

I've been formulating in my mind, what tips and encouragement I might give another artist in that place right now.  I know it feels like you are the only one but please take heart!  It will not always be like this... and there are ways you can keep the flame from going out.


5 Ways to Keep Your Artistic Flame Alive


1.  Squeeze some art into the between-moments.
Pause and give some thought to what you can make time for with your current restraints.  What can you do with short bits of time?  When you're waiting to pick up children from school?  When you're in the waiting room for dental check-ups?  While waiting for sports practice to end?

For me, it was reading magazines like The Artist's Magazine and Watercolor Artist as a quick afternoon reward while kiddos had rest time.  I've gone through them and added sticky notes to help me find favorite tips.  Now there's Pinterest!  Now is the time to get started gathering ideas for projects.  Find ideas that can be done in small amounts of time.  Find ideas for projects in the future when life changes once again.


Three books I love looking through...just lovely ideas to ponder over in the few quiet moments.  Watercolor A New Beginning by Ann K. Lindsay is just fantastic for beginners.  She's encouraging and hopeful, while giving a well-rounded foundation for watercolors.  Watercolor Made Easy by Janet Walsh is another valuable beginner's book.  The photos break it all down into simple to follow progression.  The Artistic Mother by Shona Cole will delight the senses with fantastic photography of lovely projects.  Her Introduction is titled, Why Should Mothers Make Time to Create Art?  In this book, you'll find inspiring ideas for tying photography into a variety of unique projects.

Thursday, January 14, 2016

Watercolor Adventure with Yupo Paper


While planning my next few paintings, I've had an urge to try something new.  On my shelves, you'll find several really thick art supply catalogs.  Do you remember paging through the JC Penny catalogs in days gone by?  That's the best way I can relate to how I dreamily wander through the pages of the art supply catalogs.  It's my great escape to discover new products and tools, wondering how they can be used to create more art.  I have seen the Yupo sheets before but had never tried painting on this surface before...until recently.  Maybe I just needed a little break and a chance to be more carefree with paint and brushes.  My artistic style at time has been very tight and leaning toward realism a bit.  I get a little nervous at the thought of trying to loosen up and work in a bolder way.


There are artists I really enjoy following a few work on Yupo.  Seeing their work gave me a longing to discover more for myself.  The beautiful effects achieved are just so appealing!  It seemed to me that it could possibly be quite a relaxing experience.

Thursday, October 1, 2015

Watercolor Landscape & Sky: Scotch Tape and Magic Eraser

Easy Watercolor Techniques For Landscapes

Have you been itching to try watercolor painting yourself?  Are you just a little excited to get your hands on a brush?  Today, I'm going to show two techniques that anyone can use.  

When painting a landscape that has more complex details, keeping the sky color separate from the land portion is a challenge.  It's easy for watercolor to spread over where you don't want it to be.  Keeping a paper towel ready makes a quick blot possible.  Sometimes, we just need a few fluffy white clouds in the sky so we'll add those, too.


Materials:

Watercolor paper
Scotch tape
Box knife or razor blade
1" flat brush, synthetic is durable for watercolors
Watercolor pigment in blue hue of your choice
(ultramarine or cobalt, add a little cerulean for variety)
Eraser cleaning pad
Scissors
Container of water


Scotch Tape with Watercolor


1.  Here, I've drawn a few basic lines to imitate the planes of a landscape.  The top line separates land from sky.  This is where we have possibility of paint spreading from sky area.  With this simple line, I would just turn the painting around with sky area closest to me.  This trick is key for landscapes with more varied or complicated shapes.  If the paper is clipped to a support board, then it can be tipped at an angle so paint runs toward the highest point of sky.  You can rest the board on a roll of masking tape to keep the back edge higher.


Thursday, September 17, 2015

Nature's Water Therapy


Have you ever needed to get away for few days?

At the end of July, our two teens were gone for a week.  We had a weekend to get away by ourselves.  We went camping.  I know, you're saying, "really, again?"  It's what summer in Montana is made for...there's no other way to explain it.  The beautiful blue skies and the landscape is just too irresistible.  We packed up the basics we would need and headed for the mountains.  It's under an hour's drive and we have our little home-away-from-home parked and settled.  We had a great time sharing one another's undivided attention.  There wasn't a set schedule and we ate when we were hungry.  It was so freeing to not be thinking about a regular mealtime schedule.  We ate our favorite junk food.  We didn't have to be a good example of healthy eating!  It was a nice vacation from the typical camping trip for our family of four.  We missed our kids while they were gone for that ten days but the break relaxed us a great amount.  The weather that weekend brought high temperatures and I noticed that many flowers were done blooming.  The vegetation was changing, preparing for late summer turning to become autumn.  There were signs that the local area was dry, which would in turn result in a great number of wildfires.  

While we were out taking the dog for a walk, I had my camera but it late morning which meant the sun was high.  The lighting was not best for photography.  Everything had a tendency to be washed out and had less contrast.  The longer shadows of morning and evening really add to composition.  I ought to make myself get out earlier and sacrifice sleep for my art.  I wished that I'd been out early in the morning but sleeping in late was such a welcome option.  I didn't really view this weekend outing the same as others.  I had been pushing so hard at home in the studio and felt the need for some time off.  My main focus was on enjoying a relaxing time with my husband.  Photography for art references wasn't the main goal that it had been on previous camping trips.  


This area runs along the road and is a series of beaver dams.  The colors were a little washed out, especially in the sky but I used a few Picasa filters for improvement.  When I have a photo I'm not

Thursday, September 3, 2015

Mount Oberlin, a Waterfall, and a Sketch


It's time to be realistic here.  
I feel like I chickened out...in more than one way.  


Have you ever felt that way?  Gosh, that's how I have been feeling and I'm needing to re-train my brain.


I've had the best experience over these summer months.

It felt completely different than before, like I could make some real progress.  Sometime during the second week of August, the Indian Paintbrush paintings were complete.  Those three paintings brought my summer total to nine paintings in less than three months.  It wasn't easy but nothing worth doing ever is, right?  The time had come to clean up and start again.

The great amount of progress I had made during the summer months must have gone to my head.  Or the heat or both?

I say this because I was really feeling ambitious.  Maybe too ambitious?  Okay, my point is this...there's this breath taking view in Glacier National Park that I have wanted to paint for many years.  Each time we drive over the road, known as Going To The Sun, which leads to Logan Pass Visitor's Center, it draws me to take it in the great expanses and massive peaks.  From what I can gather, I believe the peak in this favorite view is Mount Oberlin.  Correct me in the comments if I'm wrong, please.


Off to the right is a small parking area with boardwalk and the mountain goats often graze here.  There are very few parking areas on the Going To The Sun Road and during the peak season, it's really hard to score a parking space.  I took these photos quite a few years ago and it's been on my list of someday paintings.  If it was possible,


I would park myself at the base of this waterfall 
and just soak it up for the whole day.  


Tuesday, September 1, 2015

Etsy Adventure Begins!

I took the leap and ChristySheelerArtist Etsy shop is Live!


Yeah, so this is the scared, excited, giddy, oh-my-goodness, I'm really doing this face.
Well, no.  I took this last week while taking more attractive selfies for artist bio purposes.  This does reflect my emotional state today though.  It's a little bit unnerving to go through all the set up steps knowing I'm probably just getting started.  I'm a bit of a perfectionist and hate making mistakes.  I overthink things way too much.  (My dear husband would nod his head now.)  It was time to quit talking and do it already!  That's the kind of self-talk going on in my head lately.  


At this point, I've got nine listings posted but will continue adding more,
including the shooting stars paintings and the Indian paintbrush paintings as well.  


In the studio, I am working on several sketches on tracing paper.  I am working from photographs both printed and on the tablet.   It's my goal to complete about five or six sketches to be transferred to watercolor paper by the end of the week.  These are all separate subjects, mainly related in that they were all taken locally.  Local views is the theme.  I've been taking photos as I work to share in next two weeks' posts.  This week I plan to share about another sketch I've completed and the story that goes with it.


The art studio is changing daily and it's a joy to be here during the day.  A little instrumental music on Pandora going on in the back ground now.  After many days of smoke filled skies with the terrible fire season...and a few days just not myself with concern for people I know in the areas evacuated...the sun is shining today.
We continue to pray for rain, the safety of firefighters, those evacuated, livestock and structures.  


I am so excited to share the news about the Etsy shop finally being a reality.

Here's the LINK, go take a look!


I'm so glad you wandered over my way today!  Thanks for stopping in
and feel free to leave me a greeting/comment below.
Take care and I'll be back Thursday.


-Christy


Monday, August 31, 2015

Painting with a Gift Card...Art Workshop in the Studio


"I'd like to paint watercolors with you sometime."


A few weeks ago, I was visiting with a few ladies and they asked about getting together to paint watercolors sometime.  To be honest, it happens that way often.  It's a compliment that I appreciate so much.  We do really mean well.  Life is busy, schedules are crazy...we're frantic trying to keep up with it all.  The day-to-day gets out of control and we don't really enjoy very much of it like we should.  So I am used to kind sentiment and wishful thinking on painting together.


Well, this time, these gals meant it.  


Here I am visiting with several ladies, while being so appreciative of all the encouragement for my recent art pursuits.  My family is patiently waiting for me in the car.  We're going to be one of the last to leave... And before I know it we're arranging to have an art workshop get-together on Thursday.  Oh.  Hmm.  Four days away.  Let's do this thing!  My mind is scrambling, I'm trying to picture how we'll set up and work in my studio with five or more of us here.  How much house cleaning needs to be done?!  In my heart, I absolutely love getting together like this and know it will be a terrific day.   It was a little bit of a shocker because plenty of people say, "let's get together" but it never pans out that way.


In the end, you just accept those God appointments and know 
He's going to bless it big time.  Ooh, this is exciting now!


First and foremost, I was making a strategy to clean up my studio (again) and arrange it in a way that works better.  This was already in the works...I have been using about half the space available.  My husband kids me that I no longer use the drafting table now that I have the drop-leaf table.  Then we resurrected the old cabinet which gave me more storage and more flat work surface.


So I sorted, packed up, got rid of and organized stuff.  With the addition of folding tables and chairs, it was all coming together.  I dug out the supplies I keep for teaching classes the night before.  At times it seemed like the mess got worse before it got better.  Whew!  I was a little worn out but I knew that when it was all over, this would be a great day.  I just love time spent with other women, so add art to that and it's a bonus.  


I still felt a little bit crazy for agreeing to this

but deep inside knew it was a great idea.  Here were other women, wanting to spend time doing something I really love.  I know it's therapeutic...that's part of why I do it.  While teaching workshops, I have seen participants get lost in the process.  There's just one problem:  It's not easy to make time for creative ambitions.  I know this for a fact.  I'm the one who kept letting it get further from me.  We have these huge plans for a jaw-dropping finished project and then face disappointment when we can't complete it to our standards.  It's hard to re-examine and set different expectations instead of labeling self as a failure.  We are not failing.  We are still pursuing and that's not failure.  Failure is admitting defeat and not trying again.  We can't do that to ourselves anymore.  What could we paint without trying something too ambitious?

I remembered the trees painted with gift cards.

Gifts cards...those little plastic pre-paid cards that are all used up.  Have you seen this before?  This is not my original idea.  I first saw this on Susie Short's Learning Watercolor site.  Wow!  What a treasure trove of wonderful information.  At the time, I was looking for ideas for workshops and it looked so fun.  To see the actual tutorial click here and then click the tutorial link under its photograph.  It is so quick, simple, and fun...try it with your kids.  They'll love it!

Thursday, August 27, 2015

Tea, Hollyhocks, and Kittens


I'm a little quirky...it sounds so much better than weird.  

So maybe today's rambling will make you feel a little more normal.  My topic for today is to share a few things about me that most people wouldn't know.  I've loved tea for many years now but just recently began enjoying iced green tea.  When I'm in my usual routine, I'm drinking a smoothie in the late morning.  After lunch, I often switch to iced green tea.  Sometimes I add a little stevia to give it a bit of sweetness.  It took me a while to develop a taste for green tea.  It's got so many health benefits that I didn't give up and now I enjoy it.  Did you know there's flavored green tea?


In Great Falls, Montana there's a little shop on Central Ave.  In Cahoots For Tea (the shop's name)  sells loose tea and all the tea accessories you could wish for.  You can buy the teas by the ounce and the flavors are wonderful.  It's just a great little splurge to pick up a few ounces of a favorite like Picasso Blue or a new one like White Raspberry Champagne.  The green teas I have enjoyed most are peach and pomegranate.  I transfer the tea leaves from the little zip top bag to glass jars.  I store the jars in a cupboard away from light and heat.  It's easy to remove the label from the plastic bag and place it on the jar.  The little metal infuser holds quite a bit of tea but only a teaspoon makes quite a bit of tea.  When I make my tea, it's super concentrated so I just need to add a little to the top of a glass of iced water.  So the concentrated tea is kept in a glass jar in the fridge.  It takes up less space, no need for a full pitcher.  It's quick and easy to add to a glass without all the prep every time.


My other favorite drink this summer has been iced water with mint leaves and a squirt of lemon juice.  The fruit and herb infused waters are popular now as an alternative to carbonated soda.  Just one or two mint leaves, given a gentle twist, give the water fresh mint flavor.  If you decide to add mint to your garden, note that it spreads like a weed!  I'm going to need to plan how to bring some live herbs in over the winter.  Fresh herbs are worth it!  So for a spin on drinking more water, try lemon (or lime) and mint!  I've also tried cucumber slices and that's surprisingly delish, too.  These combinations are easy to do and I feel so much better without soda.  While I'm working on drawings or paintings, it's too easy to pull out the snacks and candy...I've got quite a sweet tooth.  Sometimes I forget to drink my water and keeping these drinks close at hand helps so much.  


Changing topics... I've got to get this out there...

I stalk other people's flowers.  


There.  I said it.  I feel a little creepy about it and hope other people don't bat an eye BUT I think I'd be suspicious of someone walking around the neighborhood with a camera like I do.  (Click on Continue Reading below left...)

Thursday, August 20, 2015

Indian Paintbrush


The stately Indian Paintbrush are bold and hardy.  The shade of hue can vary from pinks and peaches to fiery red.  They make their home in a wide range of places.  Along the unpaved roads in mountainous areas, they take their share of dust from passing vehicles.  They are found in clusters next to the trails and they seem to love the full sun.  Mountain meadows have these beauties scattered in the lush green like confetti.  I realize not everyone can be so mesmerized by wildflowers...after all, aren't they just weeds?  I still feel like this creation is so awe-inspiring when we stop long enough to take it all in.  We see intricate details we would never realize otherwise.  

I learn something new every time I take on painting a wildflower.  I have painted these little gems before...over ten years ago.  There's usually a part of the composition that will stump me.  Sometimes I am aware of it before I begin; I just think on that challenge as I work my way toward it.  One thing I learned this time is that there are more than one species of this flower.  These three photos show one of them.  Are you wondering how I figured this out and why it really matters?  I am not a botanist or any other type of expert on the subject.  In order to be able to accurately describe what I am presenting as my work, it seems important to be ready to answer basic questions.  One basic question is, "what kind of flower is that?"  I use printed photos and a Motorola Xoom (love its big screen!) to study my reference photos.  The tablet makes it possible to zoom (ha!) in on details so much more closely.  It's just amazing that printed photos are not so necessary anymore.  


I began the sketches in early summer.  The drawings were made directly on tracing paper.  I believe I was working on the crocus drawings at the same time so I set aside the paintbrush flower sketches.  I remember feeling like I was a little glazed over mentally when I finished the stack of sketches.  I was tired and didn't feel very confident that these sketches were complete.  It's hard to say until I actually have paint ready to apply to paper.

I was pushing myself pretty hard not only with art work but in all areas.  I had taken on several other projects and feeling a little over committed.  My dear man has been such a fantastic support and encouragement.  He has gently reminded me when he senses I need to relax.  With the thought of these lofty goals I've made for myself and no real road map on how to accomplish them, it all feels complicated and disorganized.  At this point my goal was three painting in a week and half.  That was only possible under ideal circumstances...so I will have to take it easy on myself and my family when it can't happen that way.
 Once the crocus paintings were completely finished and I'd taken care of everything necessary to have photos in the computer...
I began the process again!


My computer file has a total of 156 reference photos for the Indian Paintbrush at this time.  We are going camping this weekend so that number could grow yet before summer's end.  I chose the three photos for these paintings; Two sketches came from photos on the tablet and the other sketch was a combination of two photos that were only available as printed copies.  Those two photos I did eventually scan in so I have digital copy of them now.  I keep finding myself fighting the urge to panic when I can't locate the reference photo on the tablet right away.  It just takes a little more patience and remembering to relax more.  There is a bit of advice I need to take to apply to my whole entire day.  Can you relate?


I must add that at this season of my life, my kids are now teens.  They don't need me like they used to in their younger years.  Oh, and it was adorably cute but mildly frustrating.  I remember four or five years ago, I had come out to get settled at my art table...so quietly hoping no one would notice where I was.  Everyone was home and busy so I wanted to take some time for myself.


My art room is also the pass through at the back of the house.  To get to the backyard or garage, the quickest route is through the art room/solarium.  It didn't take long for one of my kiddos to come into the room, and observe saying, "oh, mom's painting...I want to paint, too!"  I have never told my children no to joining me.  It may not be what I had in mind but they are welcome, too.  We began unfolding card tables and bringing out their art supplies...and soon one was near me trying to find a ruler.  Then another looking for watercolor pencils.  I was consciously working to keep my patience.  I asked myself how we could make this work for all of us.  It meant my goals had to be adjusted and remember that life would not always be like this.


Frustrated at times?  Oh, and how.  Those times were not forever...very temporary.  This summer has been a huge adjustment for my teens because they need to be more independent.  They need to understand we are working into a new framework of me making a creative career.  Change is never fun.  We've had many little talks and I try to explain how this is the same as yet different than if I had a job outside of the home.  I just cannot resist.  You've got to see this throwback to another time.  I am sharing a photo of our little art project when they were still so young.  Six years ago and time just flies!  They are cuties, I know...but I remember being so tired and wondering where they got all that energy.  Isn't it nap time yet?


Okay, thank you for letting me head off track for a little bit.  So I have my sketch and graphite paper.  I have been using 300 lb. cold pressed Arches and loving it because it buckles much less and it can take the scrubbing to lift out color.  The layers are board support, watercolor paper, graphite paper and tracing paper sketch on top.  It's very important that the sketch stays in place or the process gets more challenging.  I had one sketch move a little in the process and half of the transfer was also off.


Here's the slightly zoomed out view of what's going on at my table.  Reference photos, paint is mixed in the little cups, spray bottle is at the ready...


And here's the reality of it all!  (See below.)  This is a broader view of the work space at this point.  I have more setting up to do because the foam board tent is where I post my color mixing guide.  My glass of iced tea is cold and easily reachable.  There are the books I've been reading; the Wild West series by Lauraine Snelling.  I just love historical fiction.  I know I'd be over the hard work of that life in a heartbeat but I soak it up anyway.  Maybe it makes my life feel easier?  Not sure.  So while it could be much messier, this is typical for how I work.  When it gets to be too much, I break to clean for twenty minutes.


In the photo below, you can see the color mixing guide is up on the foam board.  This was made by choosing the pinks/reds that I might use.  Then I mix each one with a different yellow or blue to visualize what mixes are possible.  This is my quick reference and there's usually one for each set of paintings.  I keep them and refer to them even when working on other paintings.  So much time can be lost with guessing in color mixing while never really hitting on a mix that works.  I pick out of this grid the key mixes that I like most.  The pigments are mixed up in little cups with lids.  I record the pigments on the lid with a fine permanent marker.  


Here is the color mixing guide I used for these paintings.  The red/pink pigments used are down the left, followed by two blue pigments.  The yellow/gold/brown pigments across the top were each mixed with a pigment down the left side.  Alizarin crimson + lemon yellow = color in the box beside the two.  Alizarin crimson + aureolin = the color first row below aureolin.    If I've completely lost you, I am sorry...  It seems that when others are not familiar with this concept, it takes them a bit to work through it mentally and then light bulb!  The facial expression expresses understanding!


I began working on the backgrounds on pretty damp paper.  I wet down the paper in an area of about 3-4 square inches with a larger brush.  I can work between round and flat brushes for this step.  My pigment on the palette is wet and soft.  This means I can work quickly without many speed bumps.   For the backgrounds I chose several mixes and softly laid them in so they could mix on the paper.  The background on the left shows a little of the effects salt on shiny wet paper makes while it dries.  The background at center has little or no extra effects.  The background at right has a much more dramatic effect from both salt and blooms.  Blooms are an effect that occurs when water or wet paint flows back into an area that is more dry.  Usually a bloom is unwanted and viewed as a mistake but I really like them in backgrounds.  These effects show the qualities of watercolor that are unique to this art medium.  They are quite enjoyable to look at and draw positive attention.  I know this is a little small and doesn't give much opportunity to see the detail.  Just hang on...and try not to scroll to the end.  It will be worth the wait.


As work began on the flower petals of the one in the center, I slowly began to realize the differences between it and the other two.  The petals and leaves are different in several ways.  The form of the petals is more rounded and not spiked.  The colors are more toward reds and yellows.  The leaves are more complicated in shape.  The painting process of this flower just flowed so smoothly and effortlessly at times.  There was very little about it that I struggled with from beginning to end.  I felt immersed in the creative process.  I did not switch from one painting to another this time around.  I worked solely on this one until it was done.  


There is a lot of mixing going on at this point and I'm sure it appears to be mind-boggling confusing.  Bear in mind, I have not always worked like this.  The large palette has room for more pigment from the tubes and doesn't have to be refilled so often.  The smaller palette has pigments I use less often and it changes more often.  I spray down both palettes routinely to keep the paint wet enough that the brush never has to scrub out pigment.  With these paintings, it helped to make notes in a steno pad to keep track of what I used and where.  The base color of the leaves, the base of the petals, the stem and so on...I see in my notes that "WOW greenish gray" was made with lemon yellow + cerulean blue + indigo blue + olive green.  Funny how my mind was thinking at the time.


Below there's a shot of the base color going in with yellows and greens.  The reason for this?  The layers yet to come are going to mix ON the paper.  These base layers will be dry when the next layer is painted in but the yellows and greens will tint them.  It really works that way.  The next three photos show the way this painting changed as more areas were worked and built.


The lemon yellow and gamboge and hansa yellow are the base of the petals.  There's a glow given by them being the foundation.  You can just feel the sun warming the petals!  The mixes used the give the petals the vibrant reds; the placement of the deeper hues give them shape.  At this point, I was bringing in darker red mixes but I was beginning to think I needed a glaze of blue or violet in the shadow areas of the red petals.  I was very nervous about this step.  The deep reds were not achieving the effect I was after.  A little dioxanine violet worked great and I was so relieved!  If you study the differences in the darks of the petals between the two following photos, you should be able to see the changes.  It is subtle but necessary to create shadowed areas.


The buds nearest the leaves turned out to look like crepe paper.  They are preparing to unfold and become full of more red petals.  The light source is from the upper right so I work to keep the shadows consistent through out the piece.  


The view of another painting in progress.  The background is more easily seen here.


I somehow neglected to take a mid-process photo of the other one.  Here are the three completed paintings; you can see they have their own unique identity for colors, background, composition and effect.  Without any planning to do so, they each become different in a pleasant way.


This one I titled Indian Paintbrush Delight because the process was so smooth and flowed in an enjoyable way.  It is 8"x 10" on 300 lb. cold pressed Arches.


Indian Paintbrush with Branches, 8" x 10" on 300 lb. cold pressed Arches.  The petals were much more pink with yellows and greens on a few tips that end with curls.  I had lightly sketched in grasses and twigs that were in the photo.  When watercolor is painted over pencil, the pencil lines are nearly impossible to erase so I had to follow through and it did turn out well.


Indian Paintbrush Group of Three, 8" x 10" on 300 lb. cold pressed Arches.  This is the most common appearance of the paintbrush flower.  This one is the favorite from my family's votes.  Mine is the first, as if you couldn't guess.  The effects of salt are unpredictable, depending on paper wetness and pigments used...and even perhaps the dry, warm air speeding up the drying time.


Reflections on My Summer:


On June 25th of this year, I wrote my post, Big New Adventures of Artist Momma.  In it, I described this new challenge I'm giving myself...with the support of my great guy and sometimes my kids.  The blog is slowly evolving into my journal of blending art into a daily habit.  A creative career is the long term goal.  We've talked through the steps and stages with goals along the way.  Etsy is one of them.  If you are intrigued or excited to follow this adventure, use the contact form and I'll send you an email invite to the grand opening of the online shop!  


I'm fed by the creativity in ways that my soul really needs.  I know my kids don't really understand it now.  Someday they will see how important it is and maybe they will be inspired to go after their own soul-driven outlets.  Today I will celebrate week ten!  This is a huge accomplishment.  To not only create this much art in this amount of time but also write about it on a weekly basis is such a huge step for me.  The past two weeks have not been so productive with completed paintings.  I'm feeling the ebb and flow of family schedules.  The kids were gone to my parents' in Austin, TX for ten days and I finished these three paintings during their absence.  It's one week until school begins again and I'll miss the kids being at home.  At the same time, I look forward to having quiet days here at home.  Today has been a day of interruptions, too many to count and I just keep redirecting my steps to the art studio.  


My dear man has helped me in many ways but the one I most appreciate right now... a computer for my use in the art studio.  We've cleaned and rearranged my space to make it function better.  I've got a new work table for card making (covered in my previous post) but I'll share more about that later.  I'm still working on my business card, not quite decided on what it should be yet.  


This week is really crazy with what we've got scheduled and I hate that I'm so limited on my hours in the studio.  I've just got to roll with it!  That's all there is to it.  I've got to be flexible and know that it's all going to come together in time.  Summer won't be here much longer.  Soon it will be keeping up with the football schedule and autumn will be the season to relish.  

So until next Thursday...watch for the moments of everyday that are snapshot beautiful, the stuff of Instagram that we can take as a special gift through the hard stuff.

-Christy