
painting my fabric banner
I love Pinterest for the convenience of collecting and organizing ideas. I usually have several project going on at once. For all the projects actually going on at a work station in my art room, there are several more projects going on in my head.While working on a design for my event booth, I've pulled together colors and textures that represent me as an artist. Because I love nature so much, it seems appropriate that nature should be reflected in how I represent myself and my artwork. I went on my search through Pinterest to find beautiful booths from other artists and creatives. I'm definitely a visual learner (no surprise there, right?) so all the photos help me streamline what I'd like for my own event booth.
While I worked on the banner, I shared photos on Instagram and someone asked me to share more. I try to take a lot of photos as I work on a project and I enjoy sharing about the processes involved! So, here's another project that you might enjoy trying!
It began with me wondering how it could be possible to paint with watercolors on fabric. This kind of project is venturing into the unknown. It's always my preference to find some great how-to's to get me started! I came across a great tutorial and wondered how I could use it to make my own watercolor painted banner. Cami at Tidbits shares Inspiration for Do-It-Yourself Living and she gives a great tutorial on How to Watercolor Paint on Fabric. She leads the reader through an easy-to-follow project using white pillow covers. They turn out lovely with the varying colors and textures! She gave me the tips I needed to begin this project!
While rummaging through my fabric stash, I came across the leftovers from a curtain I had shortened; it's ecru color would be a perfect base. It had enough weight to it that it ought to hold up nicely. Once it was trimmed and had a new hem all around, it was ready to become a banner.
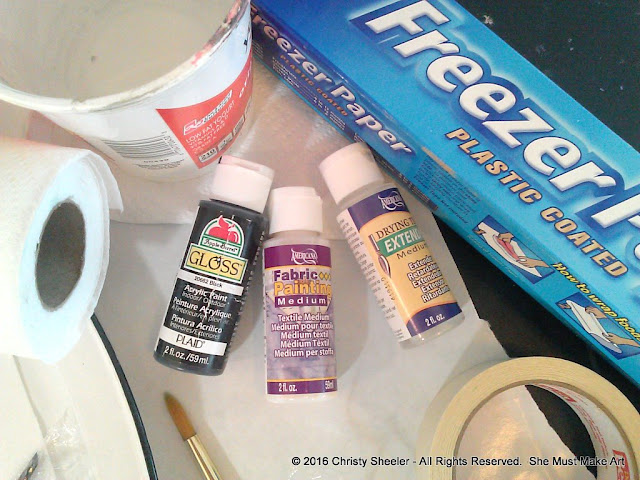
Supplies list:
Fabric
Watercolor paints (tubes or cakes)
Fabric Medium (I bought 2 bottles (2 fl. oz. for $3.75 each)
Black acrylic paint
Drying Time Extender Medium (2 fl. oz. for $2.35)
Permanent marker, black
Inexpensive brushes
Disposable plates or bowls
Freezer paper
Masking Tape
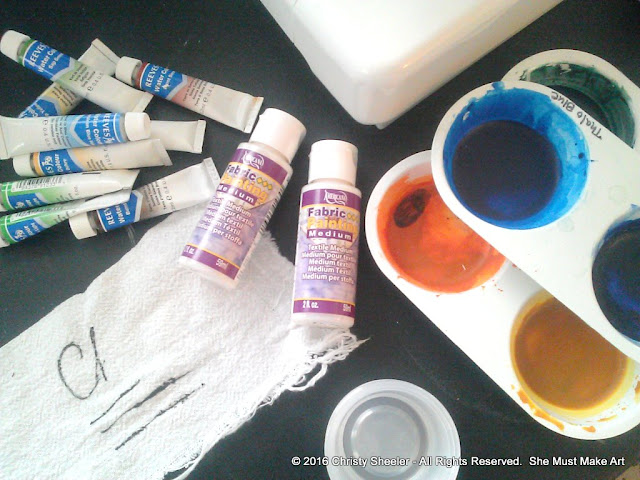
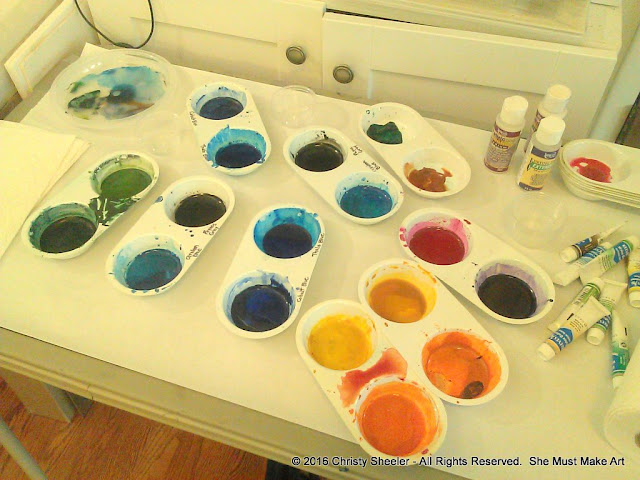
Before diving in on the actual banner, I wanted to test out the techniques on a scrap of fabric. I am a bit of a control freak and I like knowing what to expect. There always seem to be surprises but I feel better prepared this way. I pulled out student grade watercolors from when I've taught watercolor classes in previous years. I found I also had some paint still leftover in plastic palette duos.
There's a loose and fresh watercolor painting I painted in Glacier National Park years ago; it's become the background for much of my promotional signs. I love the colors and the textures and so this was my inspiration for the banner painting.
The fabric medium instructions recommend mixing paint 2:1 with medium. That means 2 parts paint to one part fabric medium. I kept this in mind but tried Cami's method first.
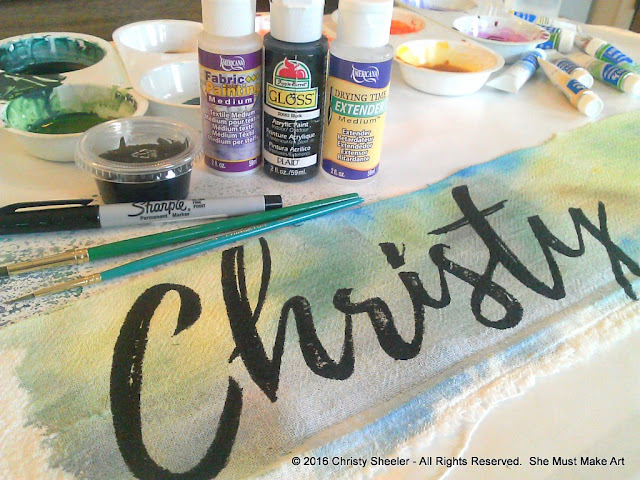
Many of the paints were already in plastic palette cups. With this trial painting session, I painted on the fabric with the watercolor paints and then went back over with the fabric medium. It went very well and I loved the effects that were achieved. I had hoped to use India ink for my lettering but that would not be as durable. Instead, I mixed a small amount of black acrylic, fabric medium and drying extender in a small plastic cup. (Both the fabric medium and the drying extender can be found in a craft store with the bottles of acrylic paint.) Please remember, the fabric medium is meant to make the paint permanent, even washable, so it will prevent you from being able to remove it from the paint cups, brushes, and so forth. (I tossed the palettes when done.)
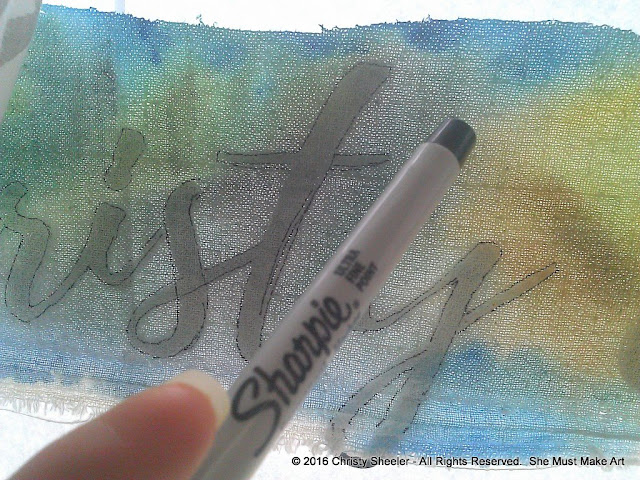
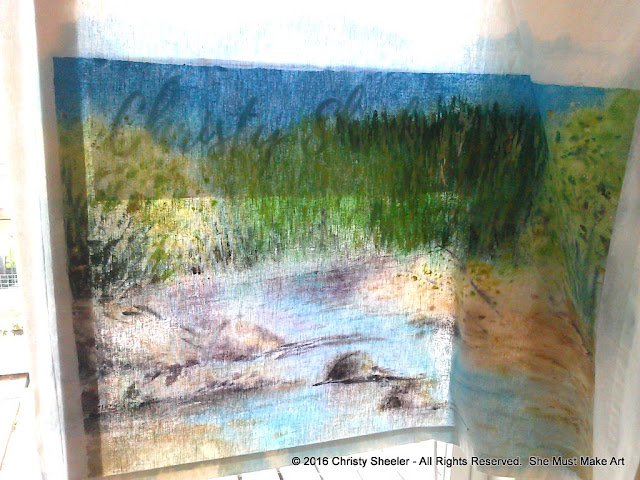
In order to transfer the lettering to fabric, I first made a template on the computer. With my name in the font and size I wanted, I printed off a copy on my printer. I used the tracing-at-the-window trick by taping the sheet of paper with the printed lettering to the glass. I taped the fabric over that so the light would shine through and the black lettering could be traced on the fabric with a black permanent marker.
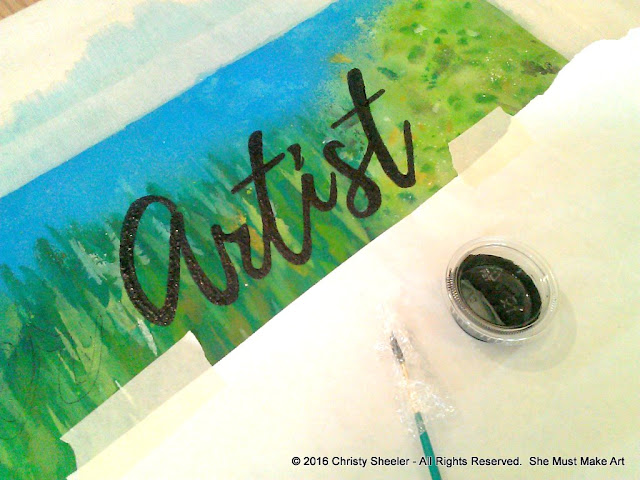
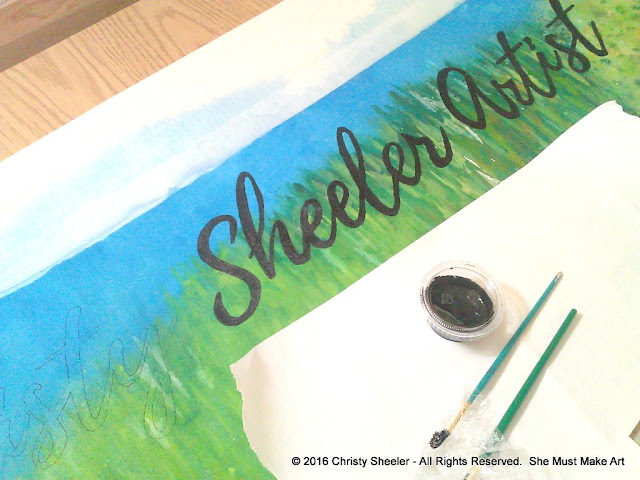
Once the lettering had been traced on the fabric, I brought it back to the work table to paint in the lettering with a mix of black acrylic paint, fabric medium and drying extender. In the example below, I created a bit of great texture by not filling in the letters completely. It really gives the effect of brushed letters. I liked this effect but did not use it in the final banner.
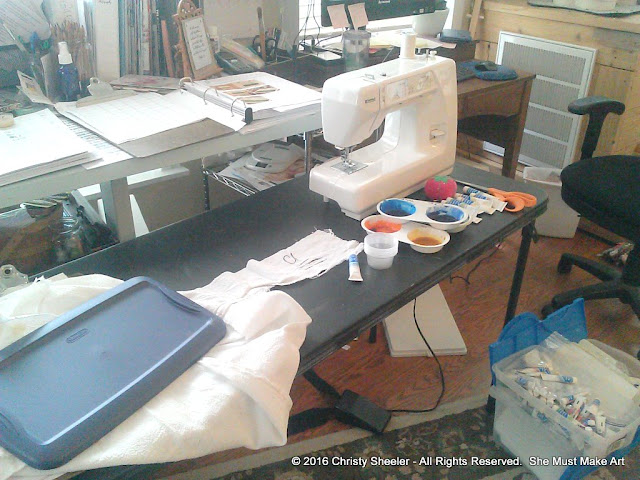
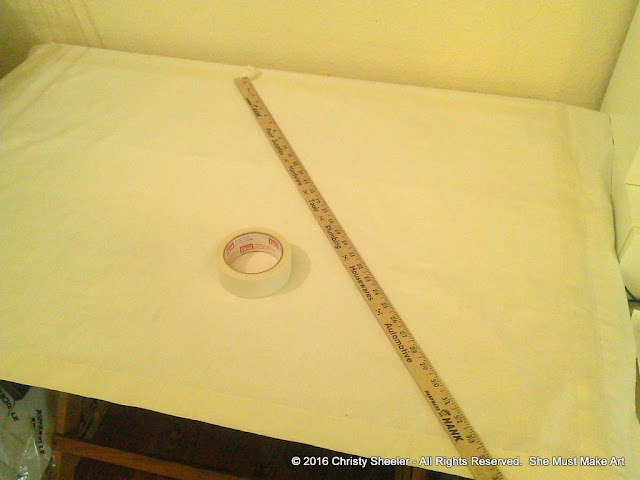
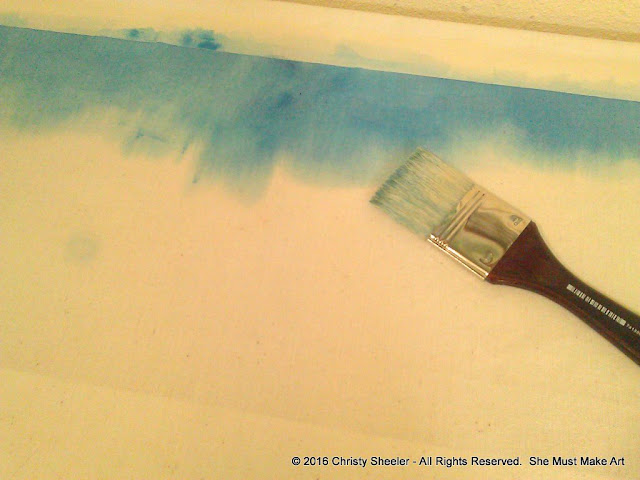
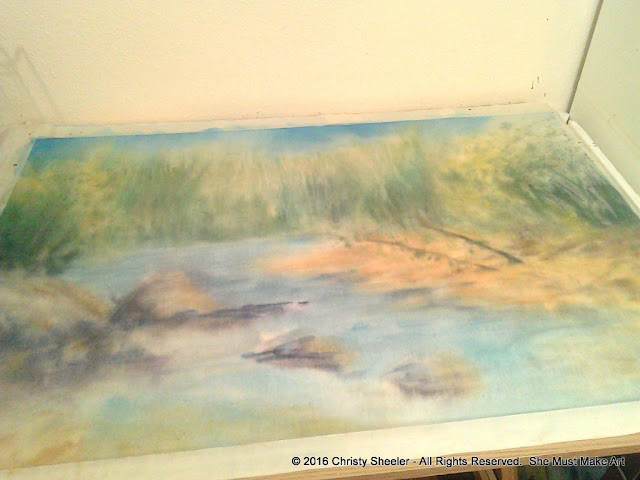
My trial run worked so well, I felt confident to begin the fabric banner. I spread freezer paper (plastic shiny side up) over my work surface. Then, with the fabric spread across the freezer paper, I used masking tape to map out my borders. The paint did bleed under the tape because I worked very wet. Be aware that the tape, unlike watercolor paper, will not prevent paint from traveling past those borders.
I really enjoyed painting with the watercolor paints on the fabric! Using the spray bottle filled with water, I could make great effects but I didn't realize it would result in more muted colors when finished. That was my mistake. Oops! When I went back over the finished painting with fabric medium, the colors became so muted, I knew I'd have to try again.
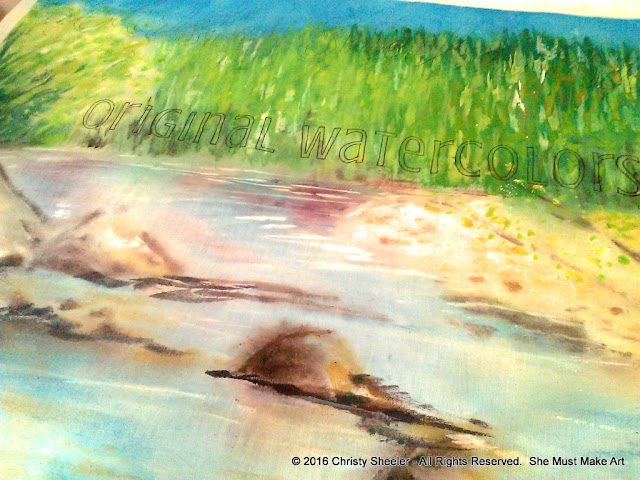
My second attempt worked better for me. This time, I mixed the fabric medium with my watercolors prior to painting on the fabric. You'll see the difference in the photos toward the end of this post.
NOTE: The brushes and mixing palettes/surfaces should be disposable for doing it this way. I found that my brush and palettes could not be cleaned completely. I took this risk knowing they might all have to be tossed in the end. I'll share a list of 10 tips at the end of this post.
The paint, once mixed with the fabric medium, becomes similar to an acrylic craft paint and will dry quickly. I used the drying extender, which I already had from another project, to give me a bit more time while painting. At this point, I was figuring out that by mixing in the fabric medium, it would be wise to use a disposable mixing surface. I don't have a photo to show, but I used Styrofoam bowls and plates the second time around. When done, the bowls could just be tossed in the garbage. Fortunately, as I tried out all this, I did not pull out my best palettes or brushes! So keep in mind, use only what you are willing to throw away when finished with this project.
I repeated the steps for transferring the lettering to the banner. I began by designing the words on the computer and printing them off on paper. Once the banner and sheets with lettering were laid out, I could judge how well the words would fit.
At this point, I needed to tape these to the glass window for tracing the lettering. My daughter helped me out here and a second set of hands made this step easier! I repeated the steps of tracing the lettering with a permanent marker.
I took some extra precautions to protect the banner from dripping paint. I tore off a sheet of freezer paper and taped it to the banner. It would be impossible to clean up any drips at this point. The paint from the background had dried and been tossed in the garbage. I didn't want to mix up more paint to cover any smudges or drips of black paint. I used cheaper brushes and kept them wrapped in plastic while not being used.
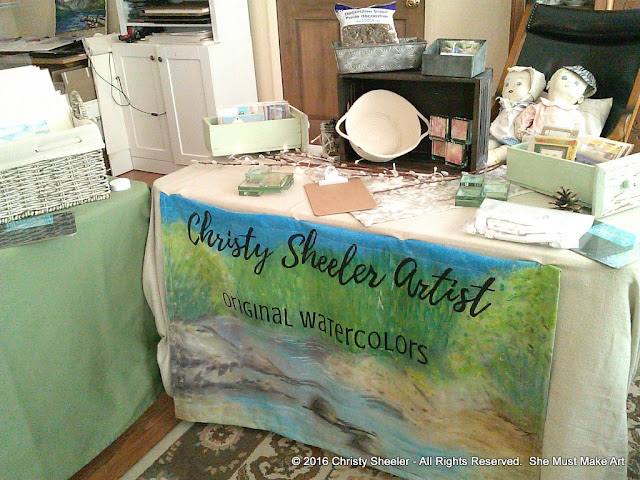 |
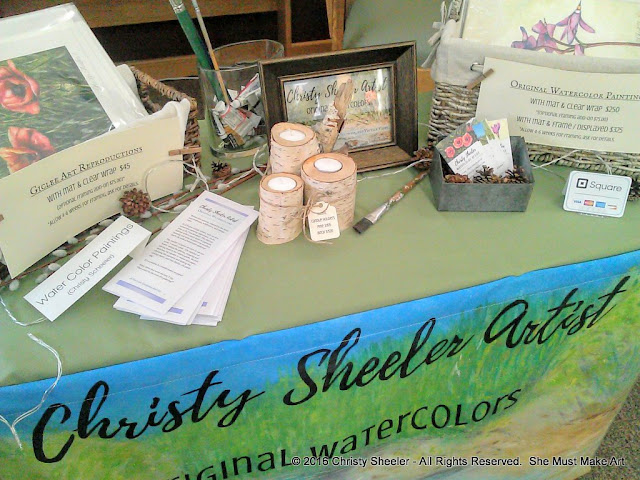
| The finished banner hanging as a part of my booth display. |
I am so pleased with the finished banner! In the end, I did trim more fabric and re-hem it to hide the soft bleed of color that moved under the tape. That was my own personal preference. I sewed the top hem so a curtain rod could be used to hang the banner.
 |
10 Tips for Painting with Watercolor on Fabric:
1. Use freezer paper to protect your work surface. Freezer paper makes clean up a breeze!
2. Practice on a scrap of fabric first. Less stress and more fun!
3. Mix the fabric medium with paint in disposable bowls/plates.
4. Use brushes you are willing to toss when done.
5. Mix one part fabric medium to 2 parts watercolor paint.
6. Type out and print off text on paper as a guide.
7. Hang the text and fabric on glass to trace lettering on fabric with a permanent marker.
8. Wrap brushes in plastic wrap to prevent drying out if switching between different sizes of brushes.
9. Try Drying Extender (just 3 or 4 drops) to extend your painting time.
10. Heat set 30 seconds with iron. I laid a clean white cloth (flour sack towel) over
the banner and used my iron on a cotton setting, moving the iron to a new section every 30 seconds.
If you'd like to see the tutorial that helped me get started with this project, be sure to visit TidBits!
Please comment below if you try this type of project and how it goes! It's a great way to explore a new way of painting with watercolor. Who would imagine that watercolor could go on fabric in a durable way?
With so many new opportunities opening up for me lately, I'm having more difficulty being consistent in my blog posts. I really do enjoy sharing more lengthy posts like this one. I have participated in two events and I have one (possibly two) coming up in November. Three original watercolor paintings and several art prints have been sold recently. I've been contacted about two artwork commissions and am excited about those opportunities! I'm in the process of making more small improvements in my art room. September was one of the busiest months I've had in over a year! It's not easy for me to share shorter blog posts. I'll work on that and try to find my voice for a short art studio update. I'm still loving the creative life and being able to share it here with all of you!
-Christy
She must make art.











I am very impressed and oh so proud of you for this accomplishment. My hat is off. Thank you for sharing.
ReplyDeleteThank you SO much, Loretta! You made my day! I've been away for a few months but looking forward to being back in the fall. I had a huge amount of fun with this one. I appreciate your kind words!!!
DeleteTry Murphy's Oil Soap to clean your brushes!
DeleteIn general, I don't agree with using Murphy's Oil soap to clean brushes. If you do use this to clean your brushes, you'll need to clean them once more with dishsoap or Pink Soap brush cleaner to remove any oil residue. This is important for brushes used for watercolor and acrylic mediums.
DeleteI just loving your sign, and this was exactly what I was looking for to watercolor on fabric. I am really excited about a project, and just wasn't sure whether to use watercolor or acrylics (I knew I needed drying extender and fabric medium). I do have a question...do you lose track of how much fabric medium you have in there when you start mixing colors? When I watercolor I really mix things up and go back to colors that are already mixed to make them what I'm going for. So - if I have say a green I was using all mixed up and containing fabric medium, and I start mixing with other things to get the next color I want - how confusing is it to get the fabric medium right? Can I just mix the medium with my paints prior to mixing them, and just assume it's all going to be okay? If you say yes, I can handle that. Just wondering if you have a better method.
ReplyDeleteI love your work! I always have too many projects going at a time, and wonder how I ever get anything finished. You sound like that to me, so I admire your work ethic.
Wow! Well here goes, queenmlv... When you mix in the fabric medium, it changes the paint in a big way. The fabric medium makes watercolor paint more like an acrylic paint. My problem on my first attempt was that I work very wet so the colors appeared washed out/faded once the fabric dried. You might want to premix your watercolors in a generous amount in a disposable container...like a styrofoam bowl or plastic cup. You won't be able to clean the watercolor mixed with fabric medium from a palette later. Your mixtures will dry quickly so keep covered when you're not using that specific mix. You're better to error on the side of a tad too much fabric medium so it will be durable and color will not lift when wet.
DeleteIf you like, mix up your watercolors first to work out your desired color design, then add the fabric medium just before you're ready to use the paint from each bowl/plate/cup. If all your watercolors in bowls have the fabric medium added in a closely estimated proportion, then you can mix away between all those bowls. My best advice, remember you'll need 1 part fabric medium to 2 parts paint...so do your best to guess and maybe add a bit more if in doubt.
Do a test on a scrap of fabric and you'll be less afraid on your actual project.
You sound like you have a pretty good handle on this already. You're probably as analytical and methodical as I am with these creative projects!
Whew! Lengthy answer; sorry about that... I hope I make sense.
PLEASE, let me know how it goes!!!
Hi Christy I have been looking to write on fabric with our using stencils. I like the natural hand writing effect. Can u suggest a way if the fabric is too thick to see the stencil thought the glass. Im manageing free hand but not happy with the result....thank you Christine.
ReplyDeleteHi Christine,
DeleteGreat question. I've been thinking about what I would recommend. How much lettering is involved? I know you said you'd rather not use stencils but my first suggestion still involves a stencil.
Using a sheet of clear plastic, like Duralar, create a stencil that can sit on top of the fabric. You'd need to print out or draw out your script, (either choose a fluid type of font as I did or write out your own)
then lay that under a sheet of Duralar plastic. Take a Sharpee permanent marker and make an outline on the Duralar. Now, using an exacto knife, carefully cut your lettering to create a custom stencil.
Now, you can secure the Duralar stencil to the front of the fabric with masking tape. You're ready to paint in the lettering with the stencil securely in place. Another option: with stencil in place on fabric,
draw the outline with permanent marker first, remove the stencil, and then continue on with painting in the lettering.
A link to the Duralar on Amazon:
https://www.amazon.com/Grafix-Dura-Lar-9-Inch-12-Inch-Sheets/dp/B002542SZY/ref=sr_1_1?ie=UTF8&qid=1508857681&sr=8-1&keywords=duralar
Reading through the reviews, a lot of great information on how others are using this clear plastic sheet.
I do help this has helped because I understand how your application makes the project a bit more complicated.
Let me know how your project goes! I'd love to see photos, too...if you'd have time.
Christy at She Must Make Art
Good Morning (for me at least),
ReplyDeleteLove the art work, wish I had that skill. What I am good at is sewing and custom machine embroidery. I'm working on a quilt that will look like a series of open book pages telling a story and I think this technique would be great for basic backgrounds to embroider the characters over. My concern is wash-ability. Will to color be permanent enough to stand up to machine washing, maybe monthly?
Thank you in advance,
Jeanne
Jeanne, Good morning to you! I am able to do the most basic of sewing so we have a mutual admiration for each other. That quilt sounds amazing...so I'll give you my thoughts. This technique will result in a thicker application and change the feel of the fabric. I would compare it to an iron-on design applique. That almost rubbery texture. I don't need to wash this banner very often; I would avoid it as much as possible. Depending on the thickness of the application of paint AND the liberal addition of the fabric medium, maybe you could get away with washing it BUT I would use it in situations where you won't need to wash often. I lost quite a bit of green when I hand washed it in the bathtub. You might just use it on some less expensive muslin or other fabric for testing it first. Do a test run for sure! I hope this helps.
DeleteYou are more than welcome,
Christy
Another thought...looking back over this blog post and remembering how I was not able to clean the paint out of those plastic paint palettes at all. I say go for it and test it out thoroughly before going forward with your quilting project. That will build your confidence and you'll be able to get a feel for it yourself. The fabric medium is under $7 (Search DecoArt Americana Mediums Fabric Painting on Amazon.com) so you won't have to invest very much to try it.
DeleteThank you for the very prompt response! This is very useful information.
DeleteInteresting post. I Have Been wondering about this issue, so thanks for posting. Pretty cool post.It 's really very nice and Useful post.Thanks Click Here
ReplyDelete"Disposable" styrofoam? I think it would be better for the Earth if you found less "disposable" ways of working. Paper products, or better, reusable products would save how much trash? Plenty.
ReplyDeleteErica, I do agree with you about the use of styrofoam. Unfortunately, the fabric medium used for this project makes the watercolor more permanent. This means it will NOT wash out of my regular artist's palettes. I could recommend using clean yogurt or other plastic containers instead. The plastic 2-well palettes I also used in this project had to be thrown away as well. In my everyday watercolor art creating, I am mindful of the containers and palettes I use. Thank you for sharing your thoughts!
DeleteOmg
DeleteWonderful piece of work and excellent description. Erica, get over yourself.
DeleteAnonymous, you made me laugh. Thank you, appreciate the compliment.
DeleteThis comment has been removed by a blog administrator.
ReplyDeleteSomeone Sometimes with visits your blog regularly and recommended it in my experience to read as well. The way of writing is excellent and also the content is top-notch. Thanks for that insight you provide the readers! wool single jersey fabric
ReplyDeleteChristy -
ReplyDeleteYour banner is stunning and really showcases your talent. Thank you so much for sharing. I could really see the difference when you mixed fabric medium with the paint. Yesterday, I started a 4'x12' watercolor mural on silk (before reading your tutorial.) I didn't order any spare silk so I jumped right in translating my paper sample to the silk, which I admit was a tad bit scary since the silk was super expensive. I work very wet letting the water carry the pigment to the edges of the wet areas. Since I'm using pan watercolors from 1960, I couldn't opt for fabric medium mixed in, plus I have found that fabric medium changes the color of the paint and fabric giving it a more grayish effect. Instead, I may opt for a light spray of DecoArt Matte Varnish diluted with water which I use to fix my pan pastels on fabric, even if it does stiffen the fabric a wee bit. Fortunately, my piece will not be washed, only vacuumed to remove dust similar to what quilt museums do with their collection. I may quilt or embroider the final piece, depending on how it looks when I finish the painting. On the subject of transferring text to thicker fabric, I often use a very worn large sheet of carbon paper under the text I've printed on paper and go over the text with a pencil or stylus. The catch is to make sure the paper is positioned exactly where one wants it, but otherwise it works great for the initial outline. Thanks again for the inspiration and techniques. Patty
Thank you for commenting and sharing your experience on fabric with pan watercolors. I would love to hear how the spray of varnish works in the end. I am going to avoid washing my banner as well...a good shake or light brush with the duster wand. It's so great to have your input. When I was in the middle of this project, I thought how it was so hard to find resources online for guidance. We have these inspirational new ideas and can come together to share with one another.
DeleteHi there! I’m interested in painting fabric with water colors. Do you suggest any particular type or blend of material in the fabric? Or would any work?
ReplyDeleteI recommend using a fabric of a natural blend. I guess, with the added fabric medium, it becomes more like an acrylic paint so you can always try a test on a small patch of the fabric you would like to use.
DeleteHi Christy
ReplyDeleteGreat tutorial
I was wondering what your work is on while doing this technique. I read but didn't see it. I would guess it would be absorbent but then that may pull your paint. So I gues my question I'd hard surface or soft/absorbent
Joyrit, thank you! I use a roll of freezer paper for projects like this one. The side that is slick and shiny is turned face up. I used masking tape to fasten the corners of the freezer paper to a hard tabletop surface. I used a folding table for my experimenting stage. When I was ready to begin the banner, I prepared to work on a washable surface on my drafting table. Yes to the hard surface, with a protective mat like the freezer paper. No to a soft or absorbent surface. Have fun!
DeleteHi, thanks for posting your techniques and what works/doesn't work. Very helpful and clear to understand.
ReplyDeletesmall tip - black sharpie when ironed becomes permanent as well. Only the black sharpie - not colors.
You're very welcome! Thanks for the tip about the black sharpie; very good to know.
DeleteThere are a variety of pens on the market in various colours which enable transferring onto any colour of fabric. fabric paint pens
ReplyDeleteHaving Painters Myrtle Beach for a number of years, one thing that strikes you is how atmospheric a beach painting can be, with nature creating beautiful range of moods through the quality of light over the beach.
ReplyDeleteSO glad to have found you and this tutorial! I am much more at home with fabric, yarn, and embroidery thread than I am with paper and paint, but I thought that painted wall hangings would be a lot more "me" than painting on paper. The softness of watercolor is perfect for the look I want. I had forgotten all about the window tracing method, which would be perfect for the portrait I want to do of someone long gone that I and many others miss terribly. Most of the rest will probably be landscapes done from either my personal photographs or from the beautiful sunset photos that my SO has sent me. No copyright violations anywhere. Wish me luck!!
ReplyDeleteSo thrilled to hear that you will be able to use these suggestions for your own creative adventures! Sounds like you'll be having some extra special time thinking on that special someone as you paint. My time spent creating is often introspective and meditative. Like you, I also enjoy painting from my own photographs. Now and then, I see a photo shared on FB or IG and I ask the person sharing if I may paint from it. I've never had anyone turn me down! Enjoy! Let me know how it goes when you are finished.
Deletehi christy, this sounds great ! hope it's washable and permanent. I will try it. what is freezer paper? a parchment or butter paper?
ReplyDeletealso, does it remain smooth or it is plastic like film on the fabric?
fabric colours form such type of stiffness on the fabric which I really don't like at all so I stopped painting on fabric. pl reply
I am cautious about washing this banner. I believe I did wash it once and it seemed that the colors faded a bit. It's been a while since doing this project but it I believe I gently washed it in the bath tub. Freezer paper has a shiny slick surface on one side. Parchment paper might work. Use something to protect the work surface because the fabric medium will make the pigment difficult to clean up afterwards. The lightest areas stayed more pliable but it is a bit stiffer; that may also differ depending on the fabric used. Where the black lettering is applied, it is shiny and thicker because of the consistency of the paint. I am now back to using the banner at vendor events and have recently applied a coat of Scotchguard spray for resisting dirt and stains. I will probably only spot clean gently from now on.
DeleteThank you so much Christy for your support. Will try it for sure. Keep creating
ReplyDeleteHi Christy. Your banner is very nice! A great way to personalize your booth. I use curtain lining material for my banners. It has a linen finish on one side and a plastic on the other. It comes in several weights and colors: white, beige and gray. It hangs beautifully! Wrinkles fall out if it hasn’t been creased too much. It doesn’t have to be hemmed. I’ve used staples in a pinch. I’ve sewn together two widths when needed. I also sew a pocket for a rod. I used house paint, craft paint and oil paint markers. Because the material has body in that it doesn’t drape like a cloth, the paint doesn’t crack.haven’t tried watercolors yet. You might try clear gesso for a protective layer, too. A bit cheaper than Scotchgard and covers more area.
ReplyDeleteI learned several tips that will help me with different projests👍
ReplyDeletefound out good tips thank you
ReplyDeleteHello! Did this technique make the fabric stiff? I want to watercolor on fabric and then embroider over it, and I don't want the fabric to be too stiff for me to work with.
ReplyDeleteHello, Tracie! Yes, this technique will make the fabric stiff. Are you embroidering by hand or by machine? I think either option would still work but testing on a 6" x 8" piece of fabric would be a good idea. The fabric textile medium is affordable enough that you can play with it to see if it works for your own purpose. Sounds like a beautiful project!
DeleteI've read your article. Honestly, I've never read this type of informative and efficient article before. This article will help lots of beginners like me to build skills in embroidery. Love to read your incoming blogs too. Really appreciate your work and dedication.We have us digitizing to fulfill your embroidery needs.
ReplyDeleteIf you iron the waxy side of the freezer paper to the fabric, the paint doesn’t run as much. Also if you consistently rinse your brushes, they do not ruin. However the “ roughness” of fabric does wear natural bristle brushes ( like raw canvas or linen would) so using synthetic brushes is a better option.
ReplyDeleteClean your brushes with a good quality brush cleaner for acrylic paint.
BTW TEXTILE MEDIUM and EXTENDER was developed to be used with ACRYLIC paint to thin it to a watercolor like effect but still make it dry and adhere to the surface. So using acrylic paint would have given you the darker color than your first attempt with watercolor.
When done, heat set and pull off the freezer paper!
I have wonderful results using gel medium or aloe Vera with lettering. Also Inktense pans work well with the textile medium as “water”. They are extremely intense though and extremely permanent!
Isn’t it so fun playing “ Outside the box” with Art Supplies?
Wow! Thank you, Rose. I learned so much in your comment and am so curious to know more about the gel medium or aloe vera with lettering. I am now adding these ideas to my list of what to try next.
DeleteI'm so glad I found you and this tutorial! I'm usually more into fabric and thread, but painted wall hangings feel more my style. Watercolor's Watercolor painting softness is just what I’m looking for. The window tracing method is perfect for a special portrait I want to do.
ReplyDeleteWow. I have played a little with painting on fabric . This makes me want to try again. I didn’t like the stiffness. Thx for new information Ann
ReplyDelete